Webchat Provider
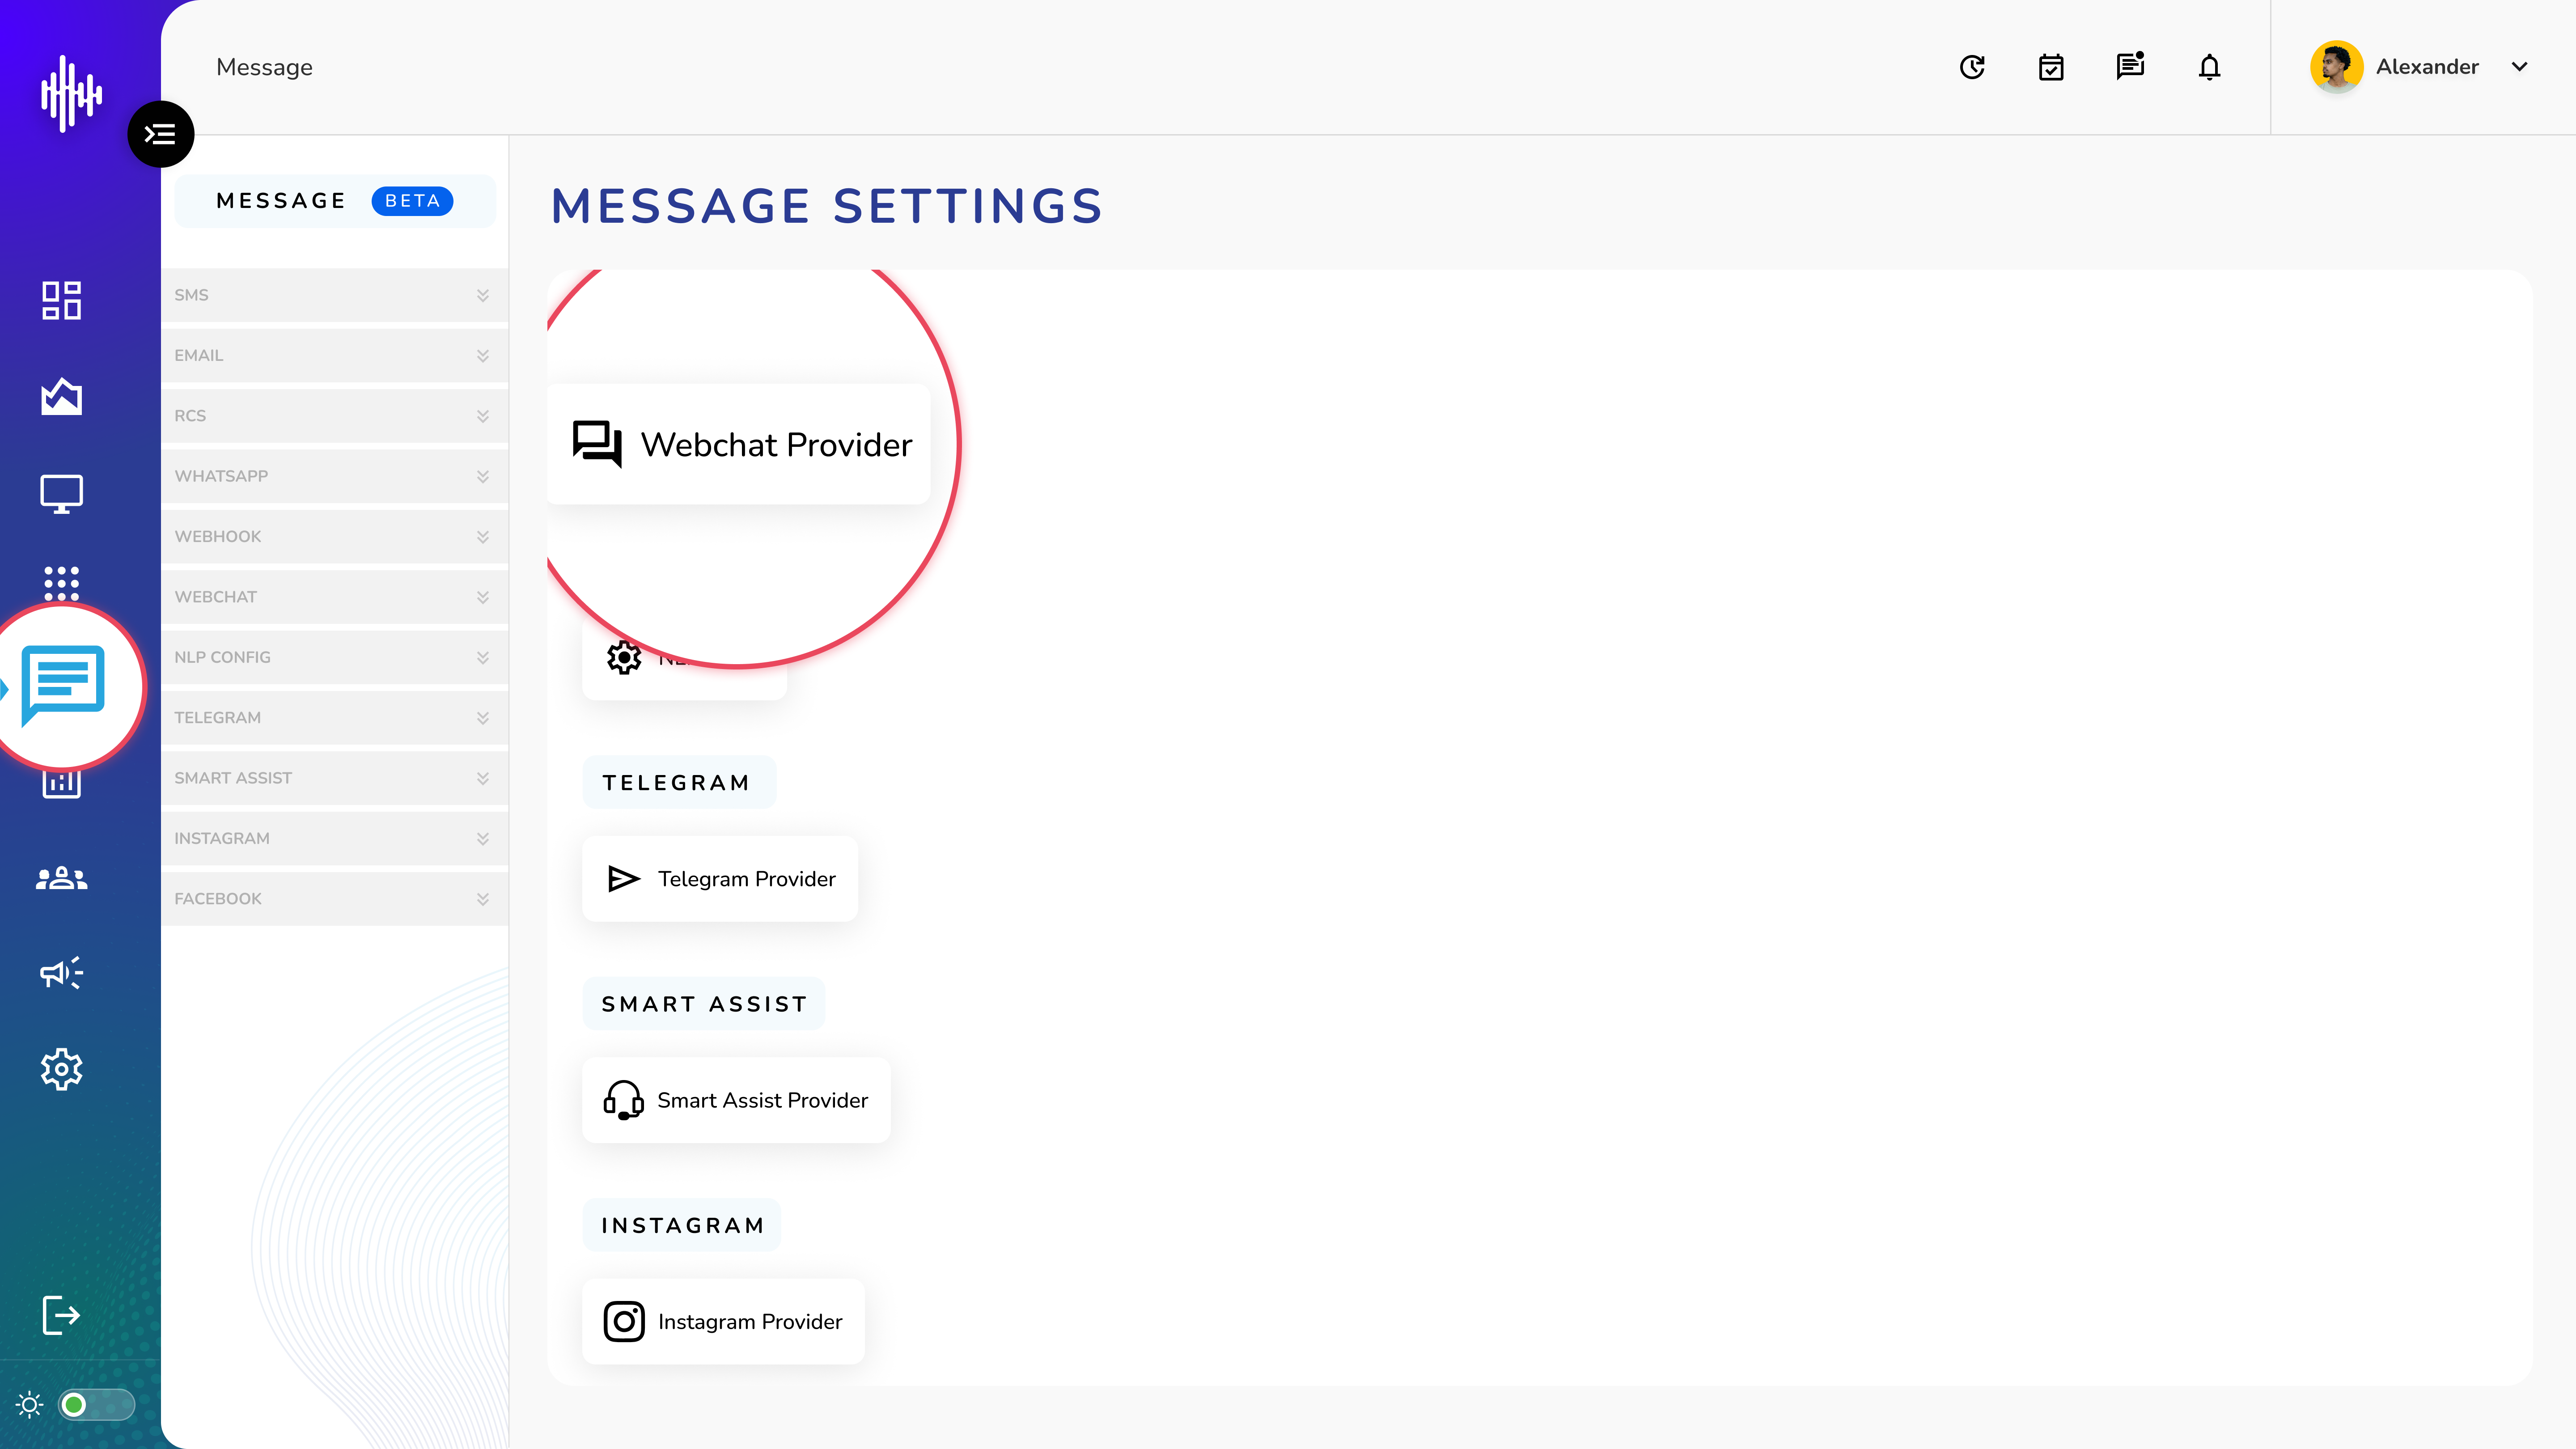
1. Login to your admin account
2. Click "Message" from the left side menu
3. Click “Webchat Provider” to access the Webchat Provider's details.
Webchat Provider Management
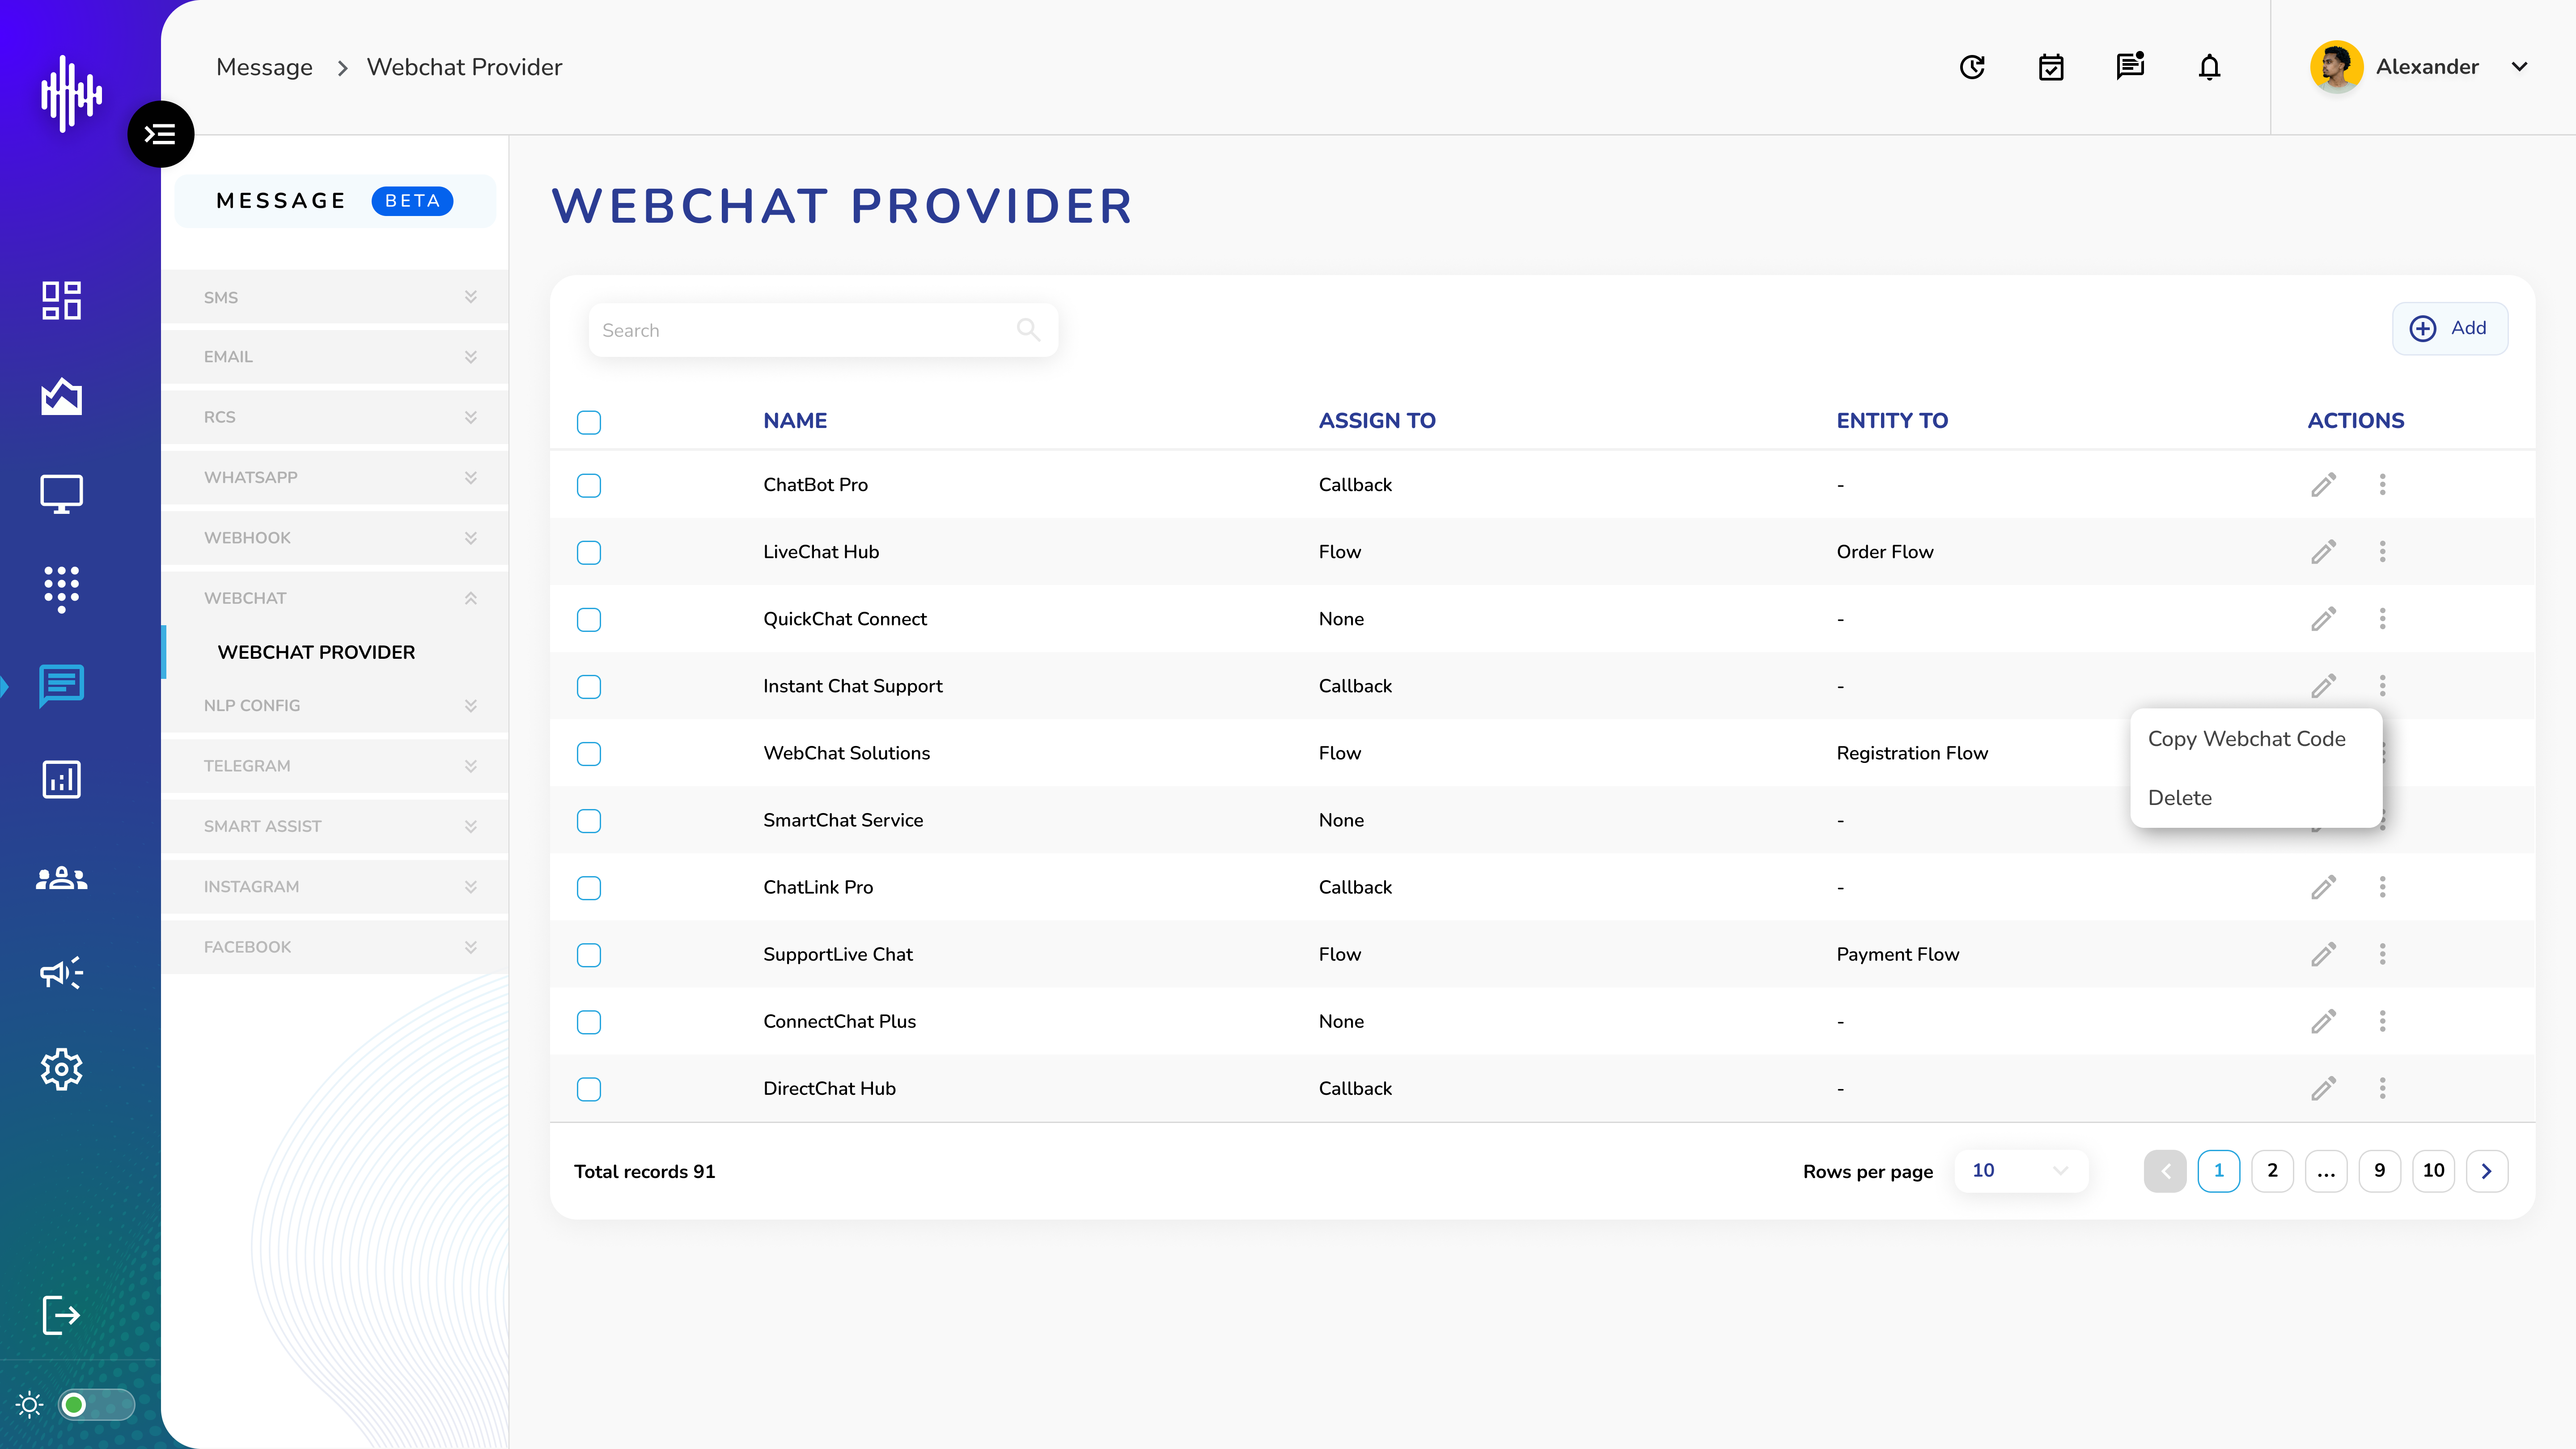
1. Webchat Provider List View
a. Screen Elements
| Column | Description |
|---|---|
| Name | Provider name |
| Assign To | None/Callback/Flow |
| Entity To | Flow name (if applicable) |
| Actions | Edit and options menu |
b. Assignment Types
i. None: No assignment
ii. Callback: Assigned to callback
iii. Flow: Assigned to specific flow
c. Available Actions
i. Pencil Icon: Edit configuration
ii. Three Dots Menu:
1. Copy Webchat Code: Get integration code
2. Delete: Remove provider
2. Top Bar Features
a. Search bar: Filter providers
b. "+Add" button: Create new provider
3. Navigation
a. Adjustable rows per page
b. Pagination controls
c. Total records counter
Important Notes:
-
Entity To only shows when Flow is selected
-
Copy code only after complete configuration
-
Test webchat before going live
-
Verify flow assignment before deployment
Add New Webchat Provider Guide
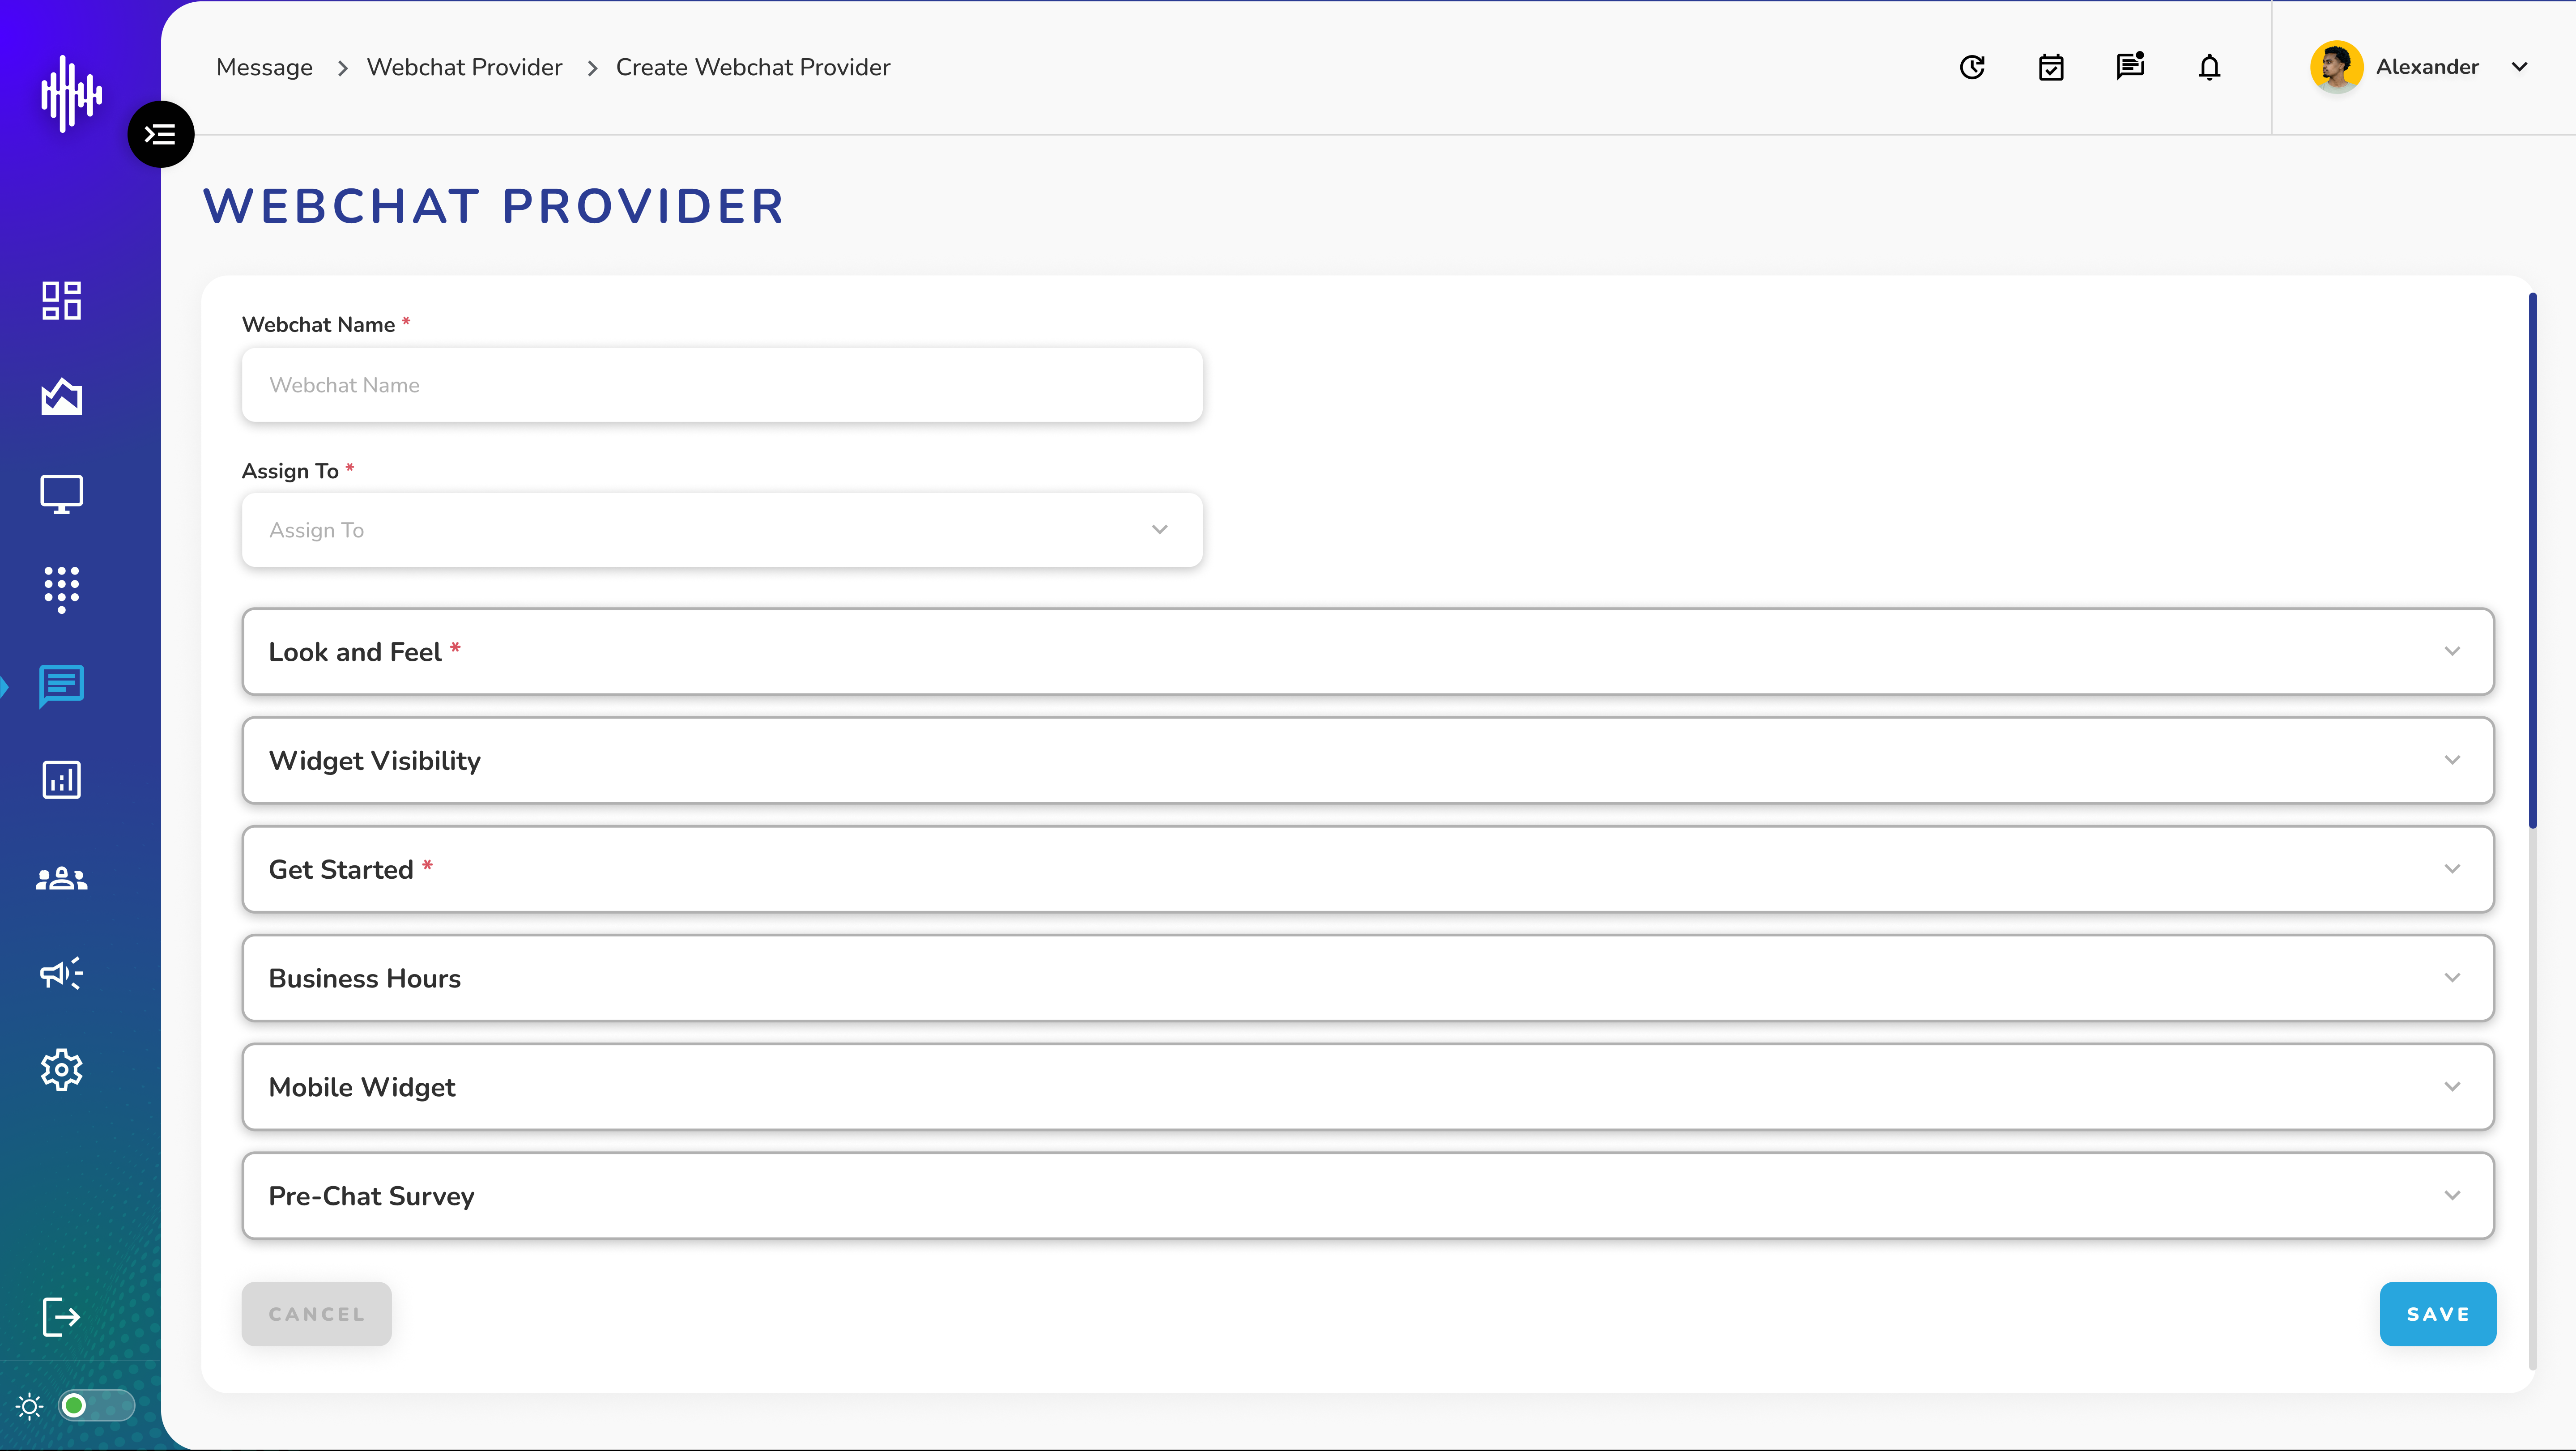
Basic Configuration
a. Required Fields
| Field | Description | Required* |
|---|---|---|
| Webchat Name* | Name for the provider | Yes |
| Assign To* | Select routing method | Yes |
b. Assignment Options
i. Callback
1. Method: GET/POST/PUT
2. URL: Callback endpoint
ii. Flow
1. Select flow from dropdown
iii. None
1. No routing required
Configurations Selections - All sections are expandable/collapsible:
i. Customize webchat appearance
i. Control chat widget display settings
c. Get Started
i. Initial setup configurations
i. Set operational hours
i. Mobile-specific settings
i. Configure pre-chat questionnaire
Action Buttons
-
CANCEL: Discard changes
-
SAVE: Save configuration
Important Notes:
-
Fields marked with * are mandatory
-
Each section can be configured independently
-
Settings can be modified later
-
Save changes before exiting
1. Look and Feel Configuration Guide
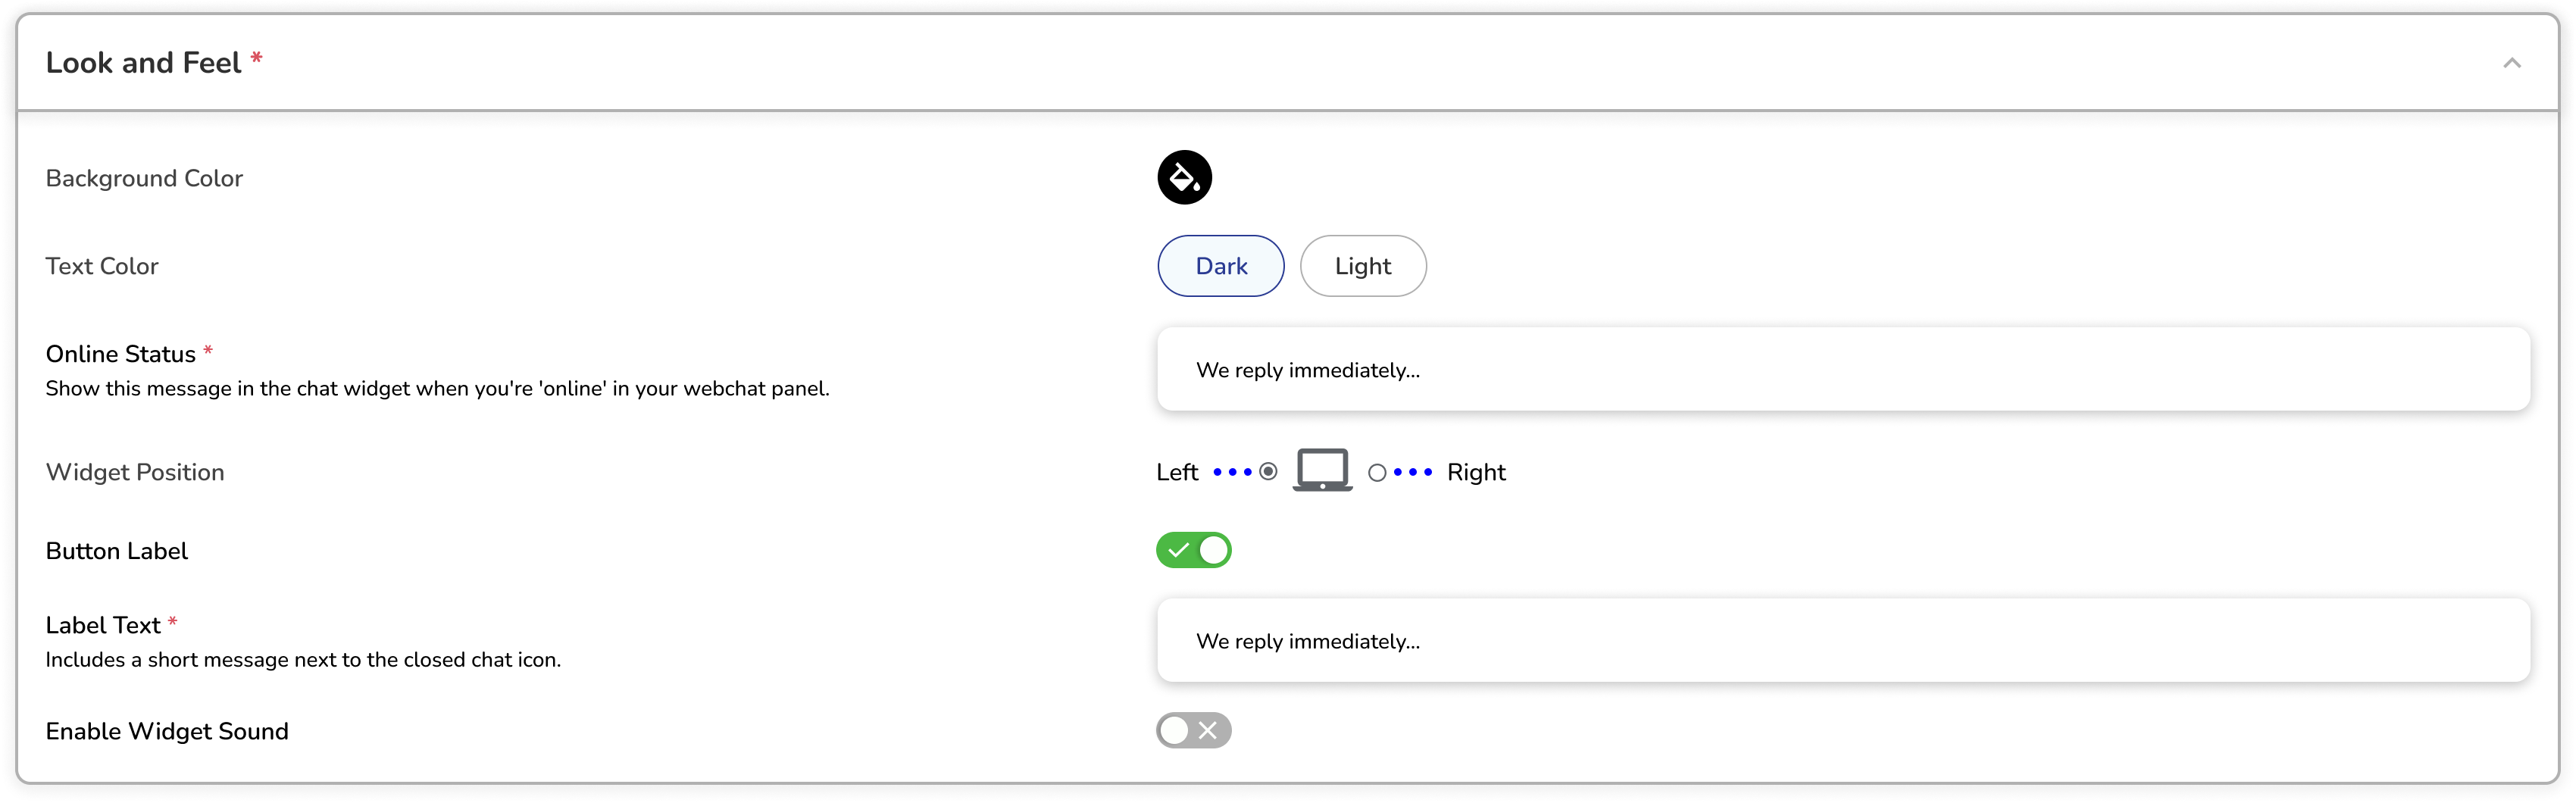
a. Appearance Settings
| Setting | Description |
|---|---|
| Background Color | Select color picker for widget background |
| Text Color | Choose between Dark/Light text |
b. Online Status
i. Message Display (Required)
1. Enter message shown when agents are online
2. Appears in chat widget when active
3. Example: "We reply immediately..."
c. Widget Placement
i. Widget Position
1. Left: Places widget on left side
2. Right: Places widget on right side
3. Use visual indicator to select position
d. Button Configuration
i. Button Label Toggle
1. Enable/Disable label text
2. Green toggle switch
ii. Label Text (Required if enabled)
1. Short message next to chat icon
2. Visible when chat is closed
3. Example: "We reply immediately..."
e. Sound Settings
i. Enable Widget Sound
1. Toggle notification sounds
2. Grey toggle switch
2. Widget Visibility Configuration Guide
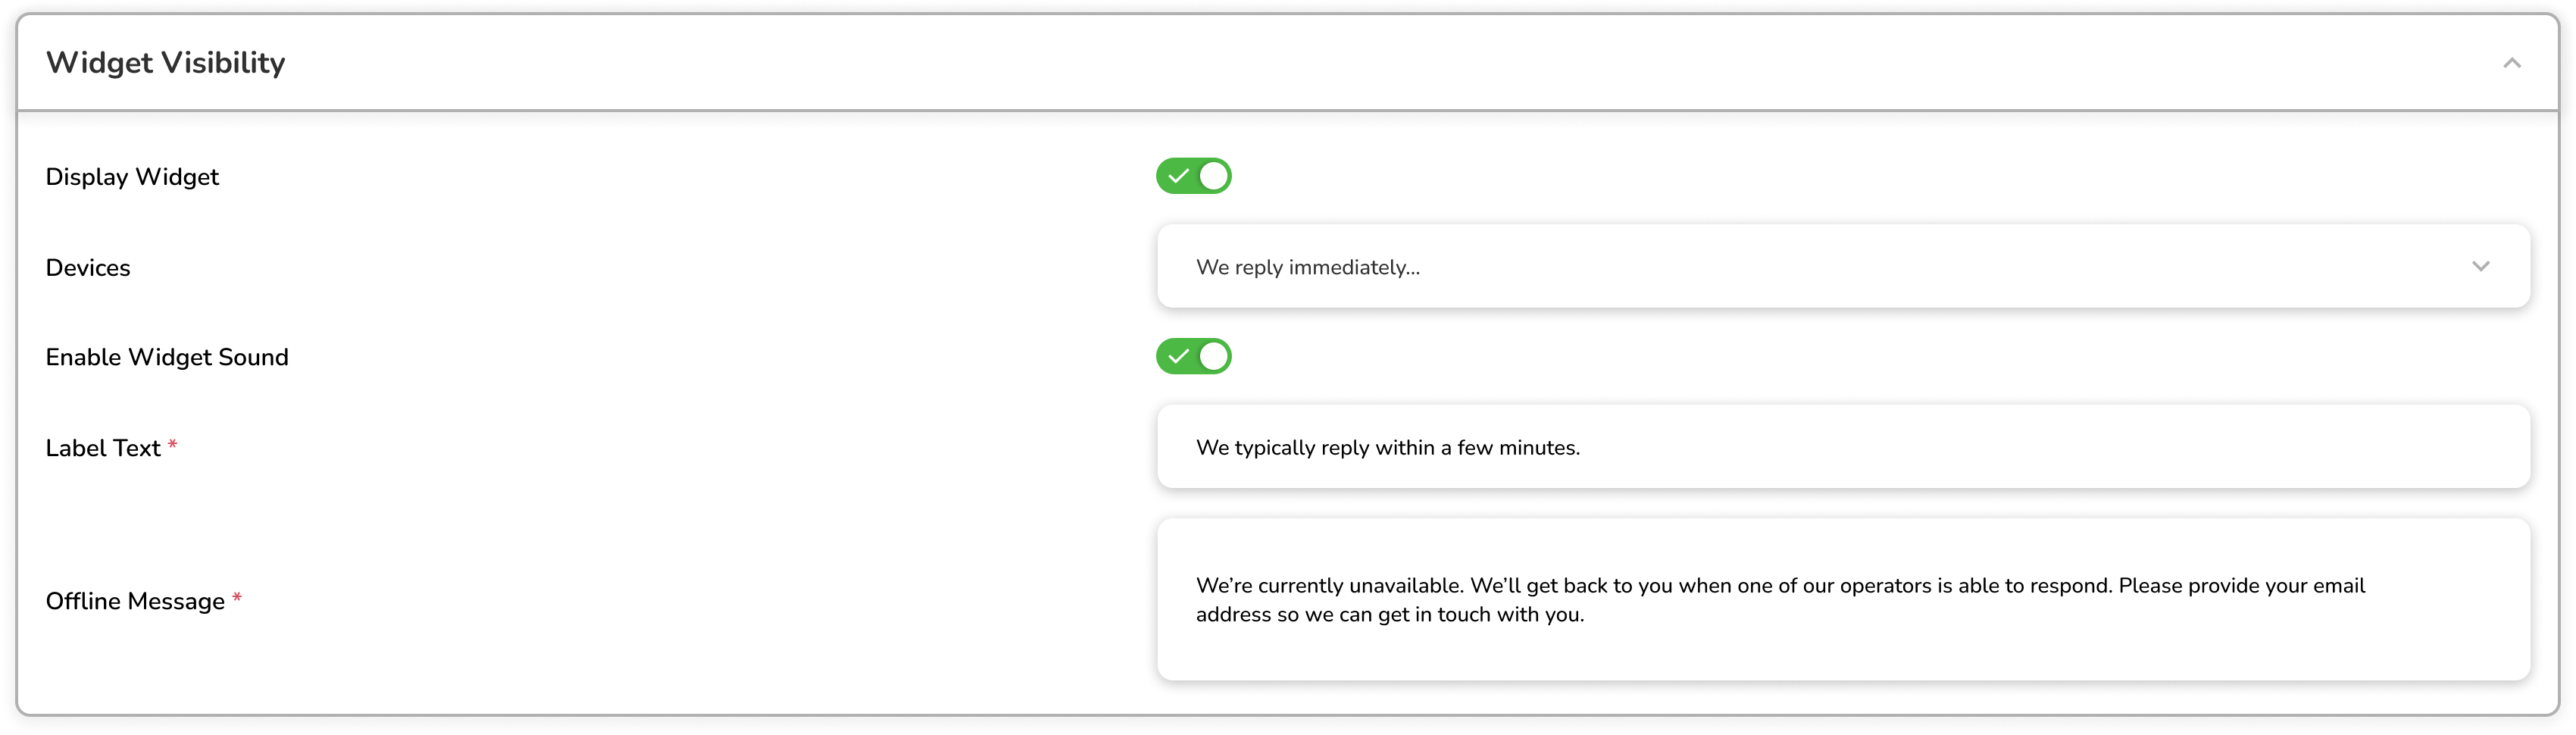
a. Display Controls
i. Display Widget (Toggle)
1. Toggle to show/hide chat widget
2. Green toggle switch
ii. Devices (Dropdown)
1. Select device compatibility:
1.1. Both desktop and mobile devices
1.2. Desktop only
1.3. Mobile only
b. Offline Settings
i. Display the Chat When You're Offline (Toggle)
1. Show/hide widget during offline hours
2. Green toggle switch
ii. Offline Status (Required)
1. Short status message
iii. Offline Message (Required)
1. Detailed message for offline hours
3. Get Started Configuration Guide
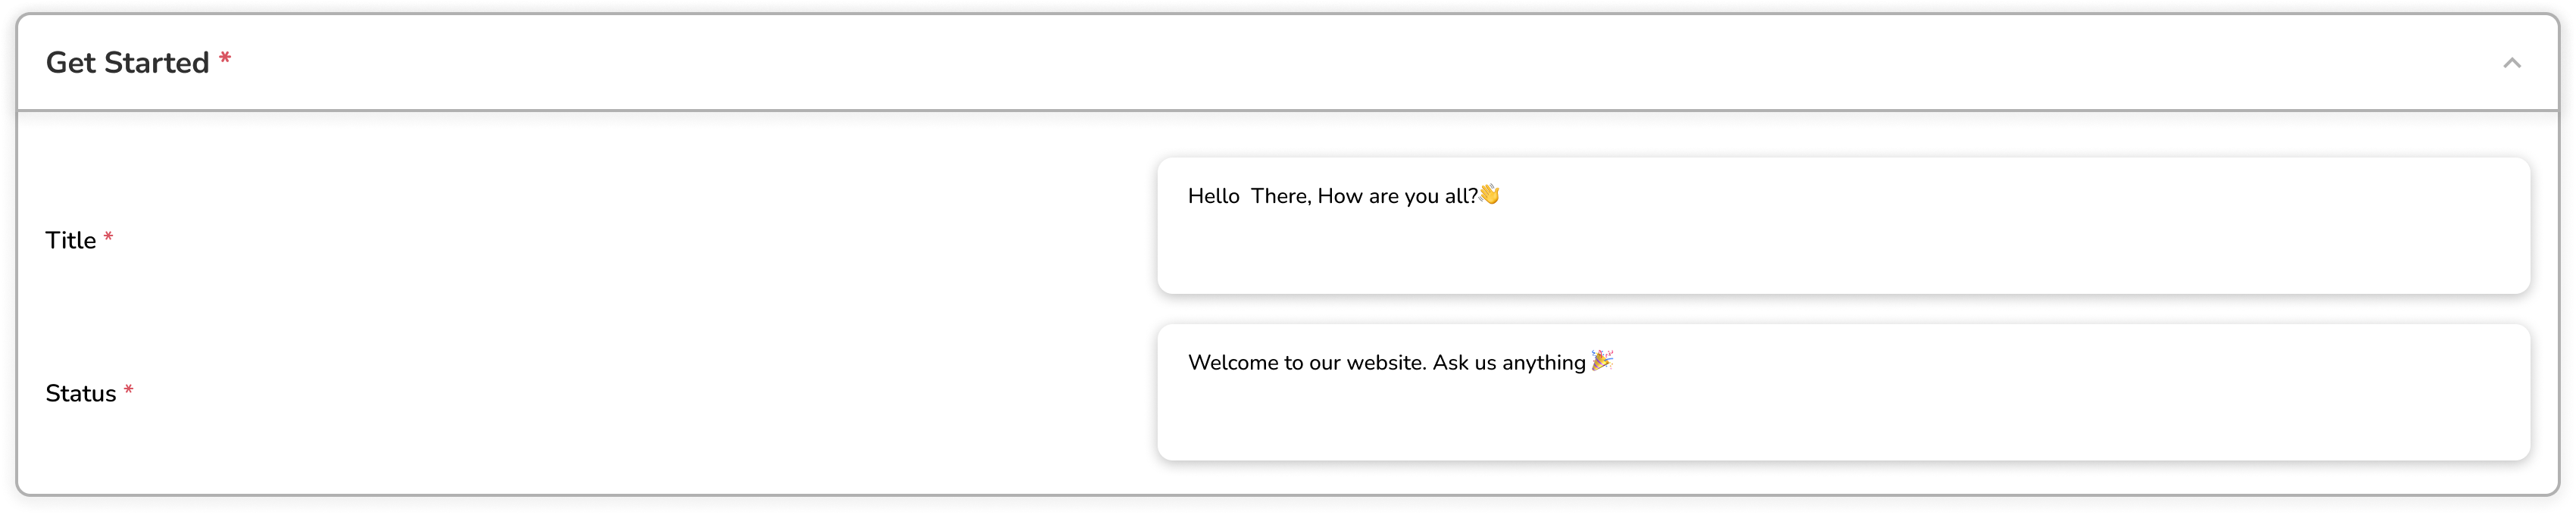
a. Required Fields
| Field | Description | Required |
|---|---|---|
| Title* | Initial greeting message | Yes |
| Status* | Follow-up welcome message | Yes |
b. Message Configuration
i. Title Message
1. First message users see
2. Keep friendly and welcoming
3. Can include emojis
ii. Status Message
1. Secondary welcome message
2. Encourage interaction
3. Can include emojis
4. Business Hours Configuration Guide
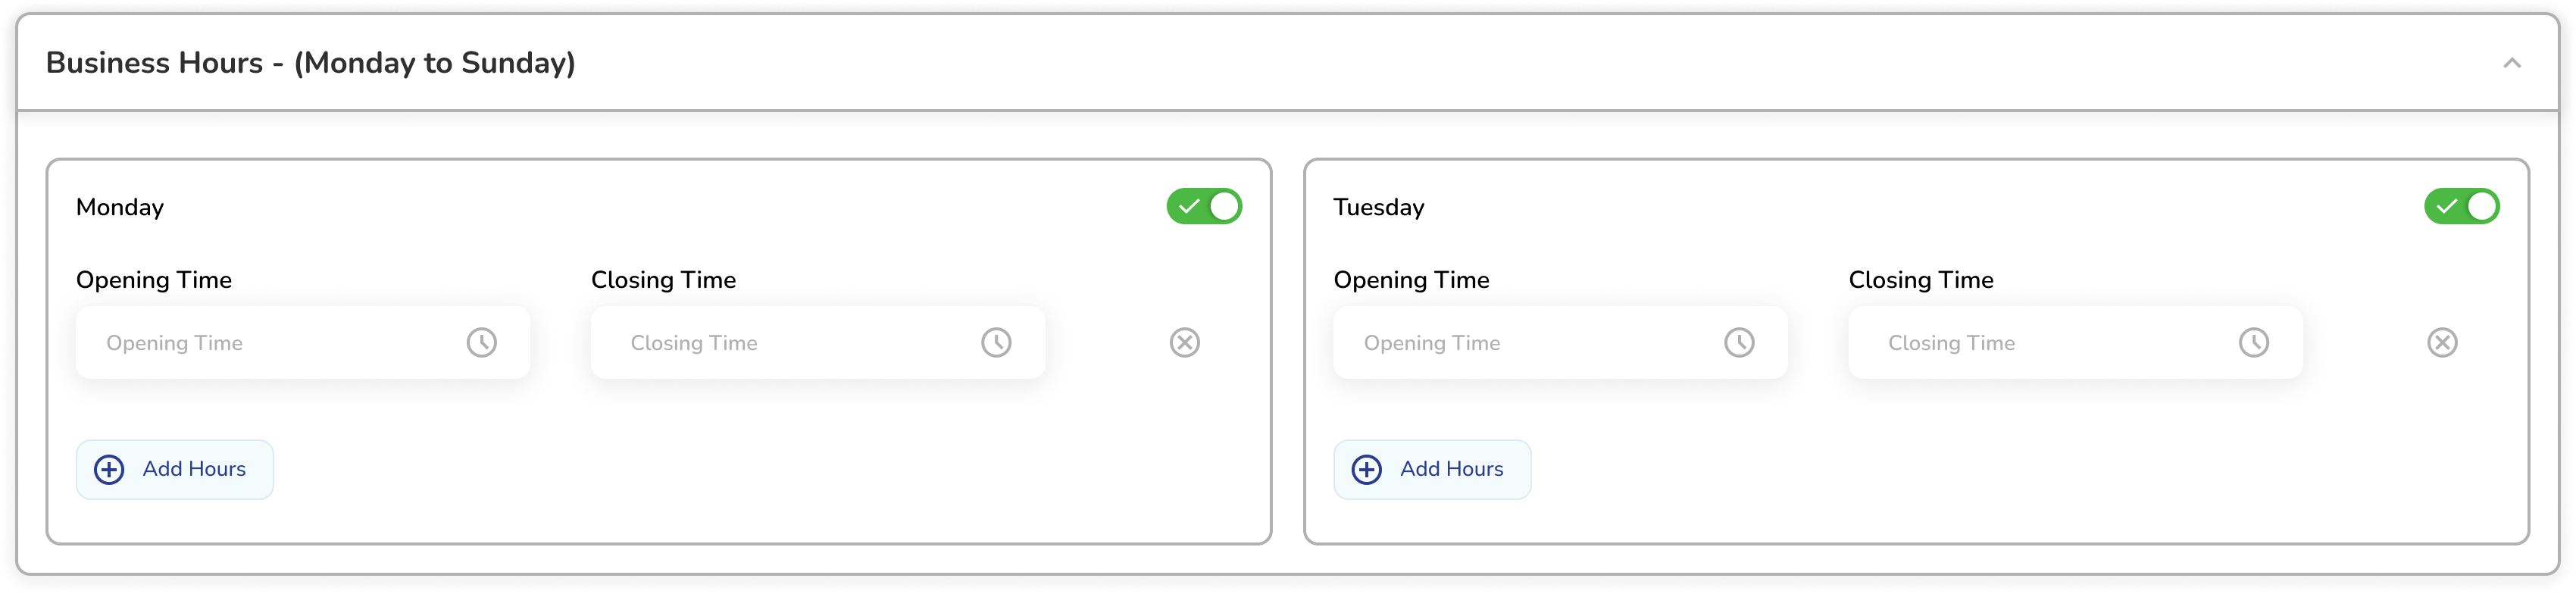
a. Business Days Setup (Monday to Sunday)
Each day has identical configuration options:
i. Day Activation
1. Toggle switch to enable/disable each day
2. Green toggle indicates active day
ii. Time Settings Per Day
| Field | Description |
|---|---|
| Opening Time | Start of business hours |
| Closing Time | End of business hours |
iii. Multiple Shifts
1. "Add Hours" button for additional time slots
2. Useful for split shifts or breaks
3. Click 'X' to remove time slots
5. Mobile Widget Configuration Guide

a. Button Position
i. Visual selector with mobile device icon
ii. Two options:
1. Left side of screen
2. Right side of screen
iii. Use radio buttons to select position
b. Button Size Adjustment
i. Slider control for size selection
ii. Three size options:
1. Small
2. Medium
3. Large
iii. Drag slider to adjust size
6. Pre-Chat Survey Configuration Guide
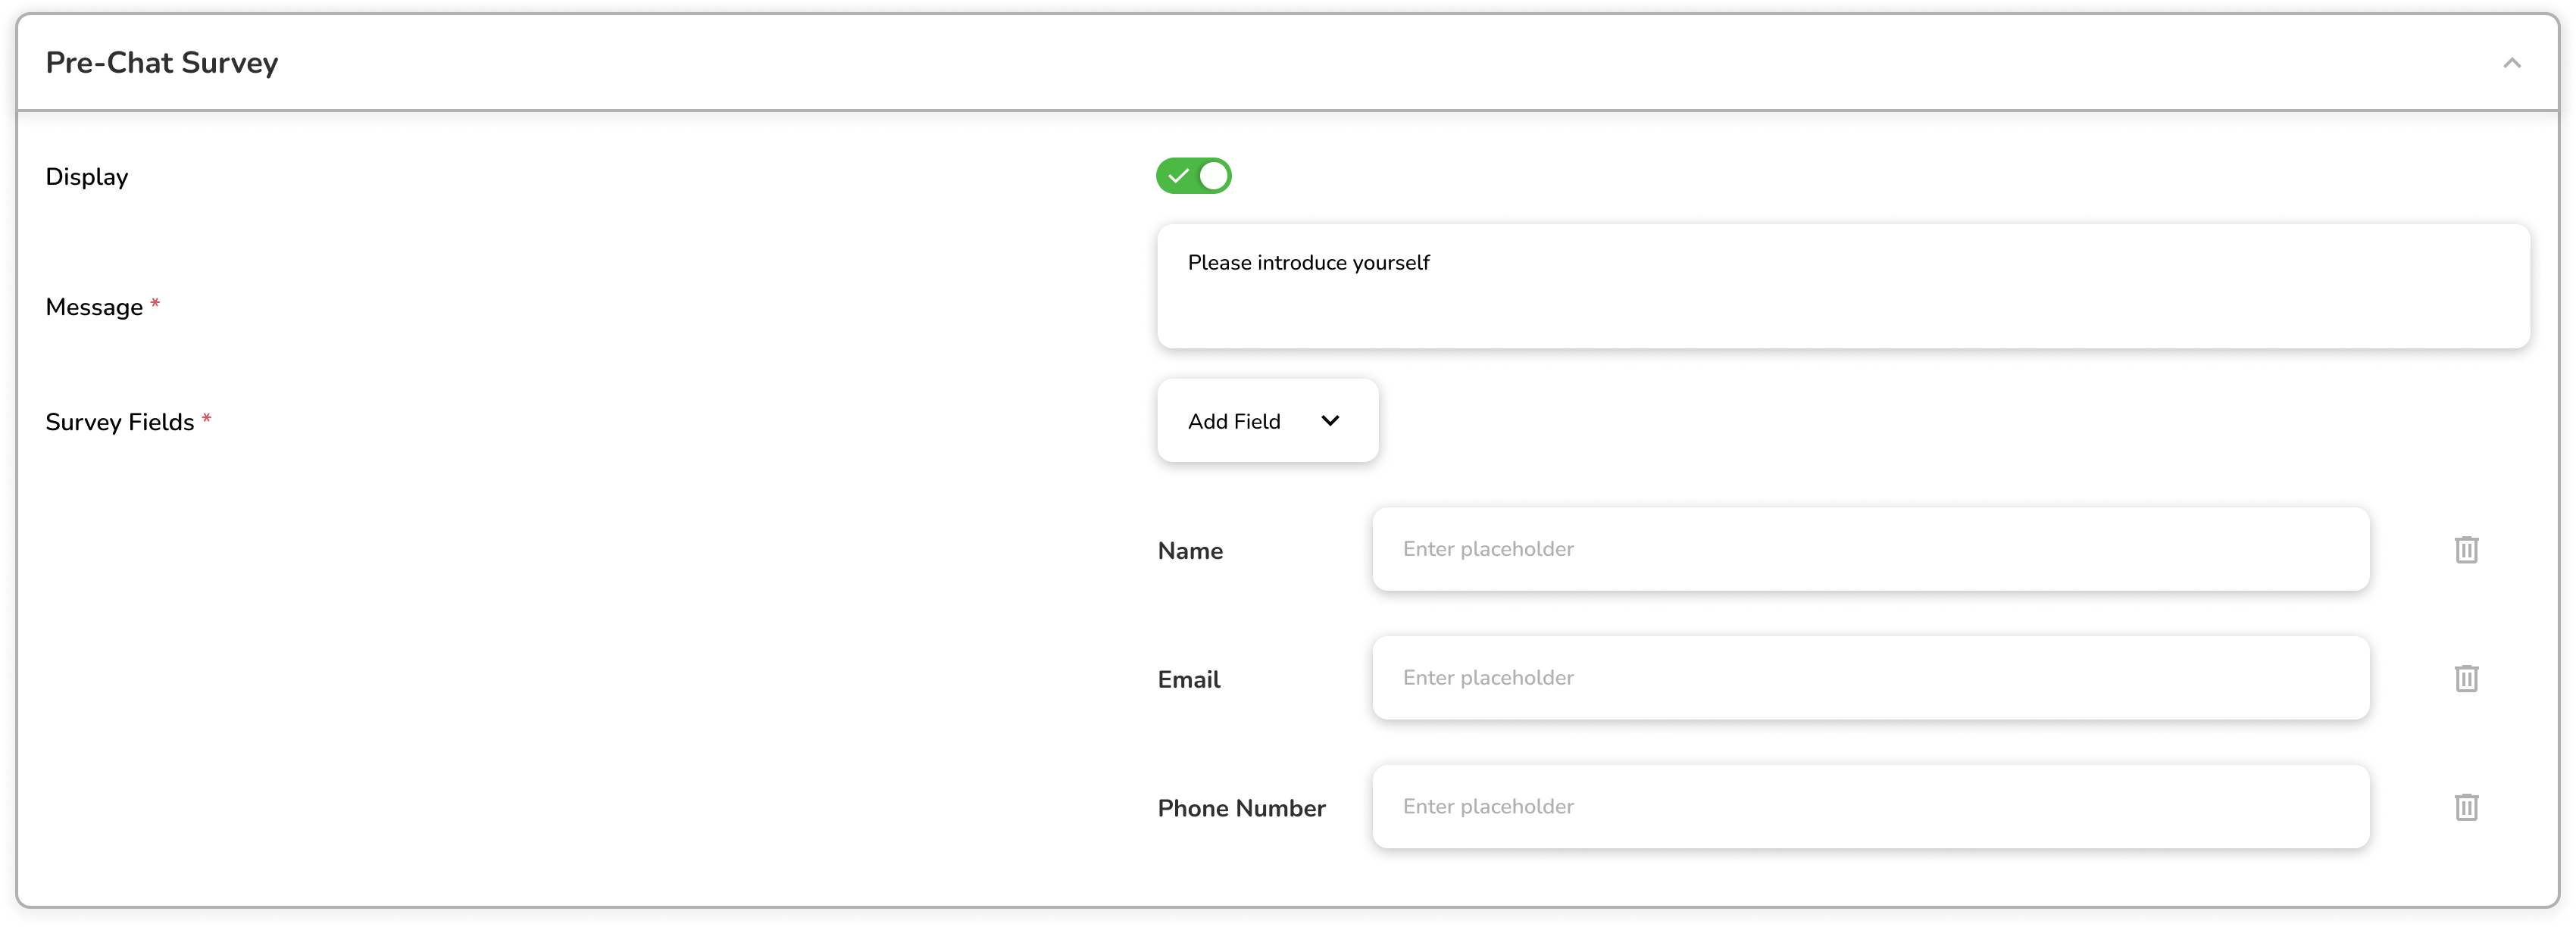
a. Display Settings
i. Display Toggle
1. Enable/disable pre-chat survey
2. Green toggle switch
b. Survey Configuration
i. Message (Required)
1. Welcome message for survey
ii. Survey Fields (Required)
1. Default fields:
1.1 Name
1.2 Email
1.3 Phone Number
2. Each field has:
2.1 Field label
2.2 Placeholder text
2.3 Delete option (trash icon)
iii. Add Field Button
1. Click to add custom fields
2. Dropdown menu for field types
c. Field Management
i. Set placeholder text for each field
ii. Remove unwanted fields using trash icon
iii. Arrange fields in desired order
iv. Customize field labels