RCS Provider
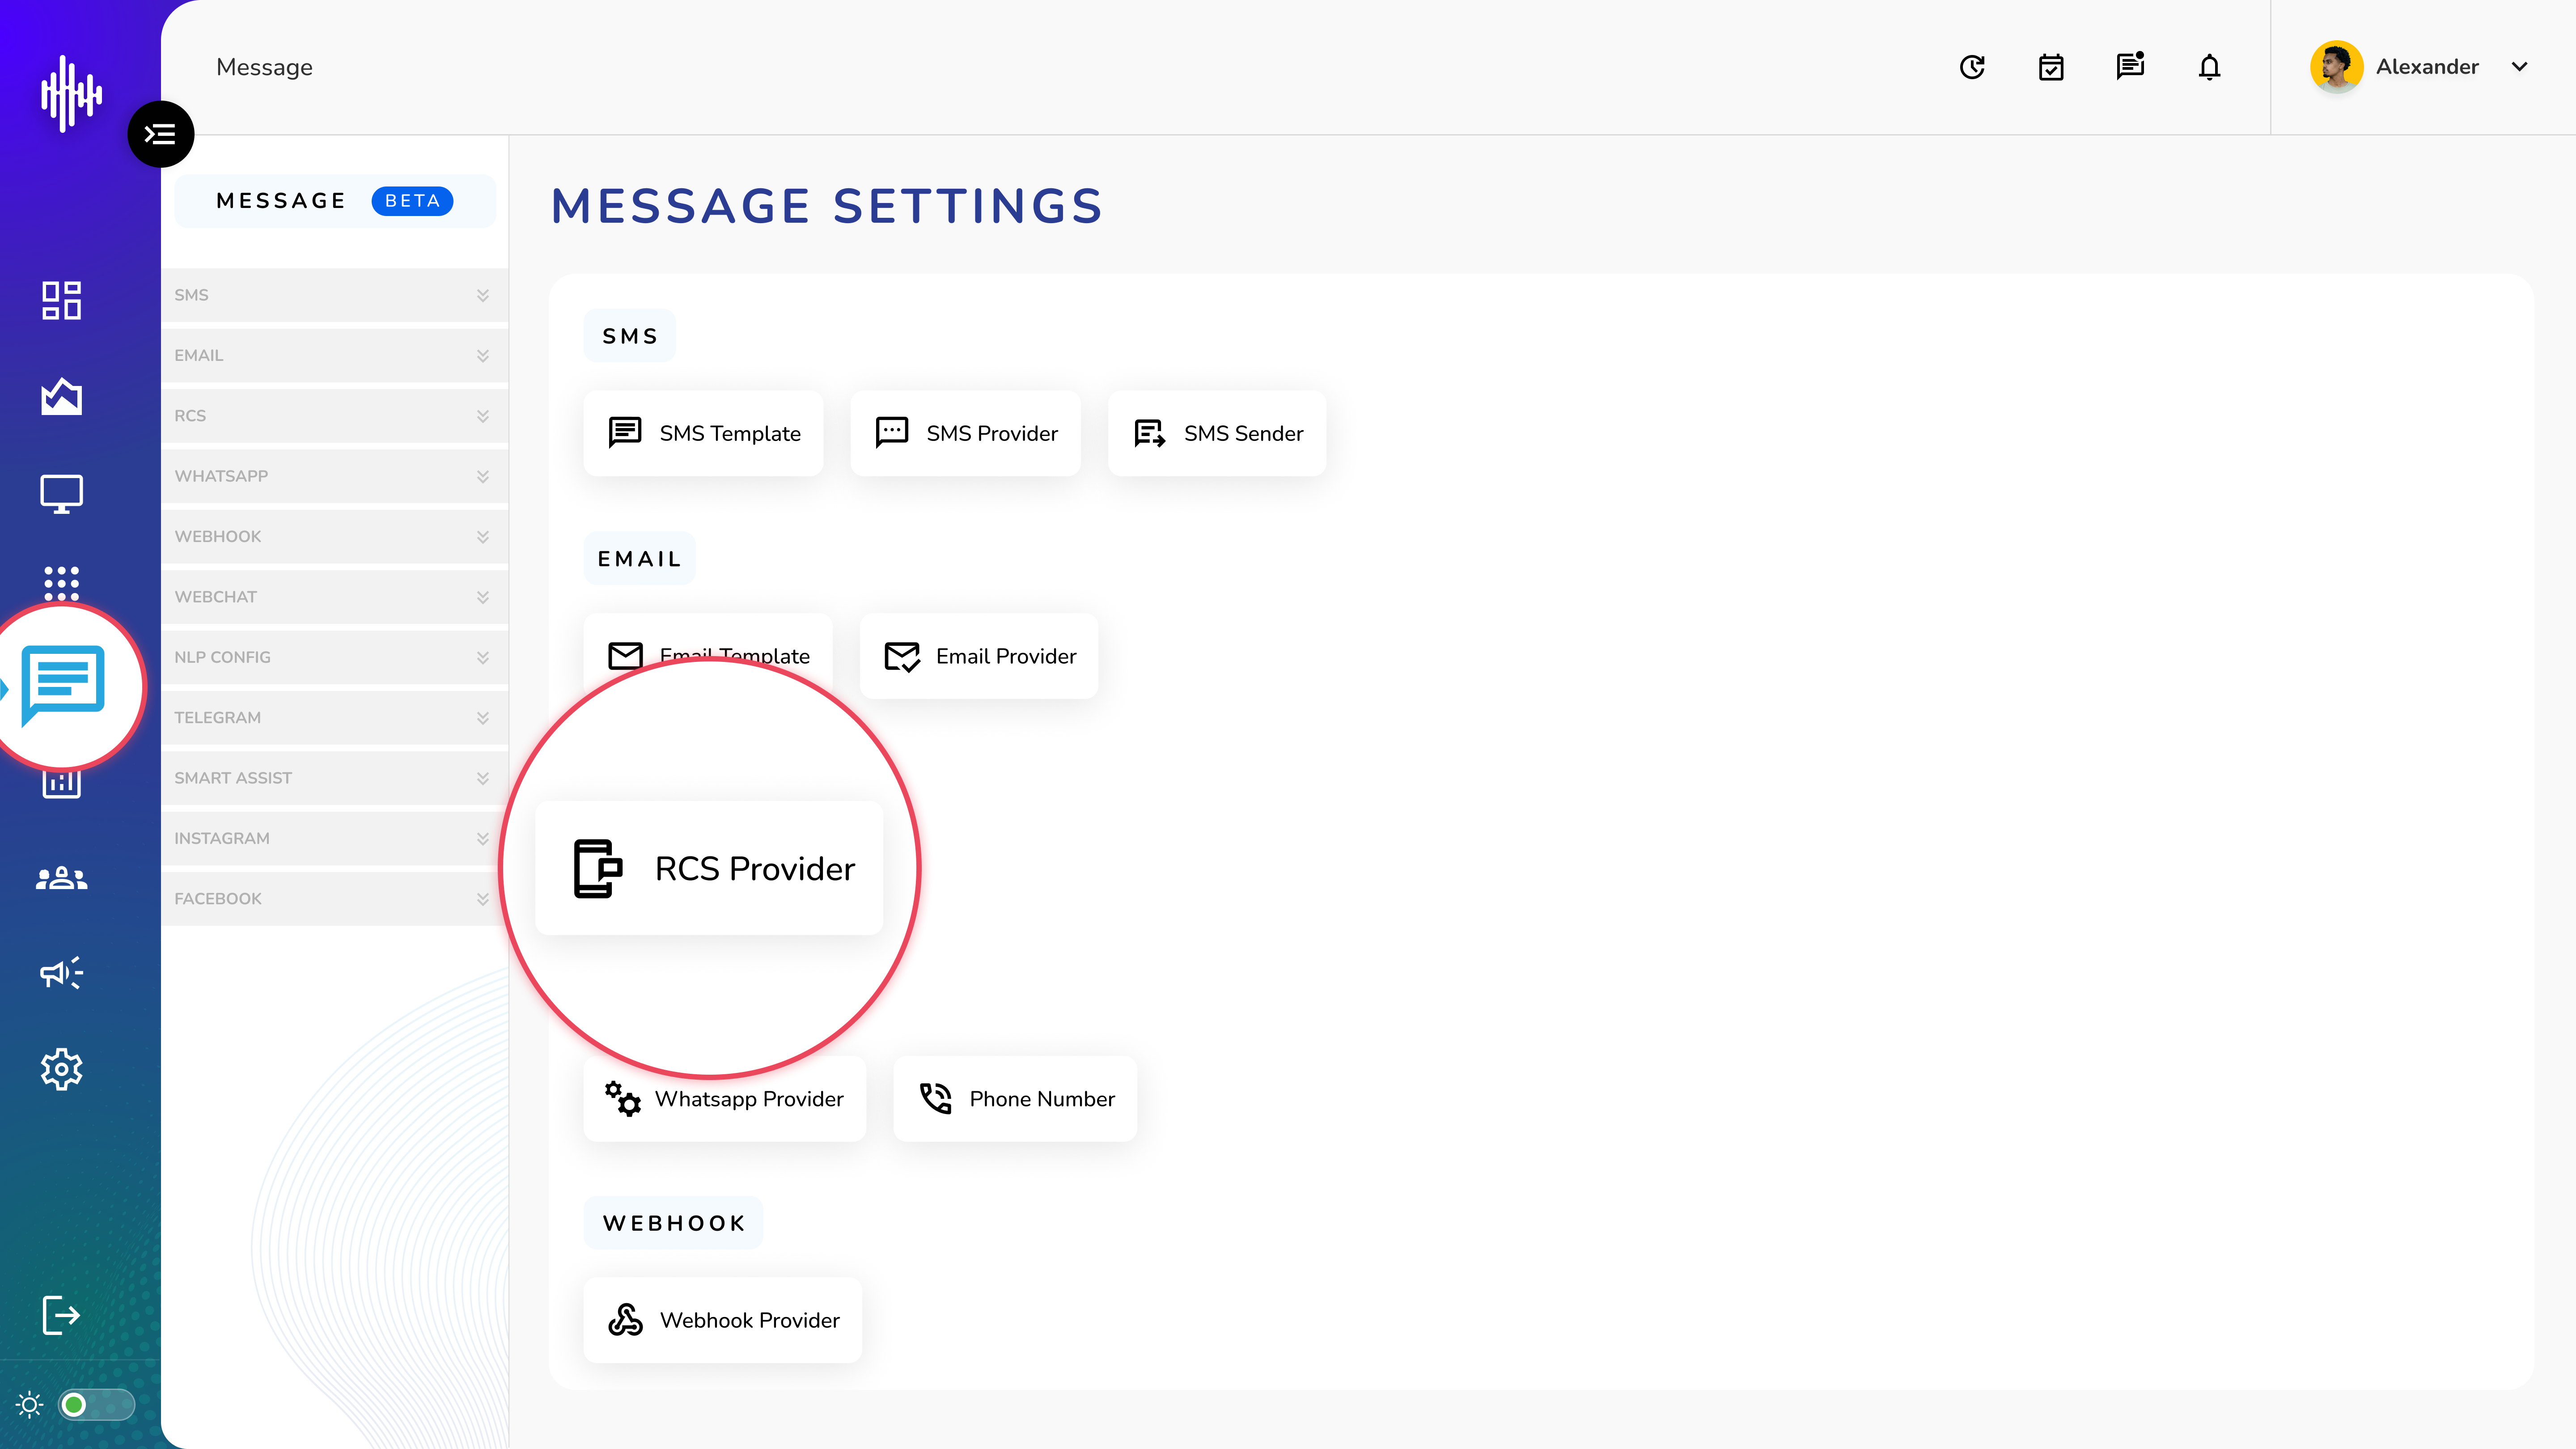
1. Login to your admin account
2. Click "Message" from the left side menu
3. Click “RCS Provider” to access the RCS Provider's details.
RCS Provider Management
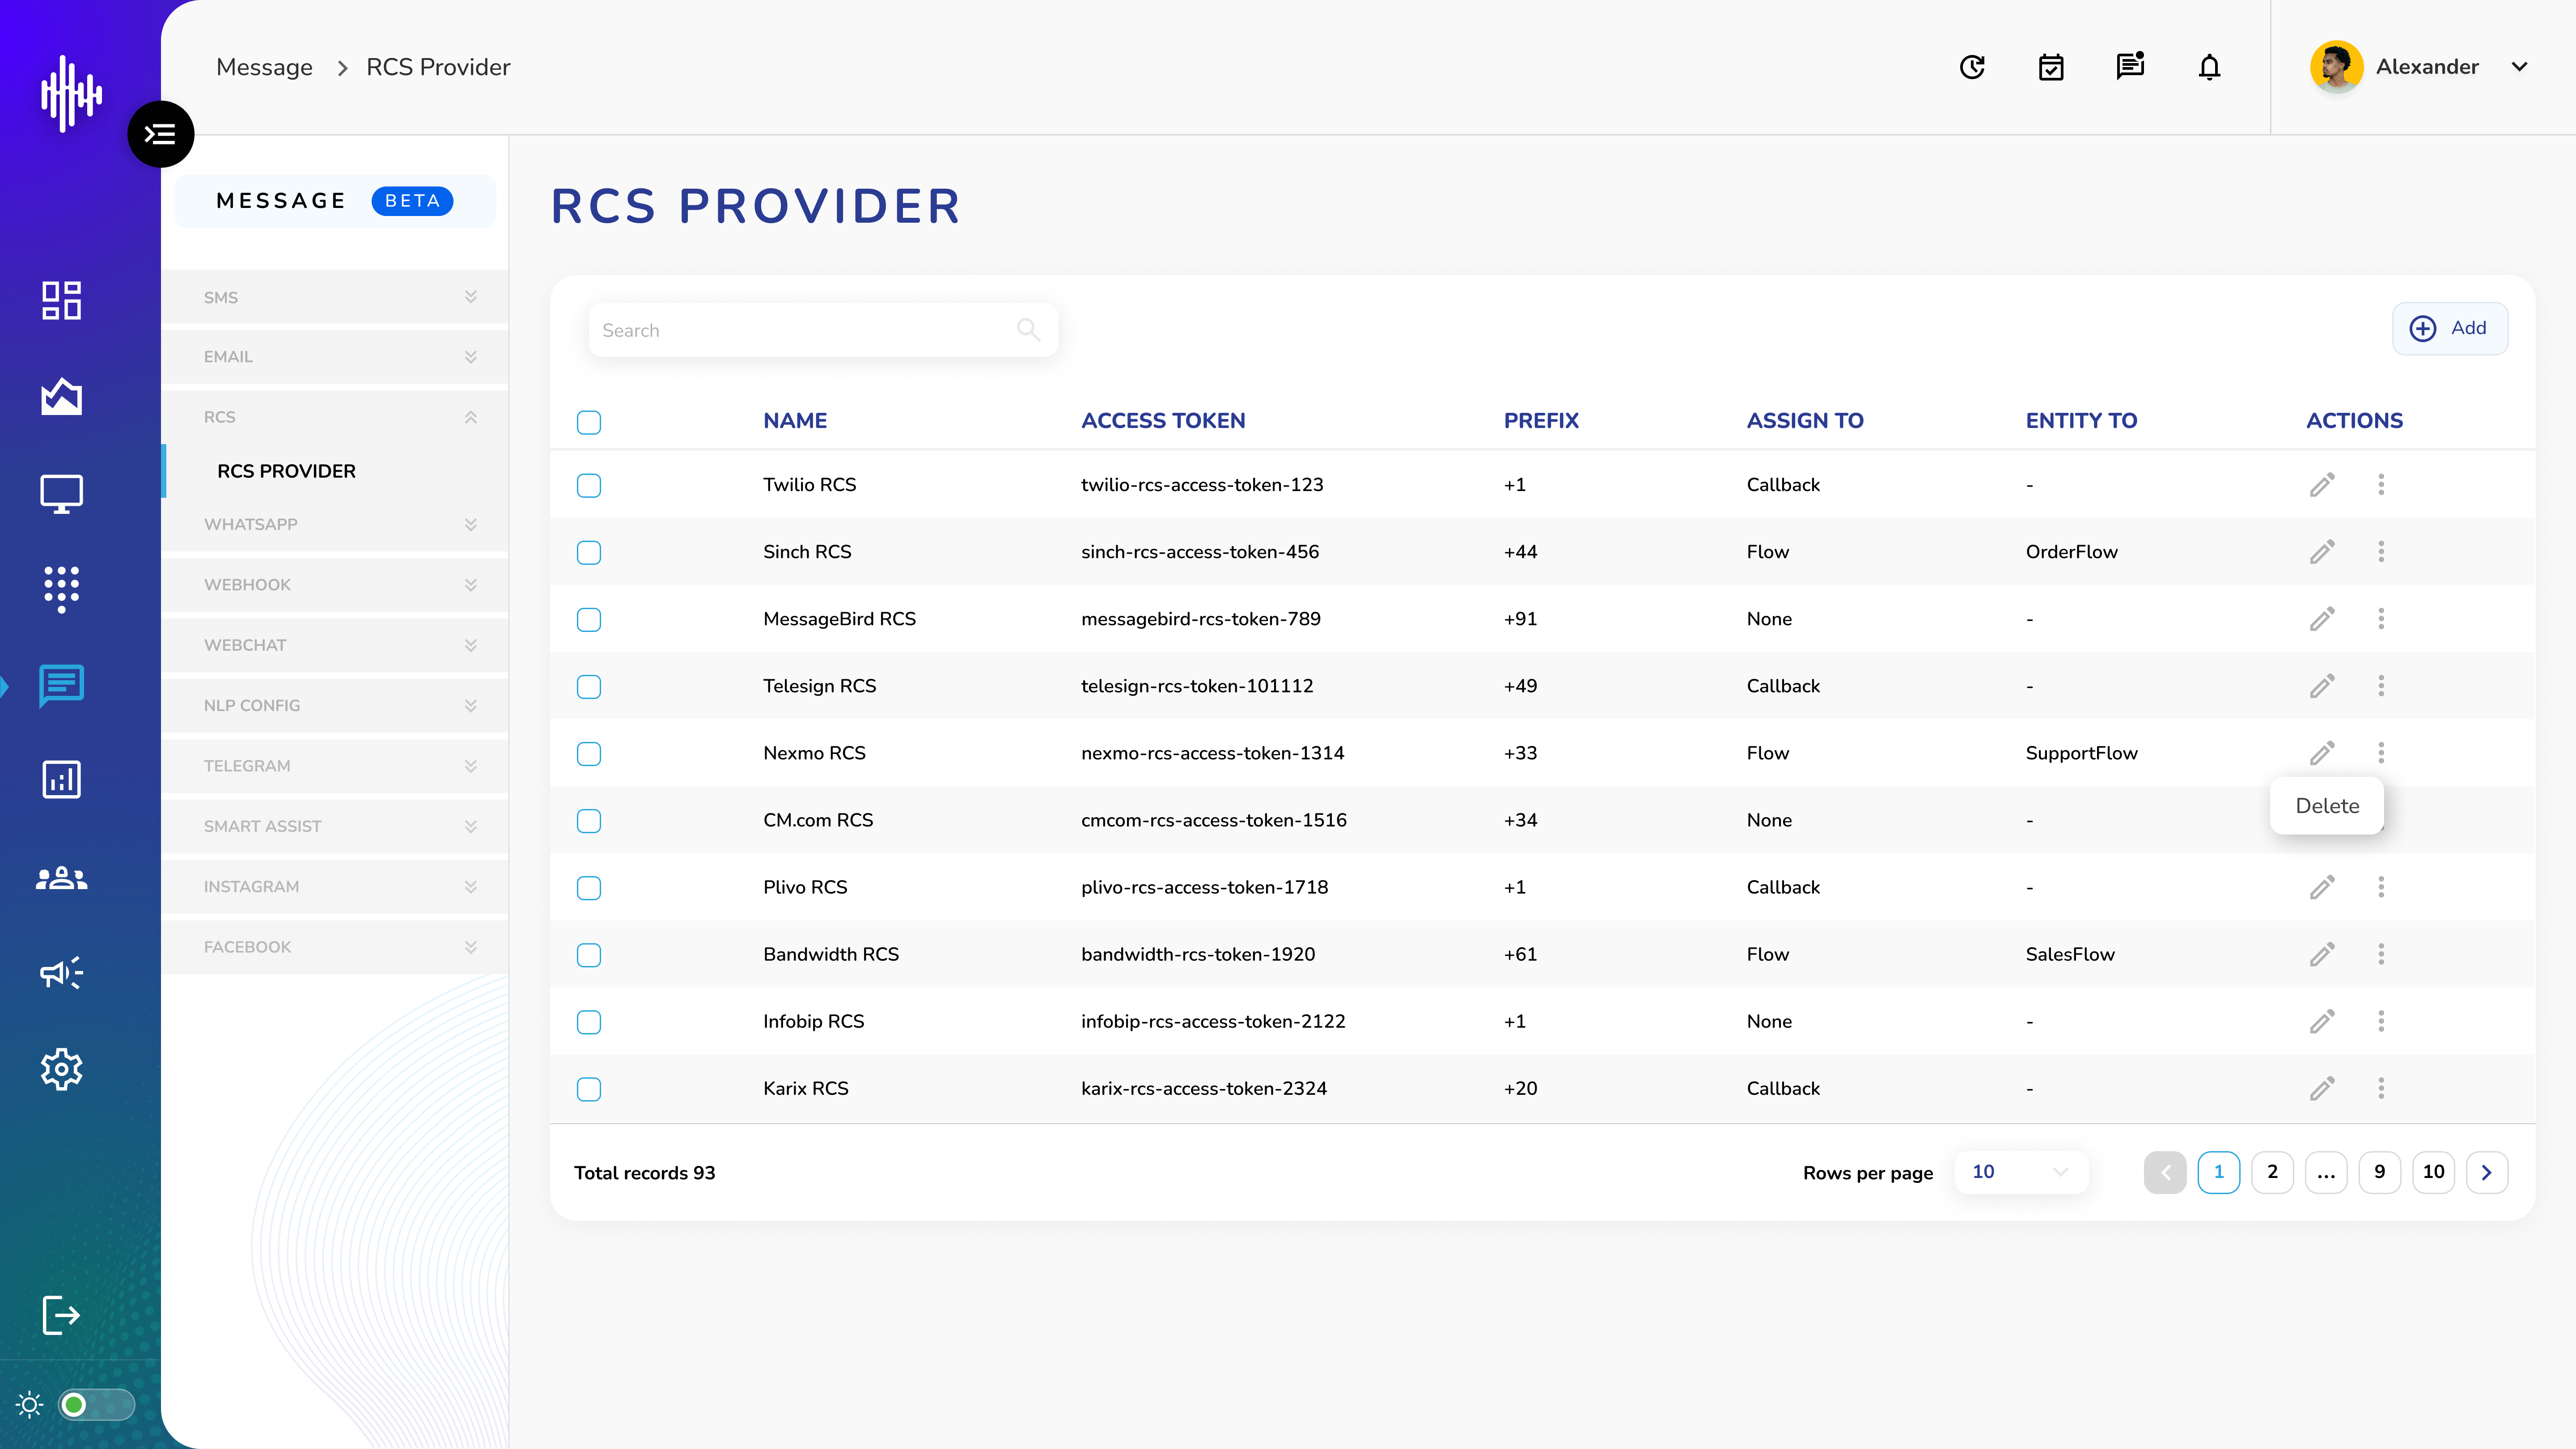
1. RCS Provider Screen Elements
| Column | Description |
|---|---|
| Name | Provider identifier |
| Access Token | Authentication token |
| Prefix | Country code prefix |
| Assign To | None/Callback/Flow |
| Entity To | Associated flow name |
2. Features
a. Search bar (top-left)
b. "+Add" button (top-right)
c. Actions:
i. Edit (pencil icon)
ii. Delete (three dots)
d. Pagination with adjustable rows
e. Total records counter
3. Navigation
a. Adjustable rows per page setting
b. Page navigation controls
c. Total records displayed
Important Notes:
-
Verify access tokens before saving
-
Confirm country code prefixes
-
Test routing configurations
-
Keep provider information updated
Add RCS Provider Guide
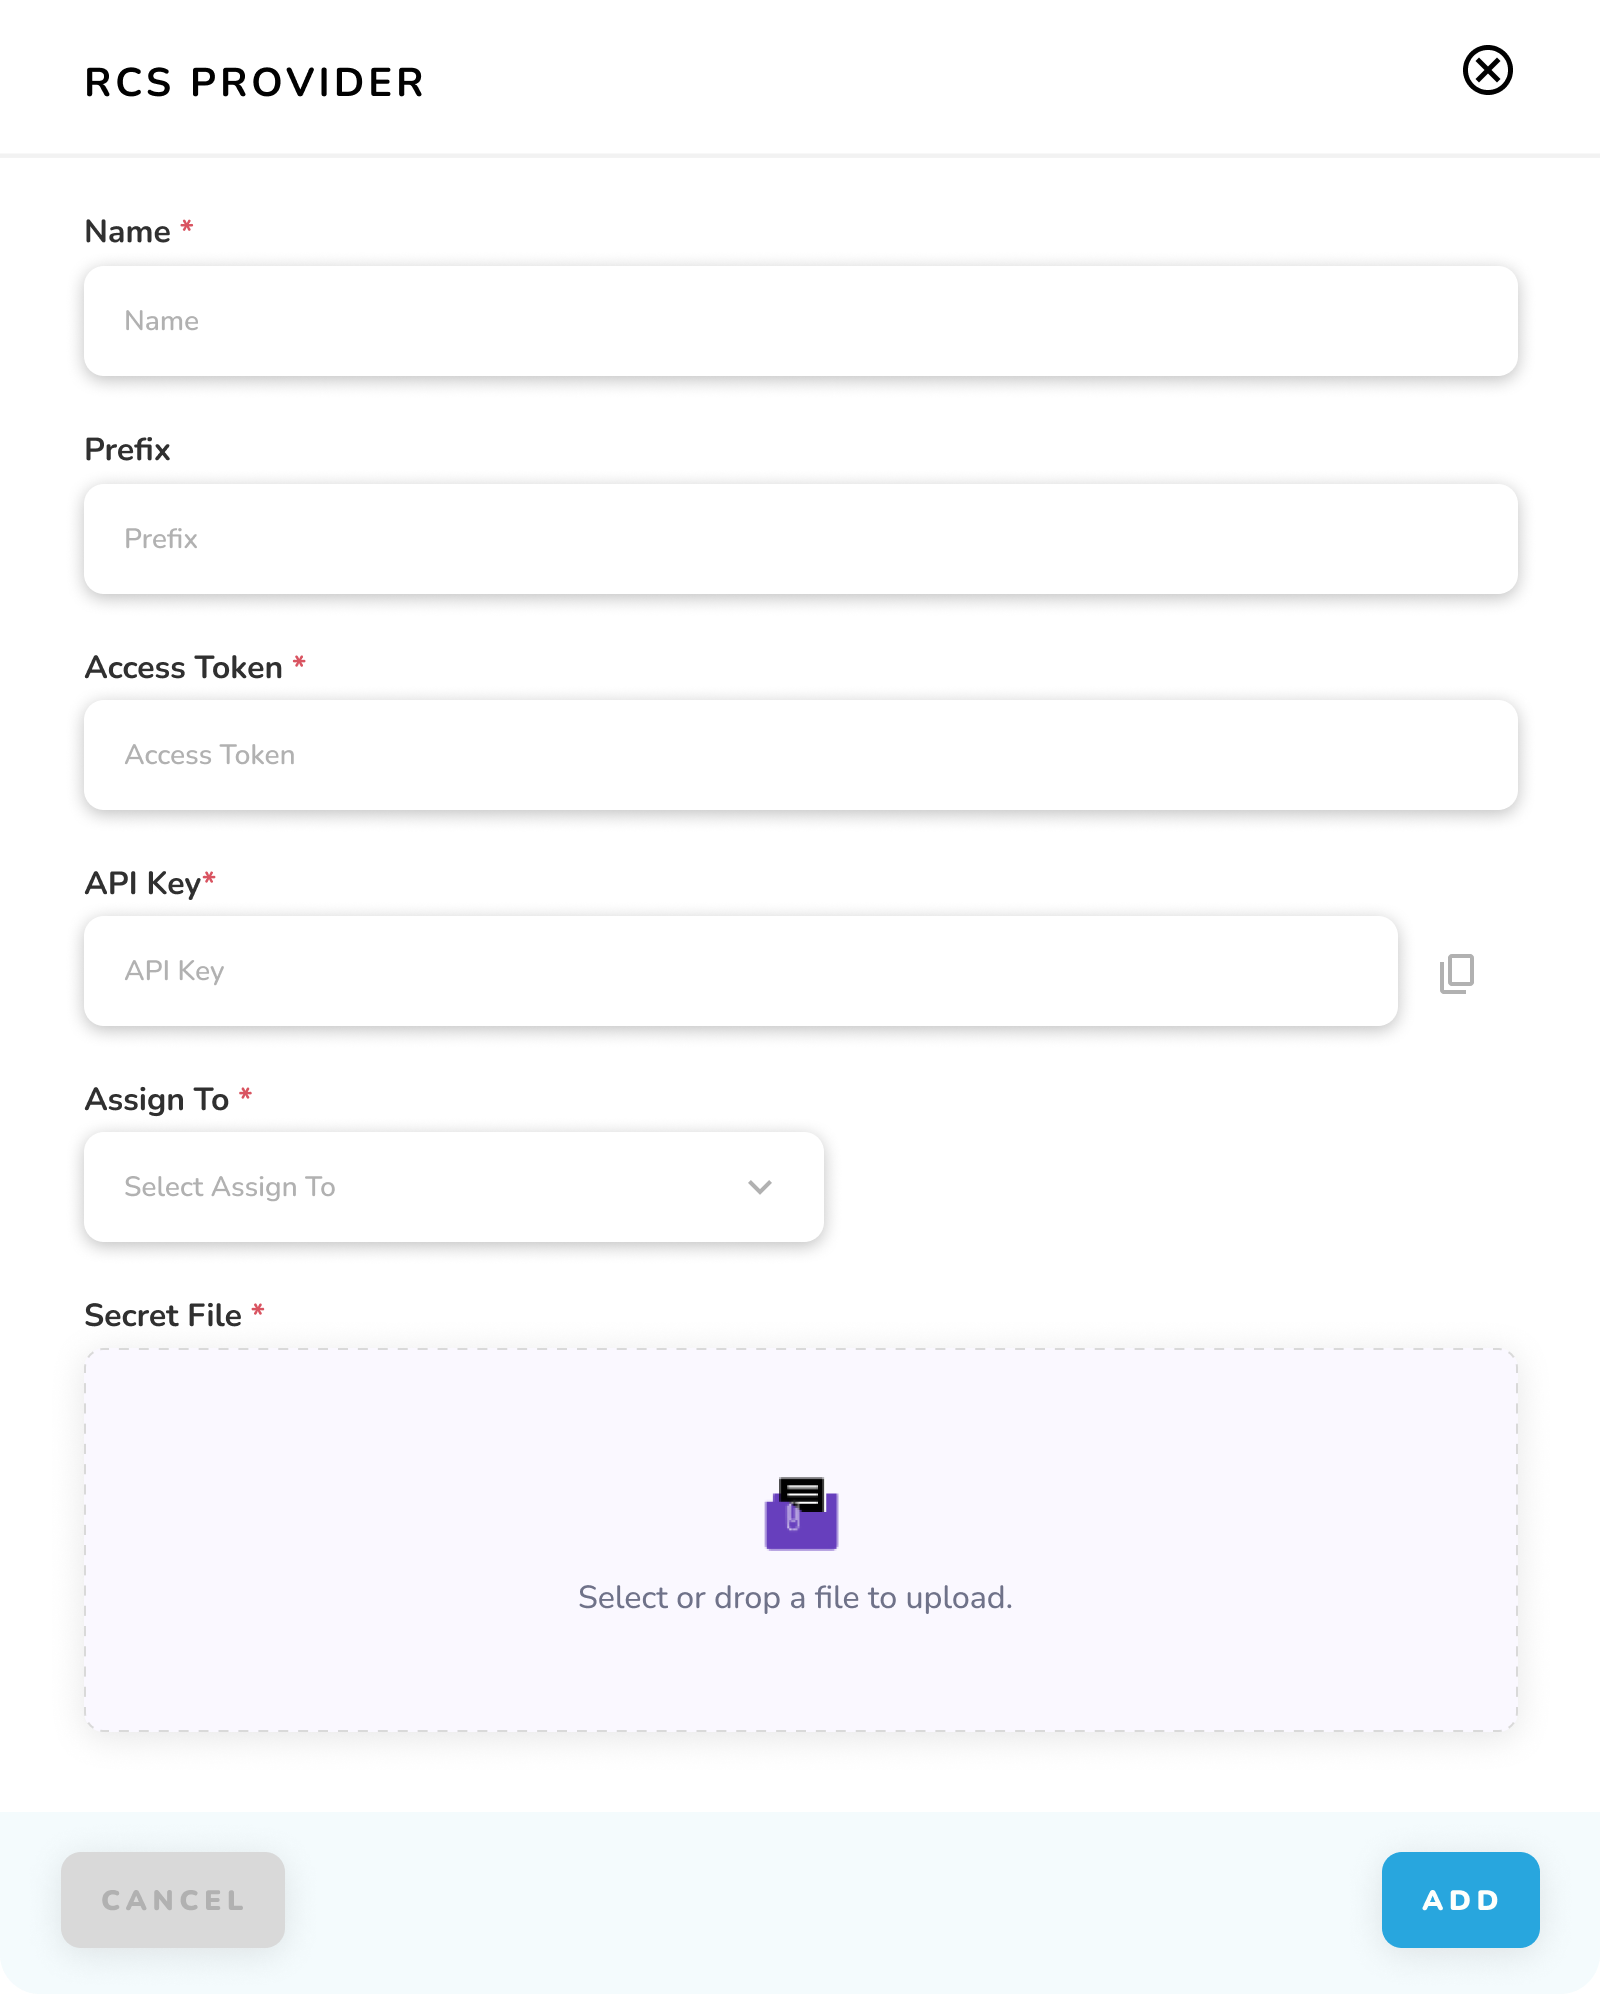
1. Required Fields
| Field | Required | Description |
|---|---|---|
| Name | * | Provider identifier |
| Prefix | - | Country code prefix |
| Access Token | * | Authentication token |
| API Key | * | Provider API key |
| Assign To | * | Routing option (None/Callback/Flow) |
| Secret File | * | Authentication certificate |
2. Actions
a. CANCEL: Exit without saving
b. ADD: Create provider
Important Notes:
-
Fields marked * are mandatory
-
Secret file accepts drag & drop
-
Verify tokens before saving
-
Test configuration after setup