Instagram Provider
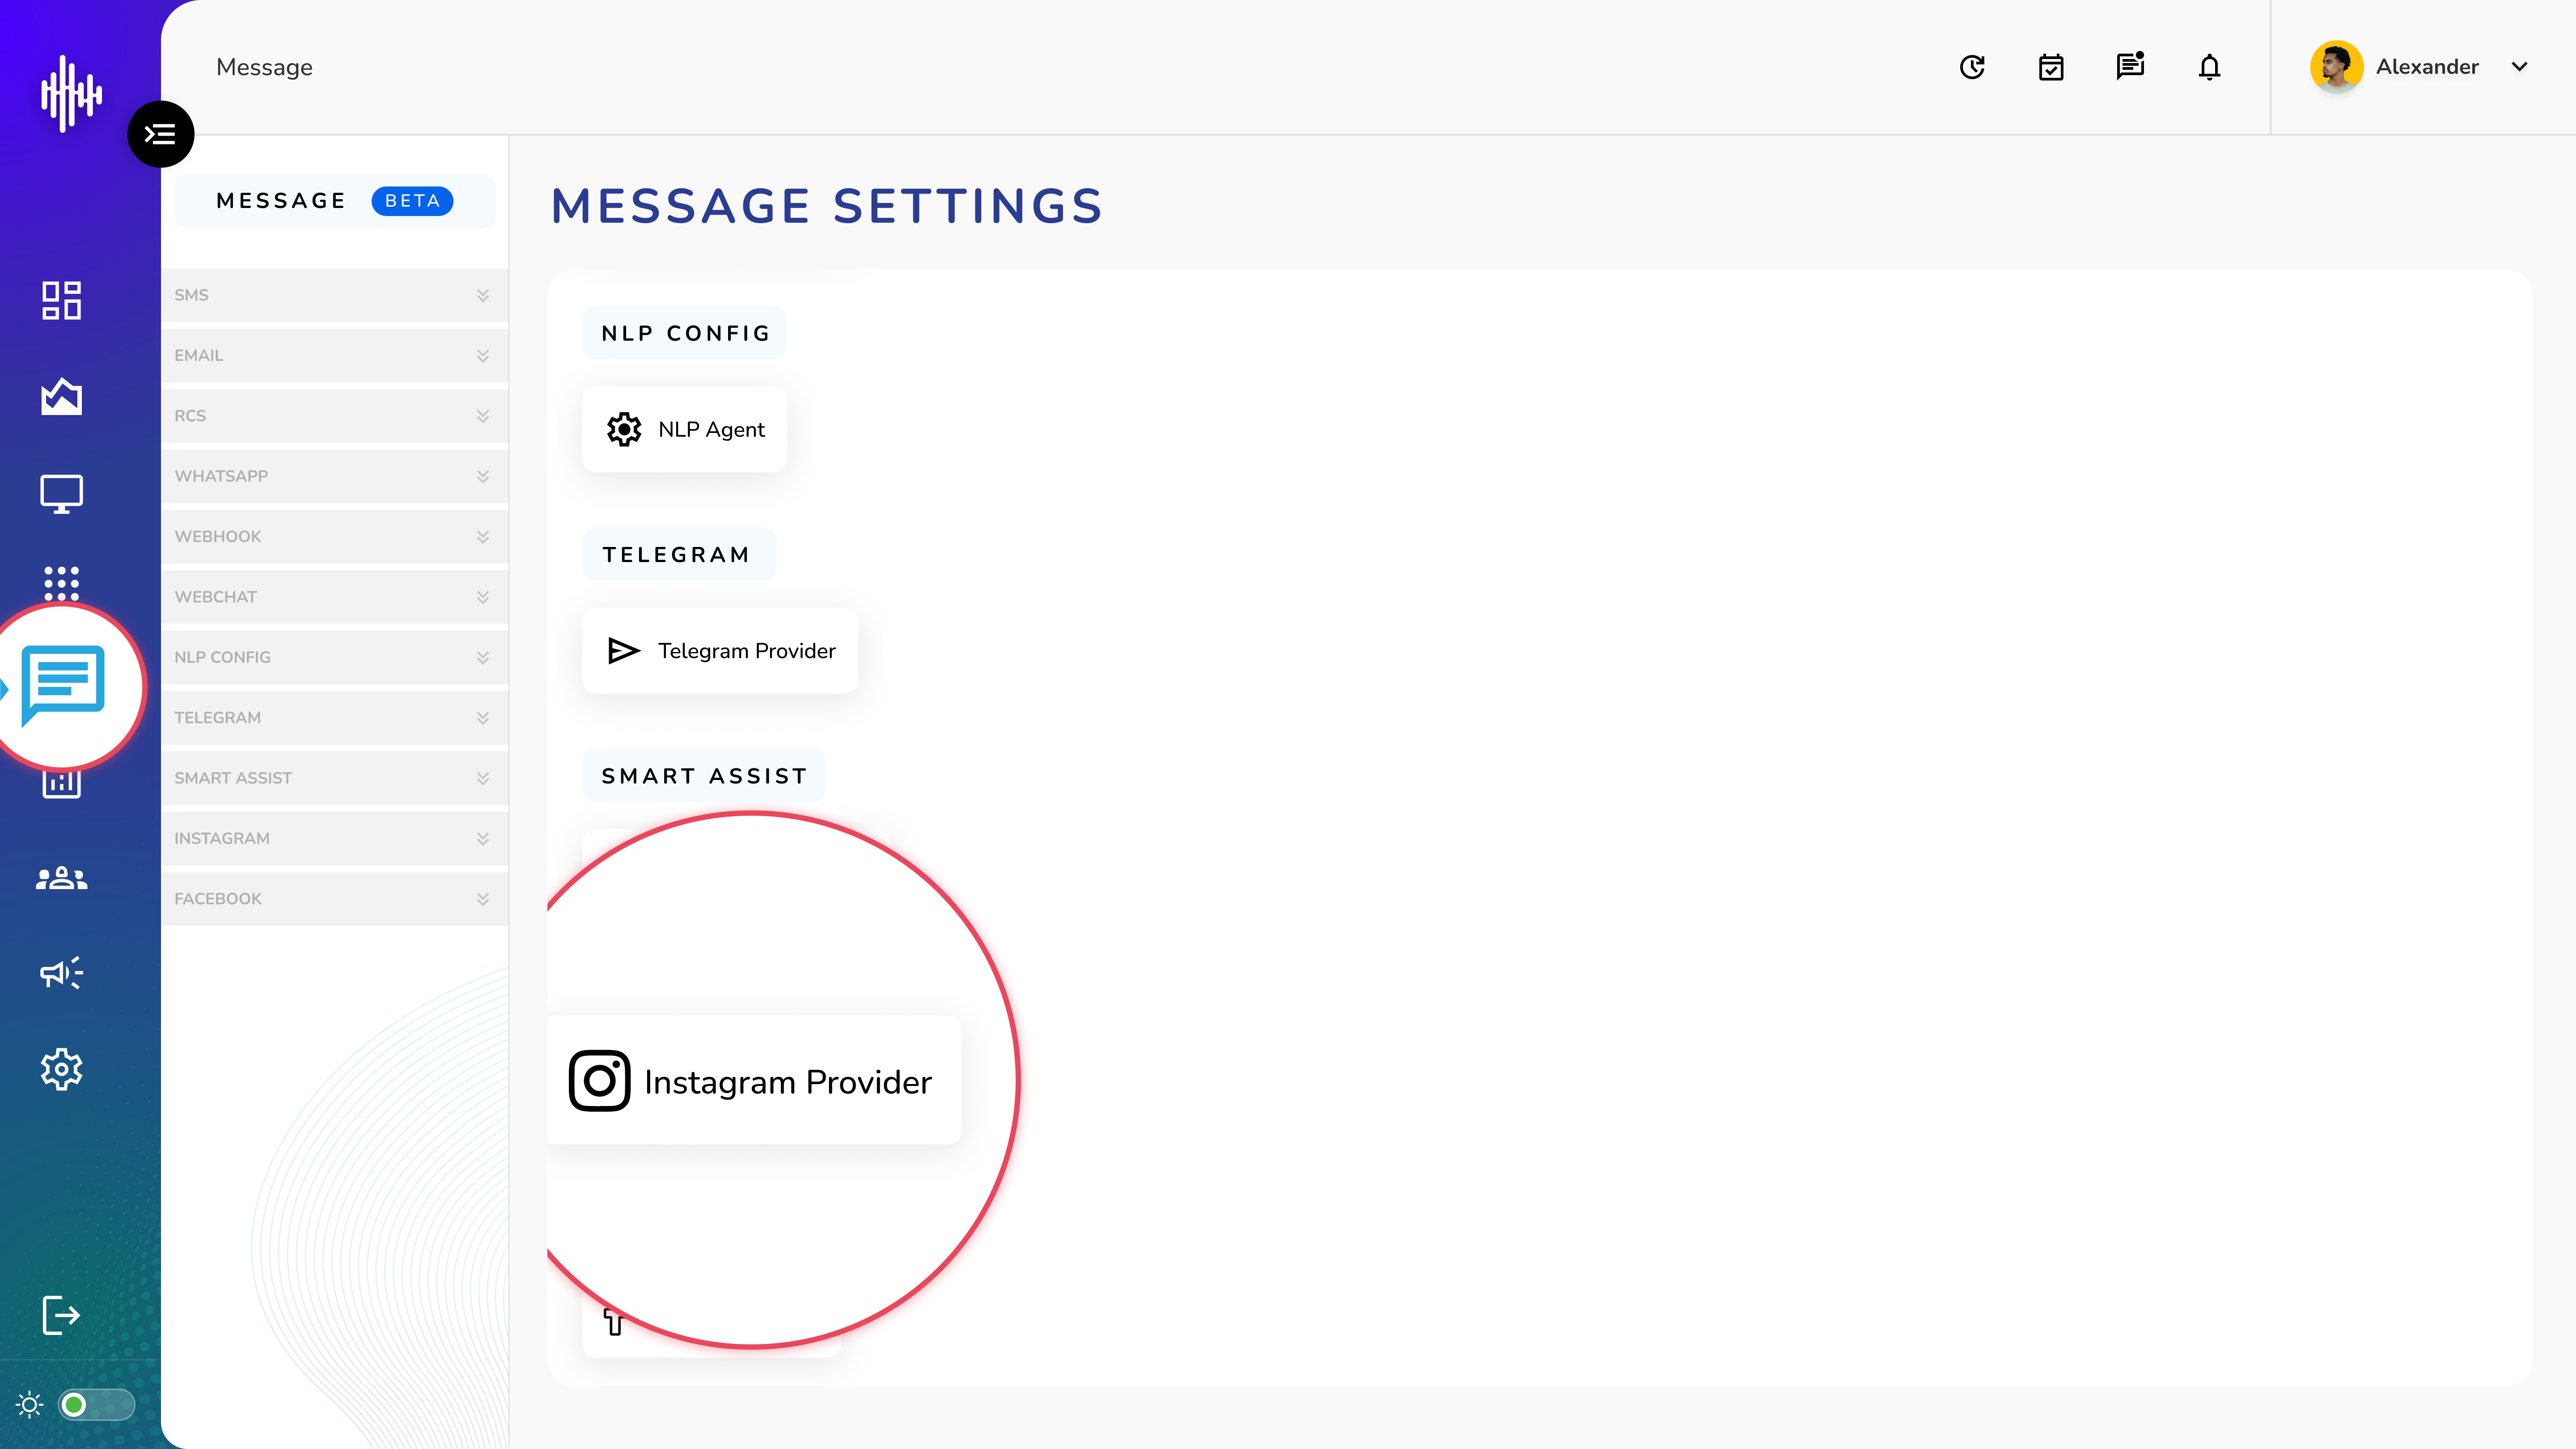
1. Login to your admin account
2. Click "Message" from the left side menu
3. Click “Instagram Provider” to access the Instagram Provider's details.
Instagram Provider Management
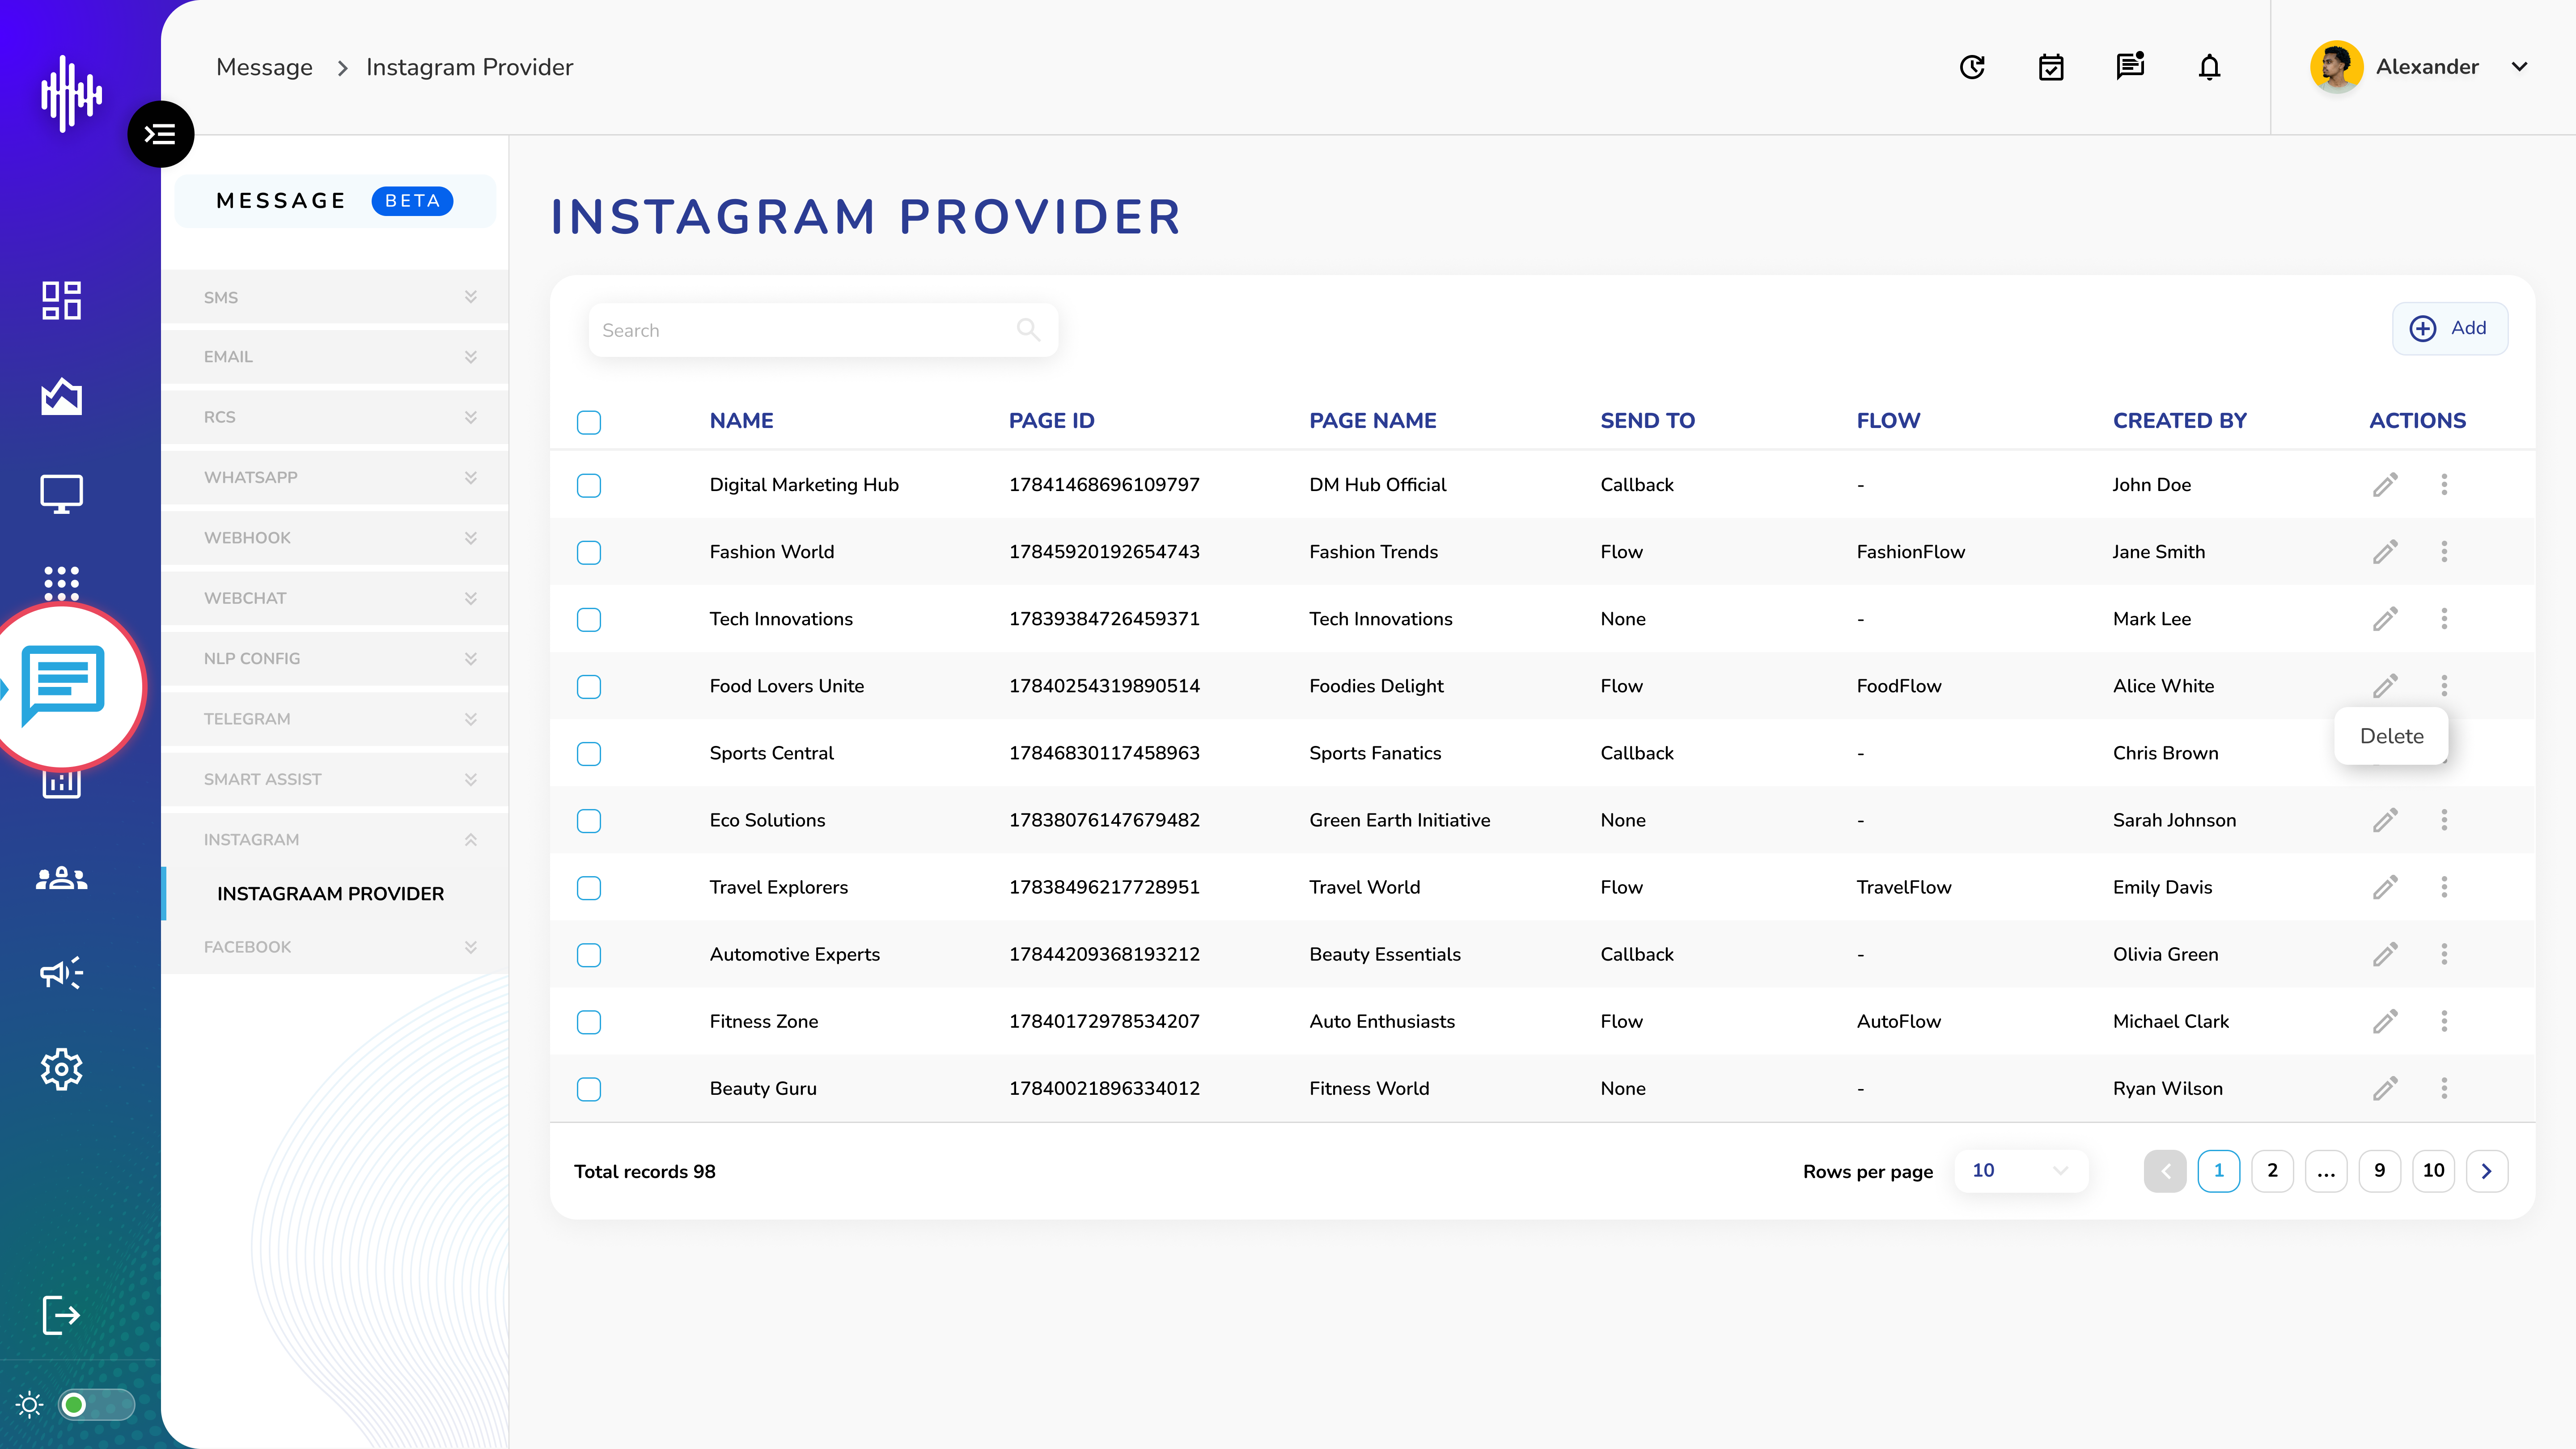
1. Instagram Provider Screen Elements
| Column | Description |
|---|---|
| Name | Provider identifier |
| Page ID | Instagram page identifier |
| Page Name | Display name of page |
| Send To | None/Callback/Flow |
| Flow | Associated flow name |
| Created By | Creator's name |
2. List View Features
a. Top Bar
i. Search functionality
ii. "+Add" button for new providers
b. Available Actions
i. Pencil Icon: Edit configuration
ii. Three Dots: Delete provider
c. Send To Options
i. None: No routing
ii. Callback: Route to callback
iii. Flow: Route to specific flow
3. Navigation
a. Adjustable rows per page
b. Pagination controls
c. Total records counter
Important Notes:
-
Page ID must be valid
-
Flow assignment required for routing
-
Verify page credentials
-
Test configuration before activation
Add Instagram Provider Guide
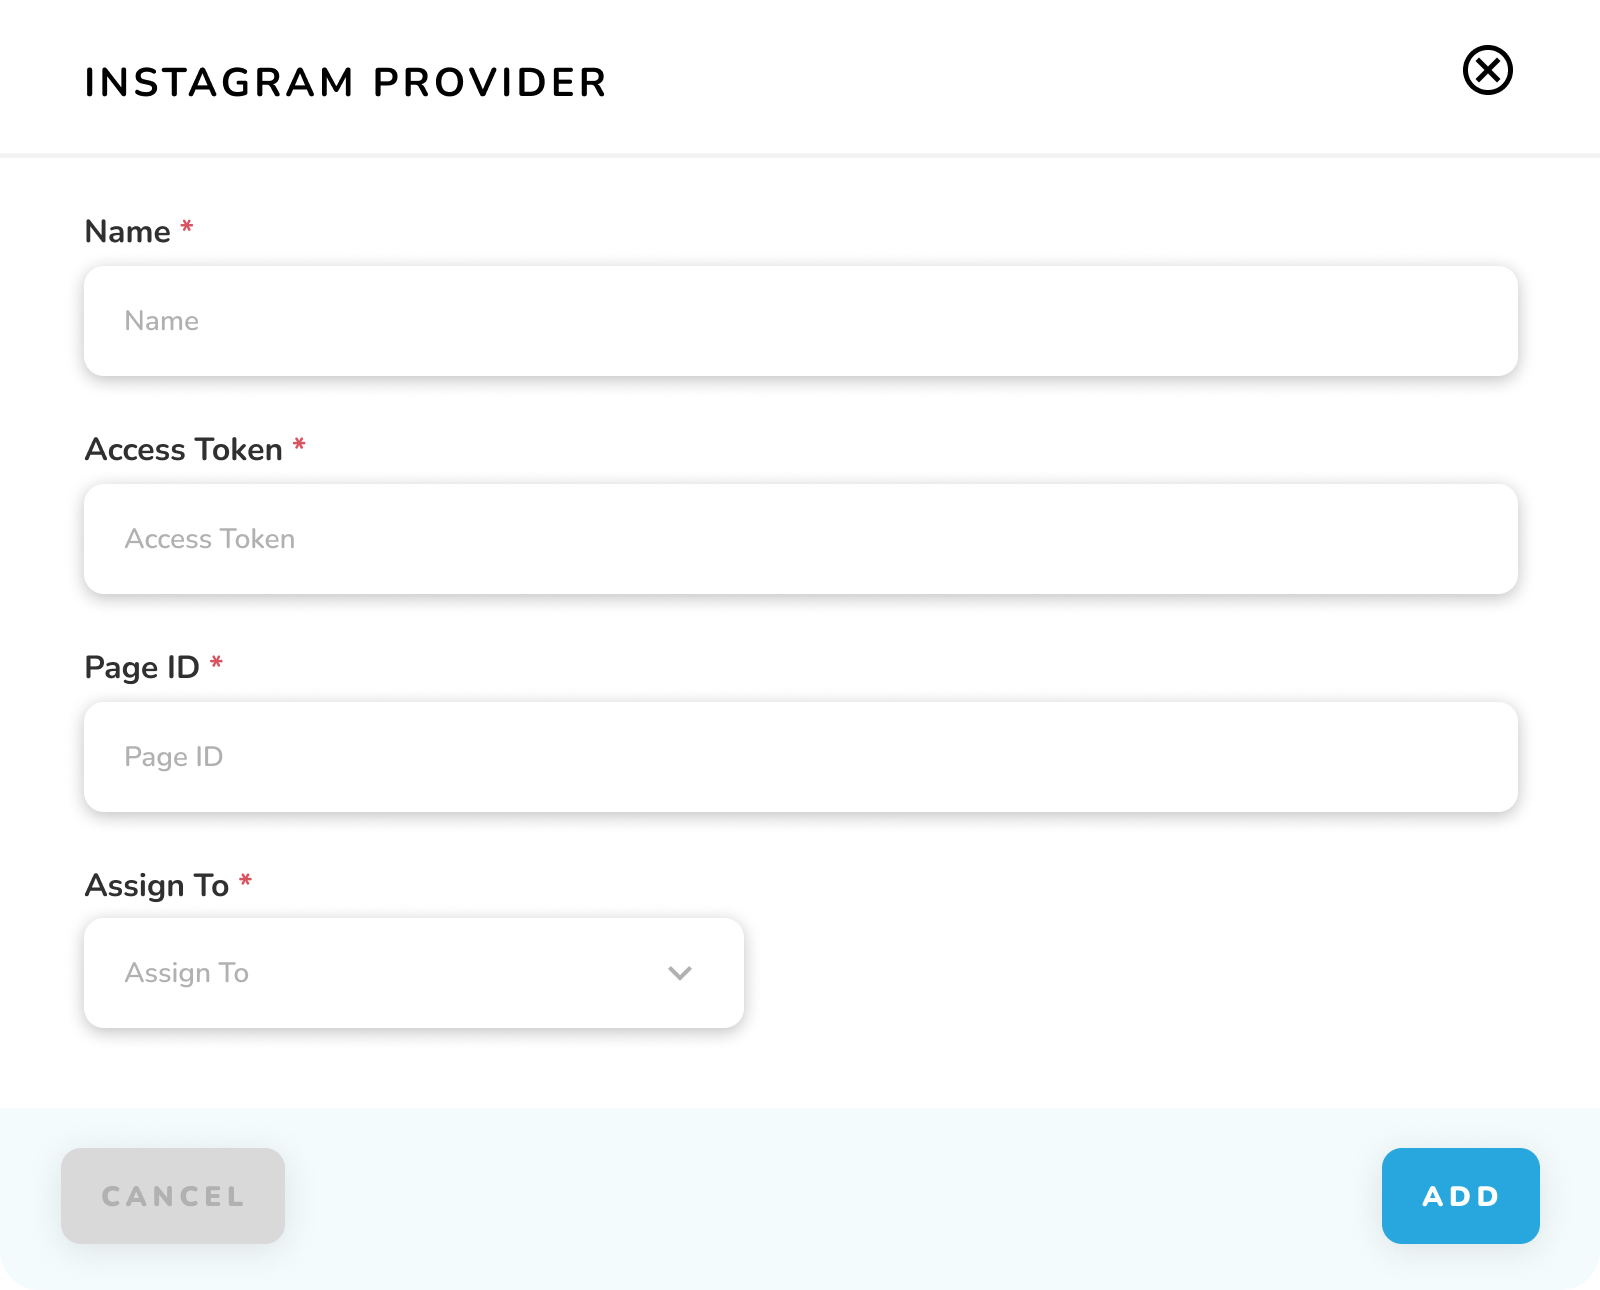
1. Required Fields
| Field | Description | Required |
|---|---|---|
| Name* | Provider identifier | Yes |
| Access Token* | Instagram API token | Yes |
| Page ID* | Instagram page identifier | Yes |
| Assign To* | Routing option | Yes |
2. Assignment Options
a. None: No routing
b. Callback: Route to callback URL
c. Flow: Route to specific flow
d. If Callback selected:
i. Method: GET/POST/PUT
ii. URL: Callback endpoint
e. If Flow selected:
i. Select flow from dropdown
3. Action Buttons
a. Cancel: Exit without saving
b. Add: Create provider
Important Notes:
-
All fields marked with * are mandatory
-
Access token must be valid
-
Page ID must match Instagram page
-
Test configuration after setup