Users
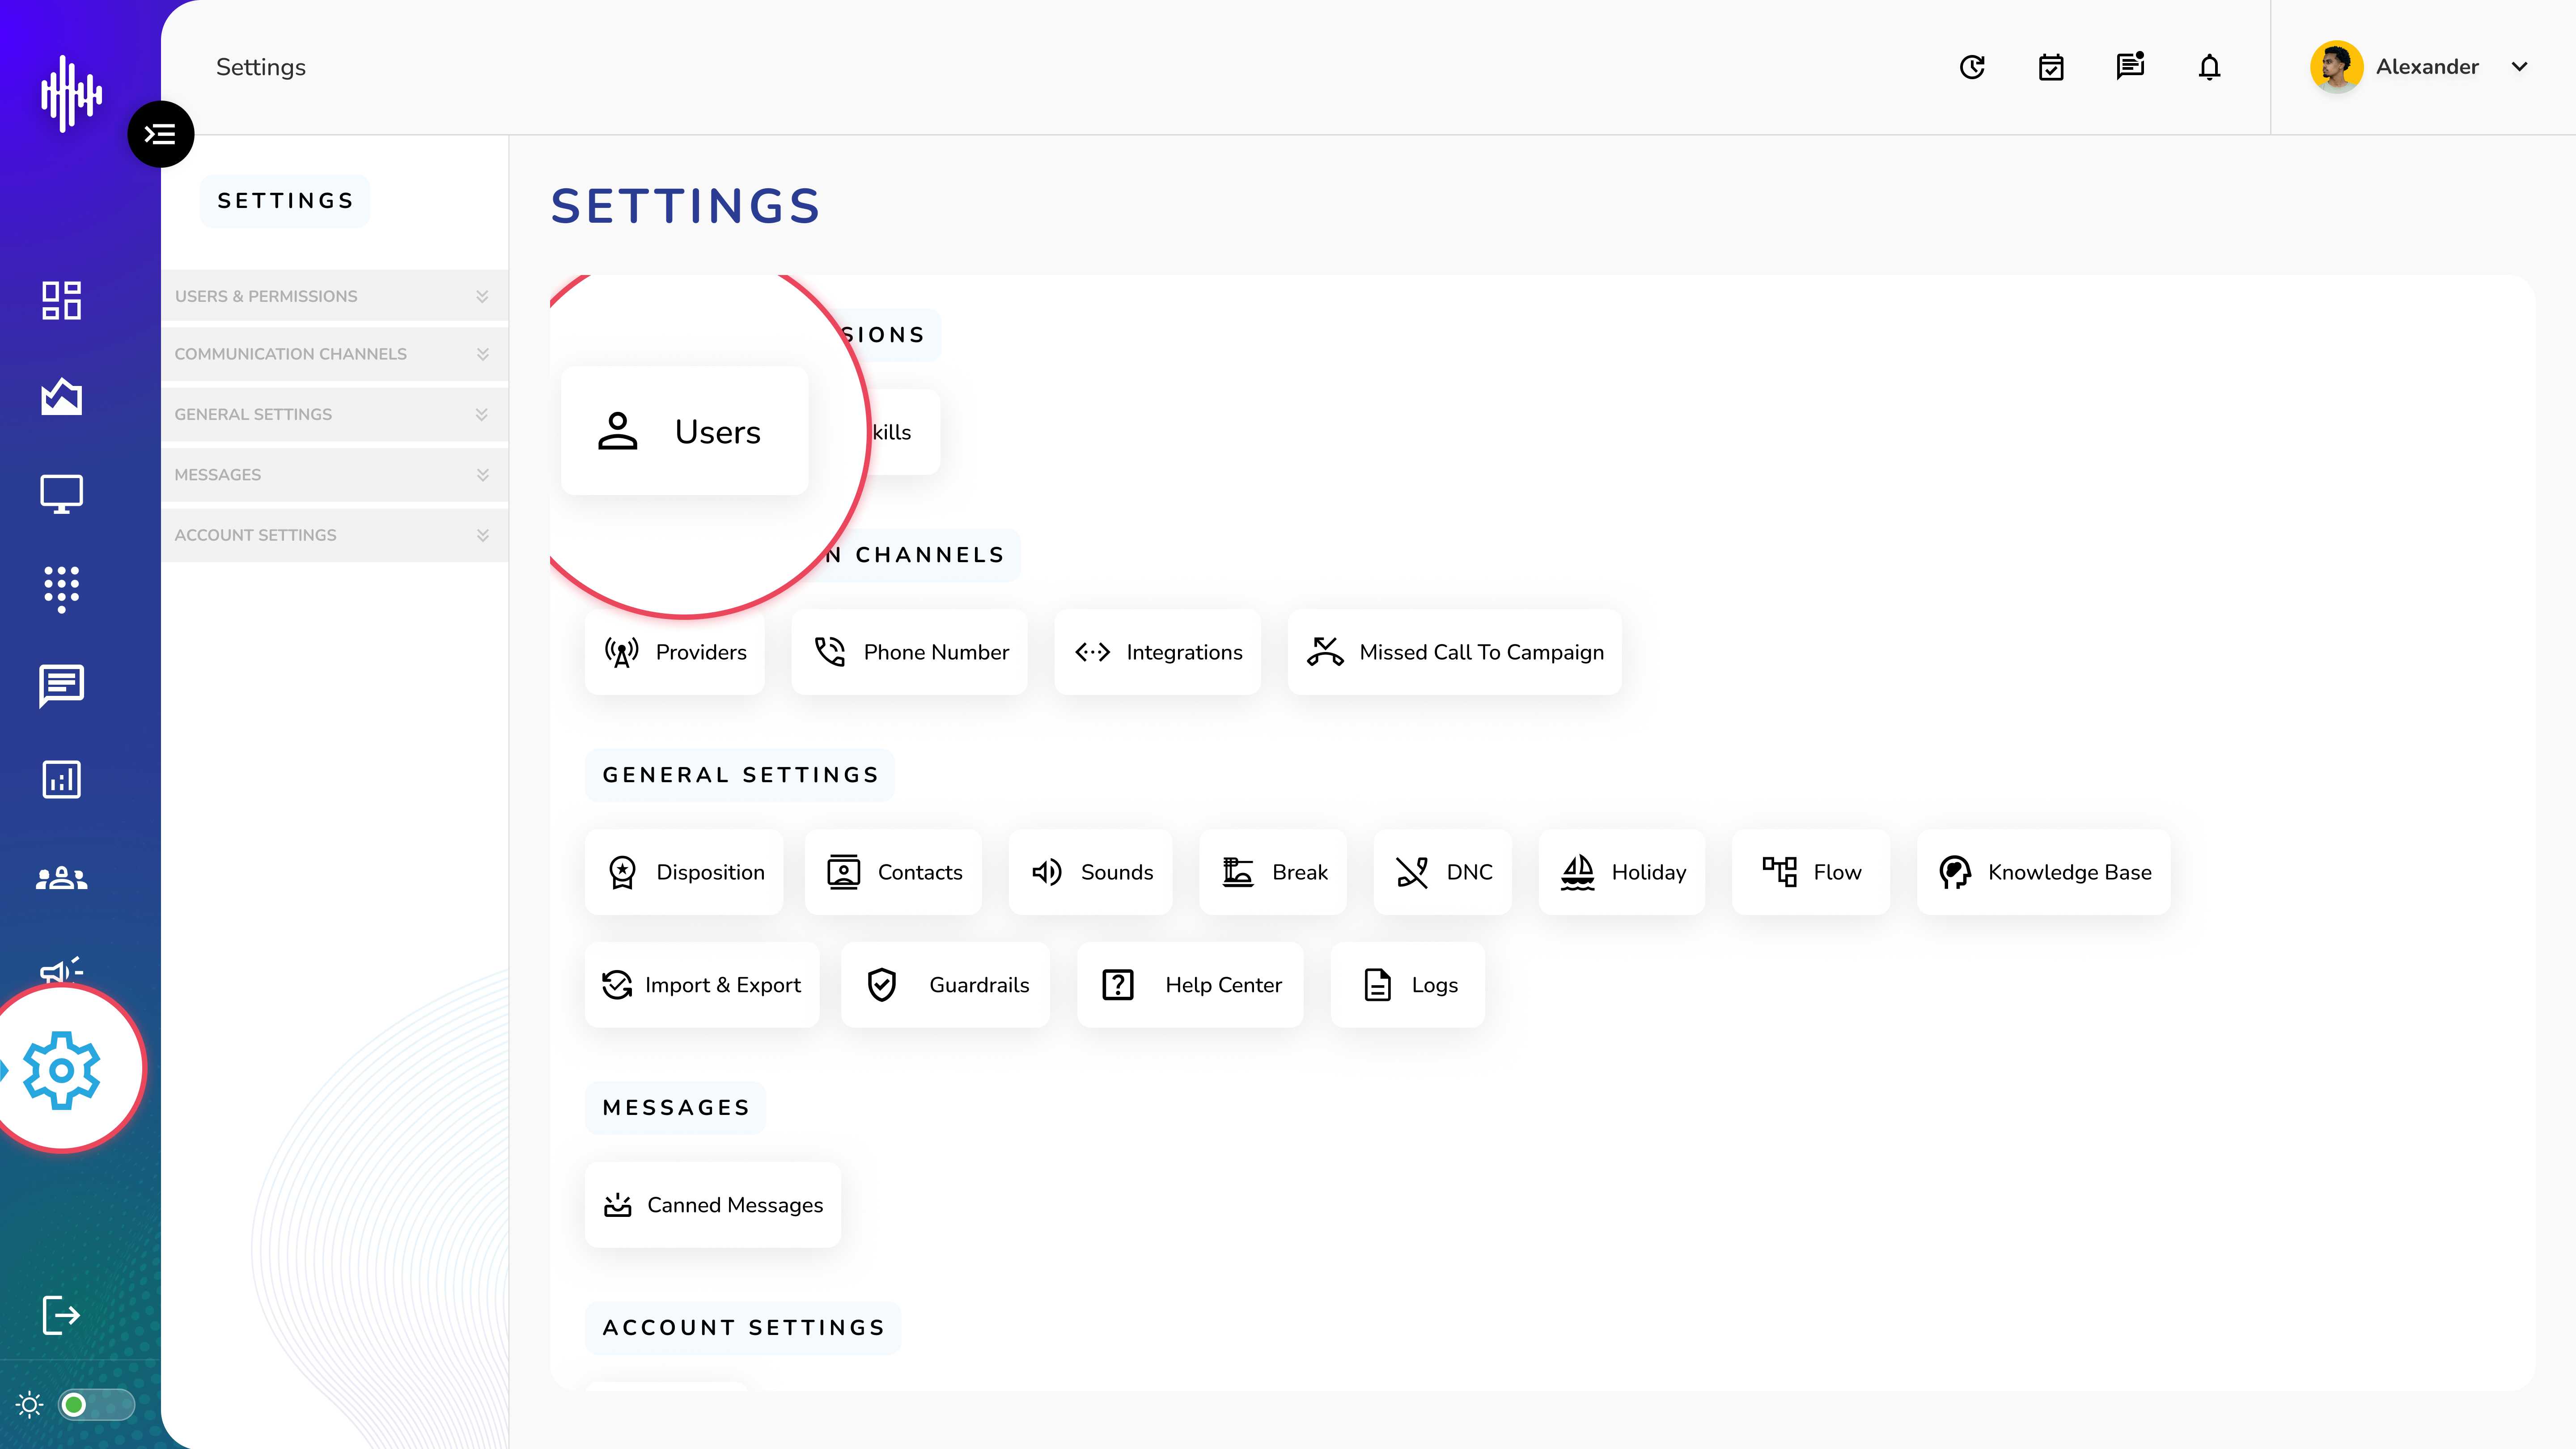
1. Login to your admin account
2. Click "Settings" from the left side menu
3. Click “Users” to access the user's details.
User Management
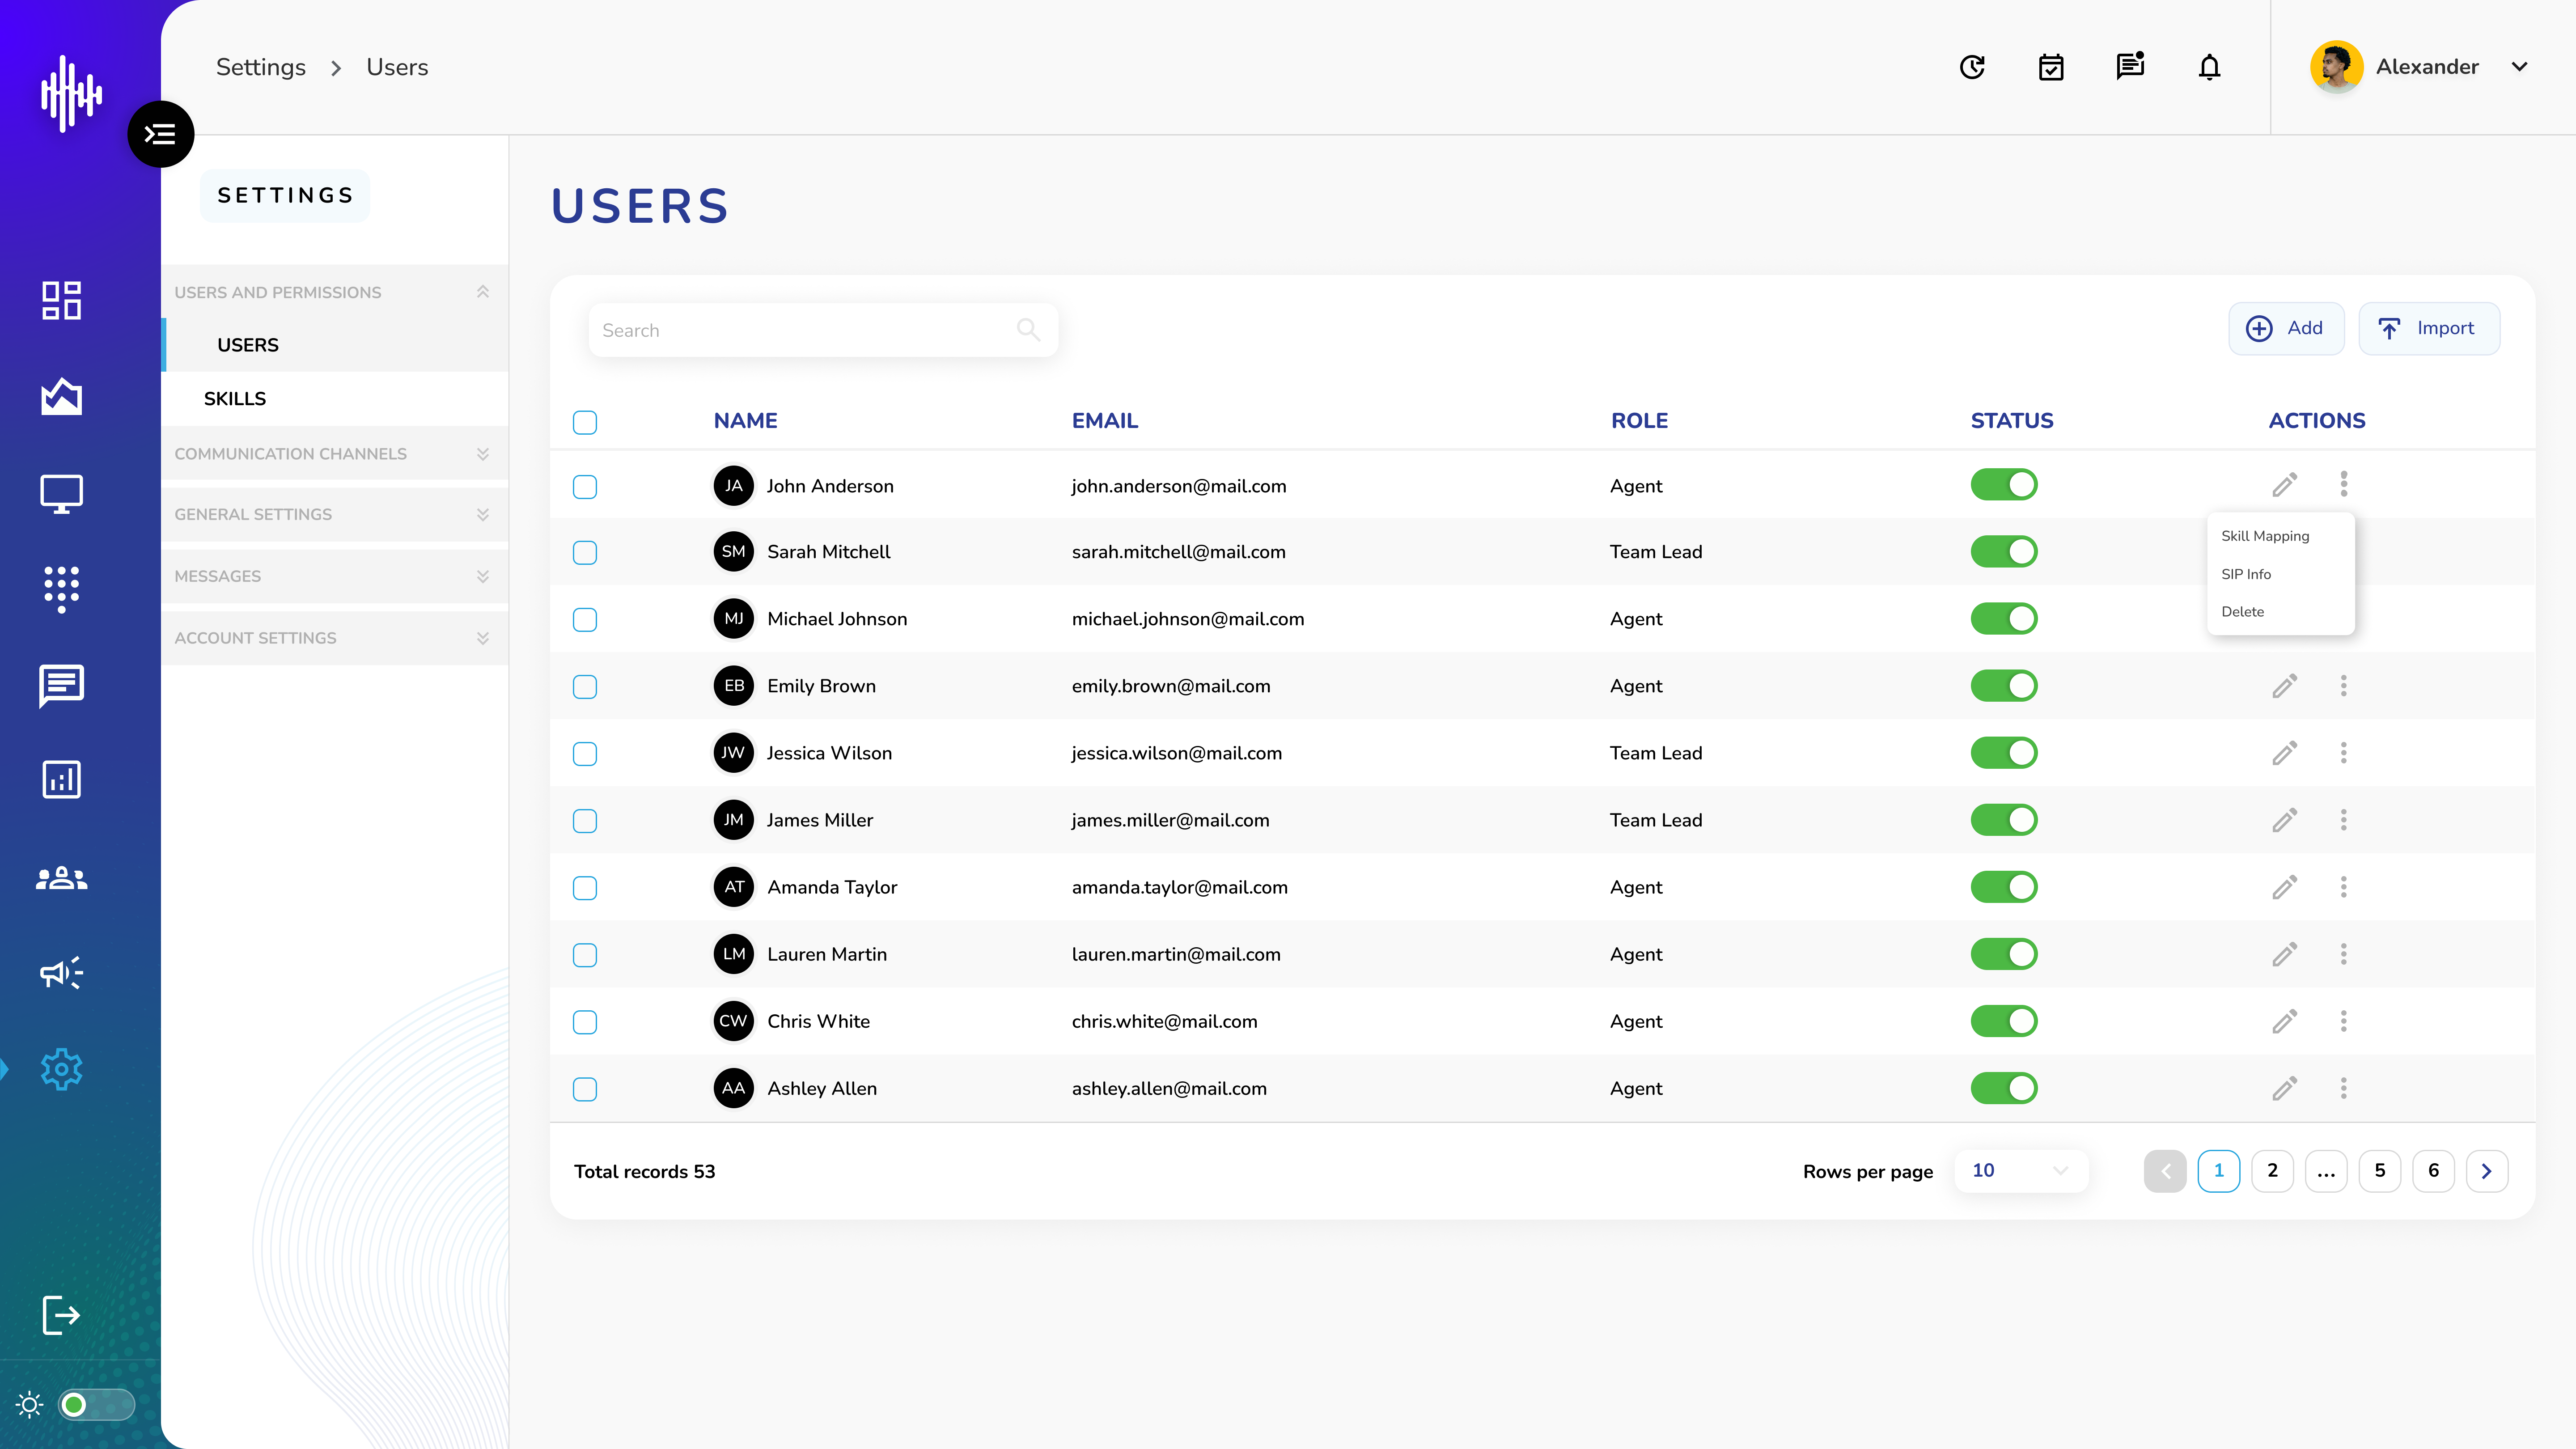
1. User List View**
| Column | Description |
|---|---|
| Name | User's full name |
| User's email address | |
| Role | Assigned user role |
| Status | Shows if user is Enable/Disable |
| Actions | Quick Edit and Additional Options |
2. Available Actions**
a. View Users
i. See all users in a list format
ii. Use search bar to find specific users
iii. Import user data (.CSV format)
b. Manage Status
i. Enable: User can access system
ii. Disable: User access is blocked
iii. Toggle status by using Enable/Disable button
c. Edit User
i. Click Edit (pencil) icon
ii. Modify user details:
1. Name
2. Email
3. Role
4. Phone settings
d. Additional Options (Three Dots Menu)
i. For Agents:
| Option | Purpose |
|---|---|
| Skill Mapping | Configure agent skills and competencies |
| SIP Info | View SIP connection details |
| Delete | Remove user from system |
ii. For Admin/Team Lead:
| Option | Purpose |
|---|---|
| SIP Info | View SIP connection details |
| Delete | Remove user from system |
This action cannot be undone
Skill Mapping
The skill mapping screen allows you to view and manage an agent's skills and competency levels.
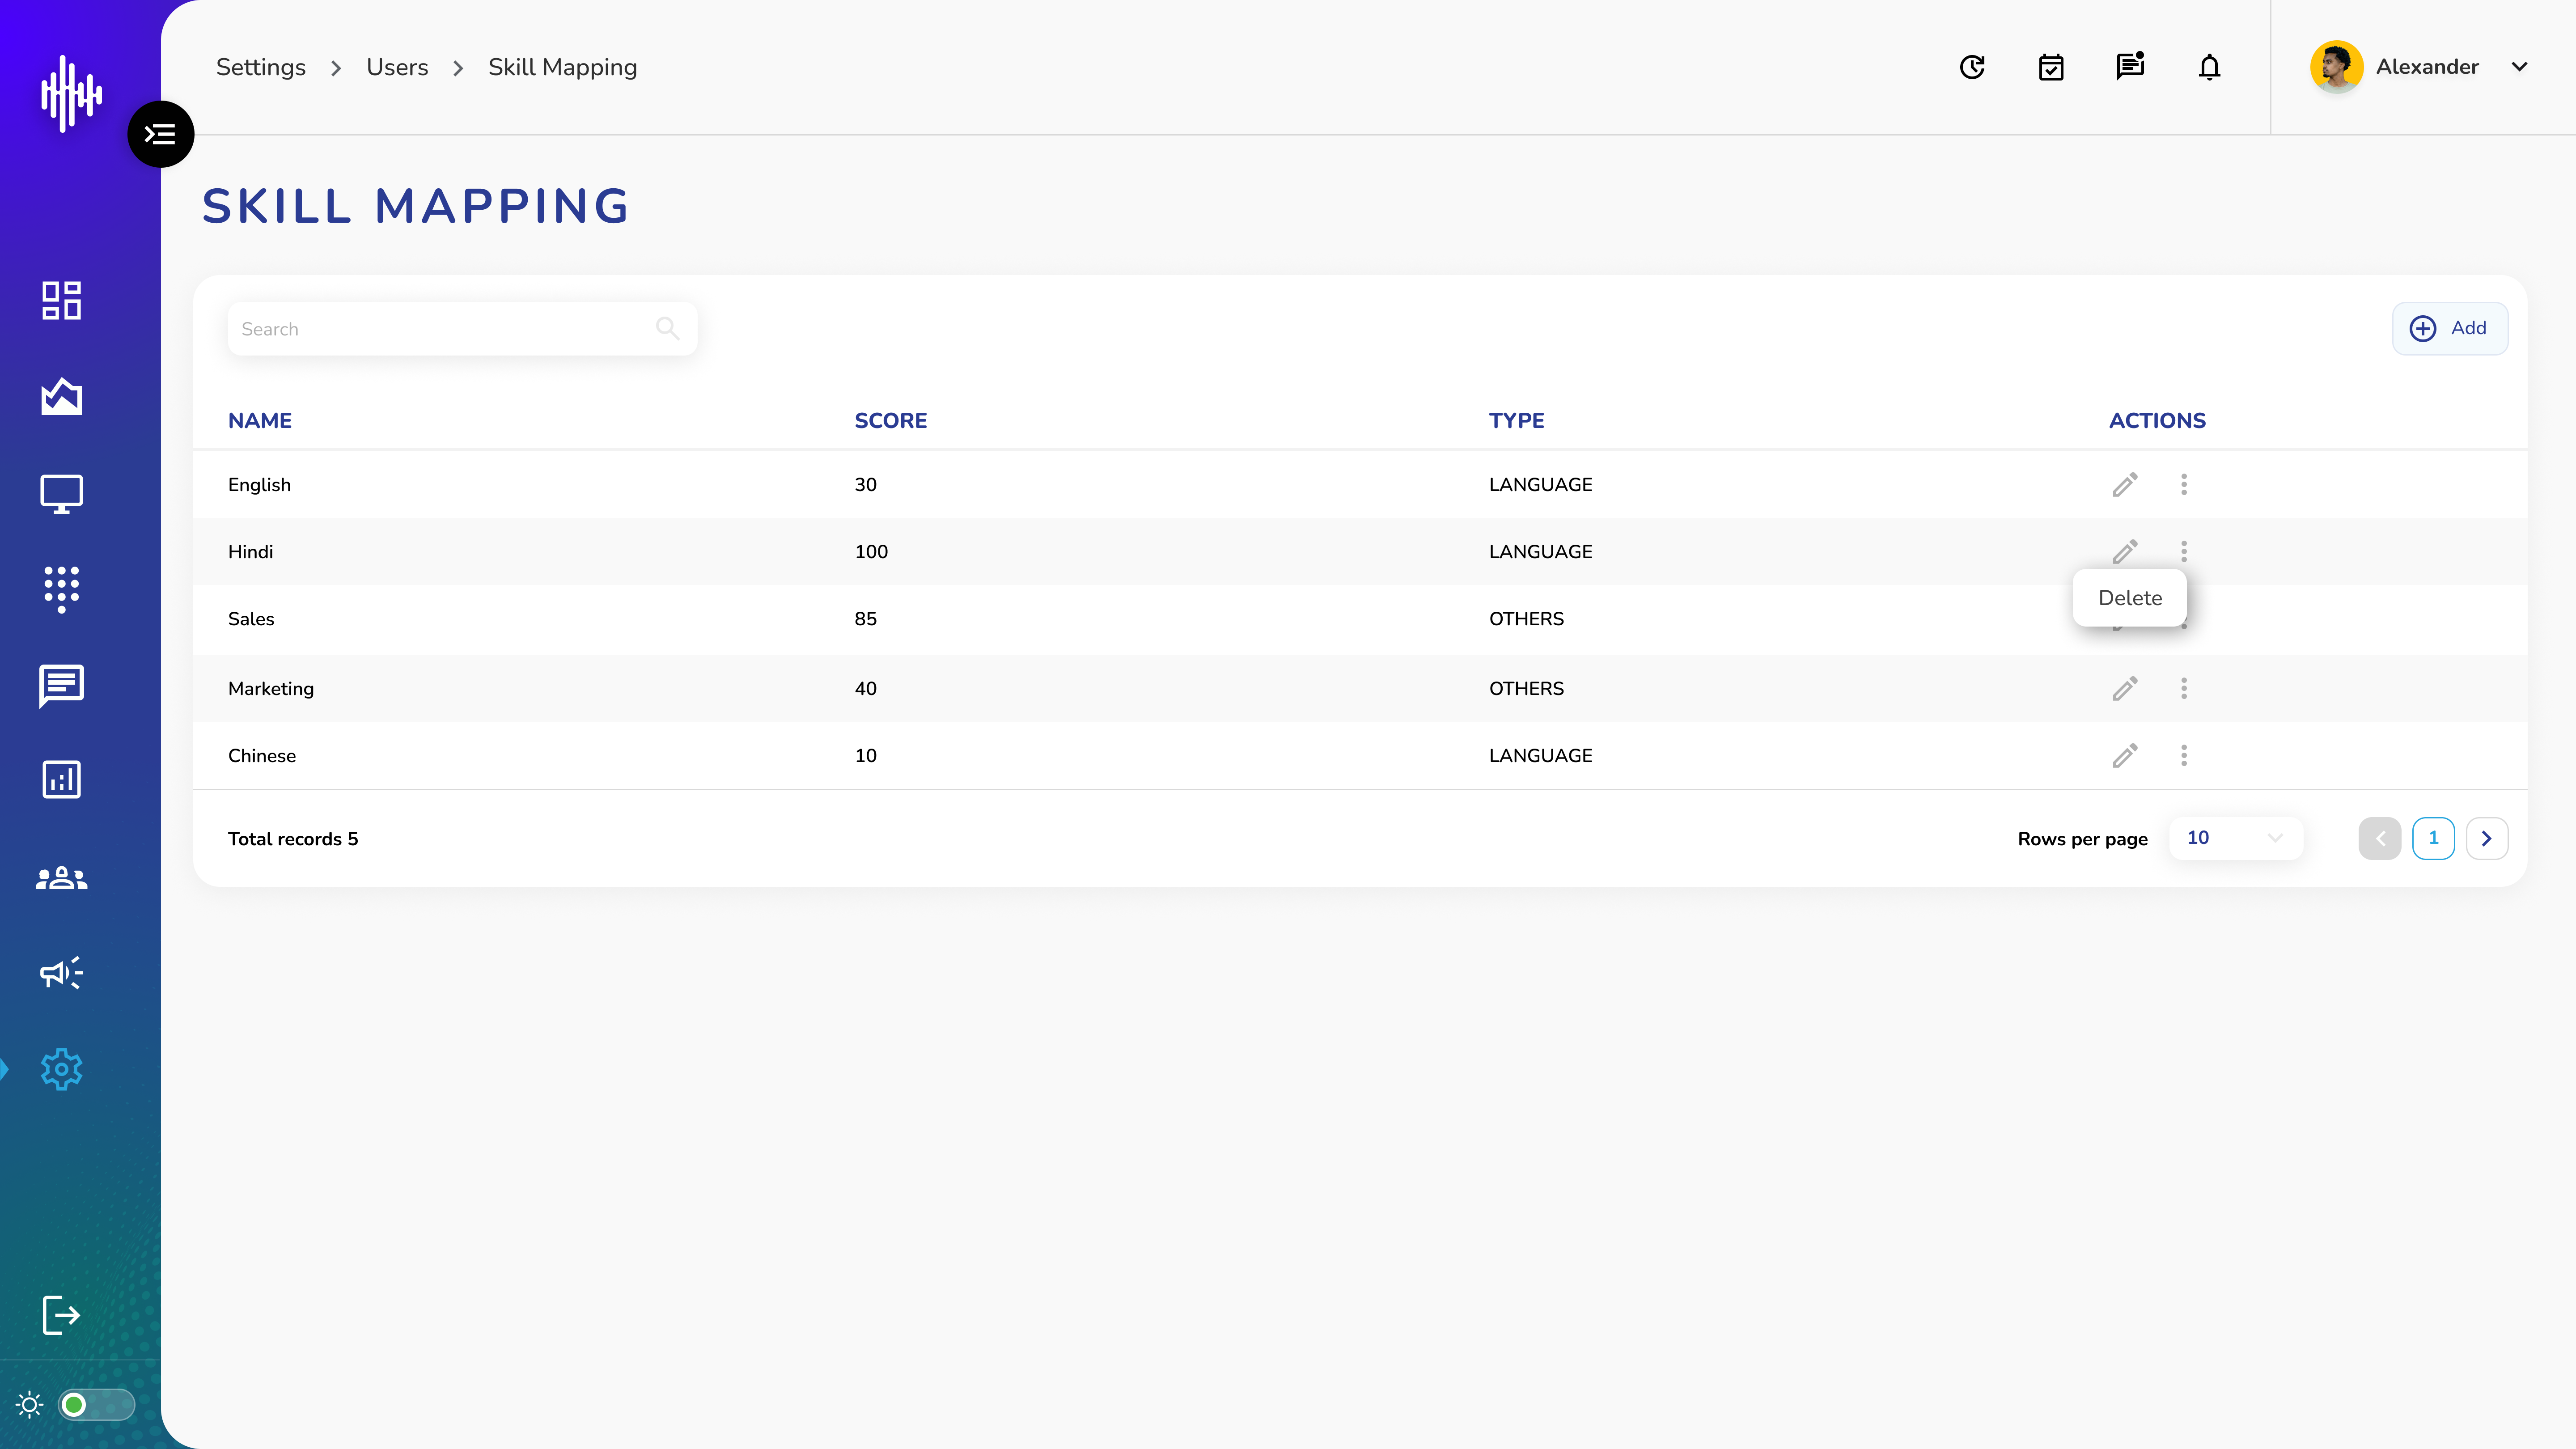
1. View Skill List
| Column | Description |
|---|---|
| Name | Name of the mapped skill |
| Score | Competency level of the skill |
| Type | Category of skill |
| Actions | Available actions for each skill |
Available Actions
1. Edit Skill (Pencil Icon)
a. Opens Skill Mapping popup
b. Editable fields:
i. Name: Skill name
ii. Score: Competency level
2. Options Menu (Three Dots)
a. Delete: Remove skill mapping from agent
Adding New Skills
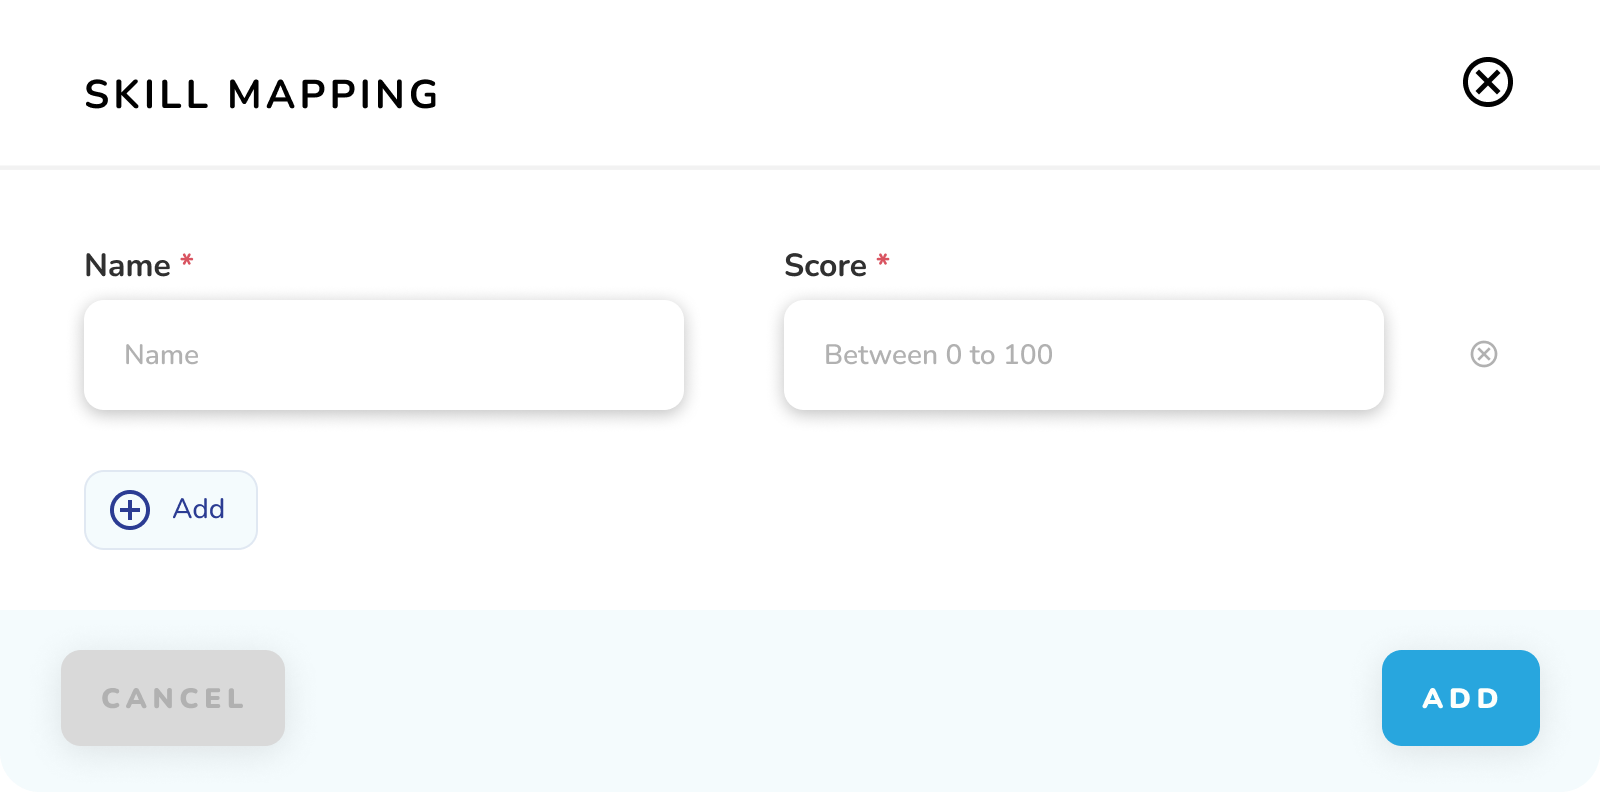
1. Click "+Add" button
2. Fill required fields:
a. Name: Select skill name
b. Score: Set competency level
3. Click "Add" to save
a. Use "Add" button to map multiple skills consecutively
Notes:
-
Skill scores help in call routing and agent selection
-
Multiple skills can be added to one agent
-
Existing skills can be modified anytime
-
Deleted skills can be re-added if needed
SIP Info
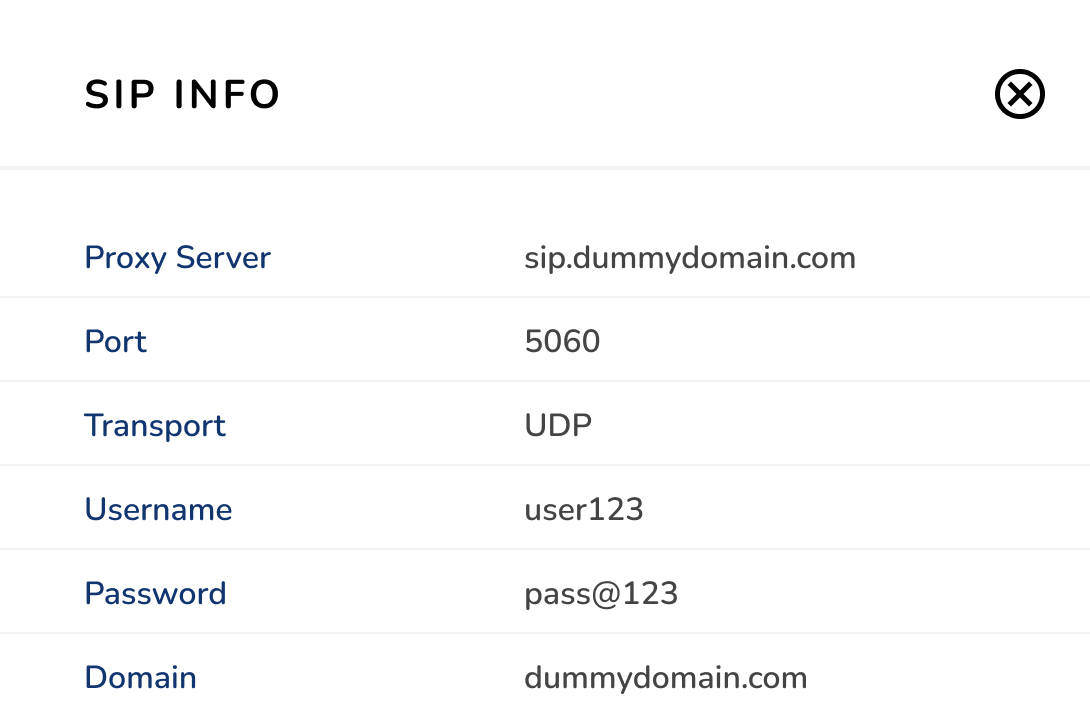
1. SIP Information Guide
When viewing SIP (Session Initiation Protocol) details for a user, the following information is displayed in a popup window:
| Field | Description | Example |
|---|---|---|
| Proxy Server | SIP server address | sip.dummydomain.com |
| Port | Connection port number | 5060 |
| Transport | Protocol type | UDP |
| Username | SIP account username | user123 |
| Password | SIP account password | pass@123 |
| Domain | SIP domain name | dummydomain.com |
Important Notes:
-
This information is required for SIP phone configuration
-
Keep credentials secure and confidential
-
Used for setting up softphones or SIP desk phones
-
Contact system administrator if you need to modify these settings
Create a new User
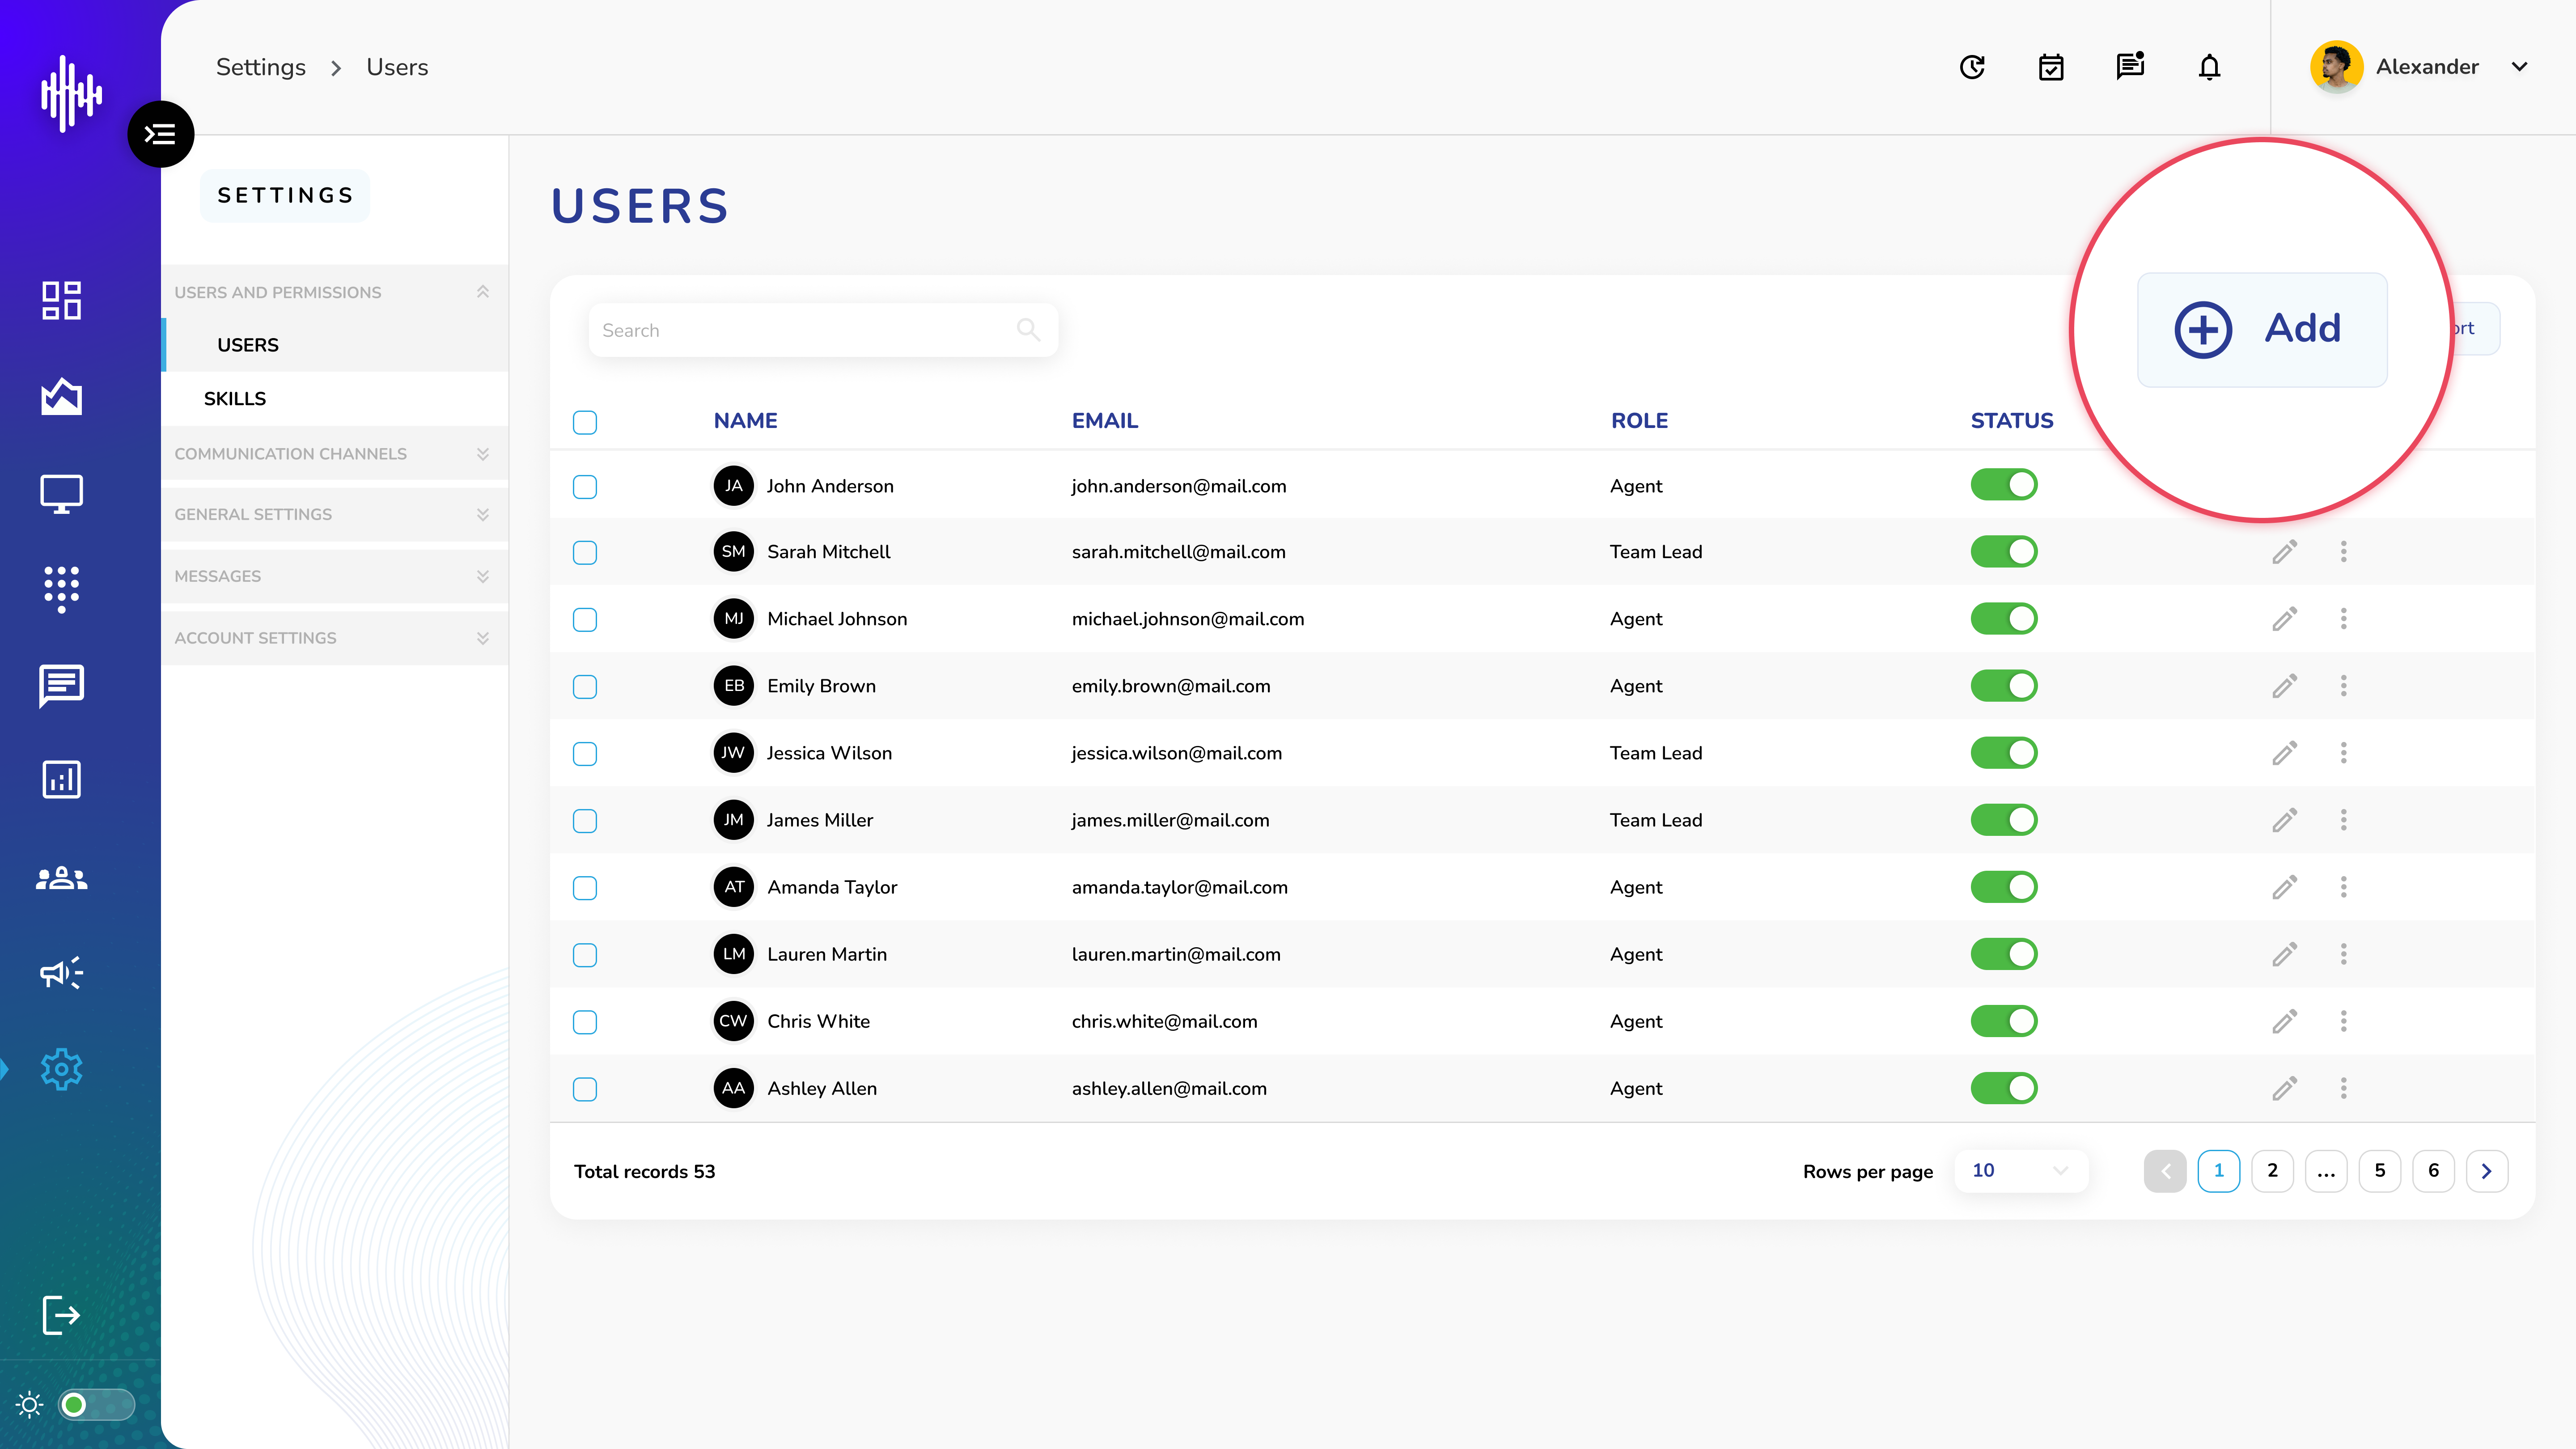
1. Add/Create a new User
a. On User management screen
b. Click "+Add" button top right
c. Popup will open to add a new user
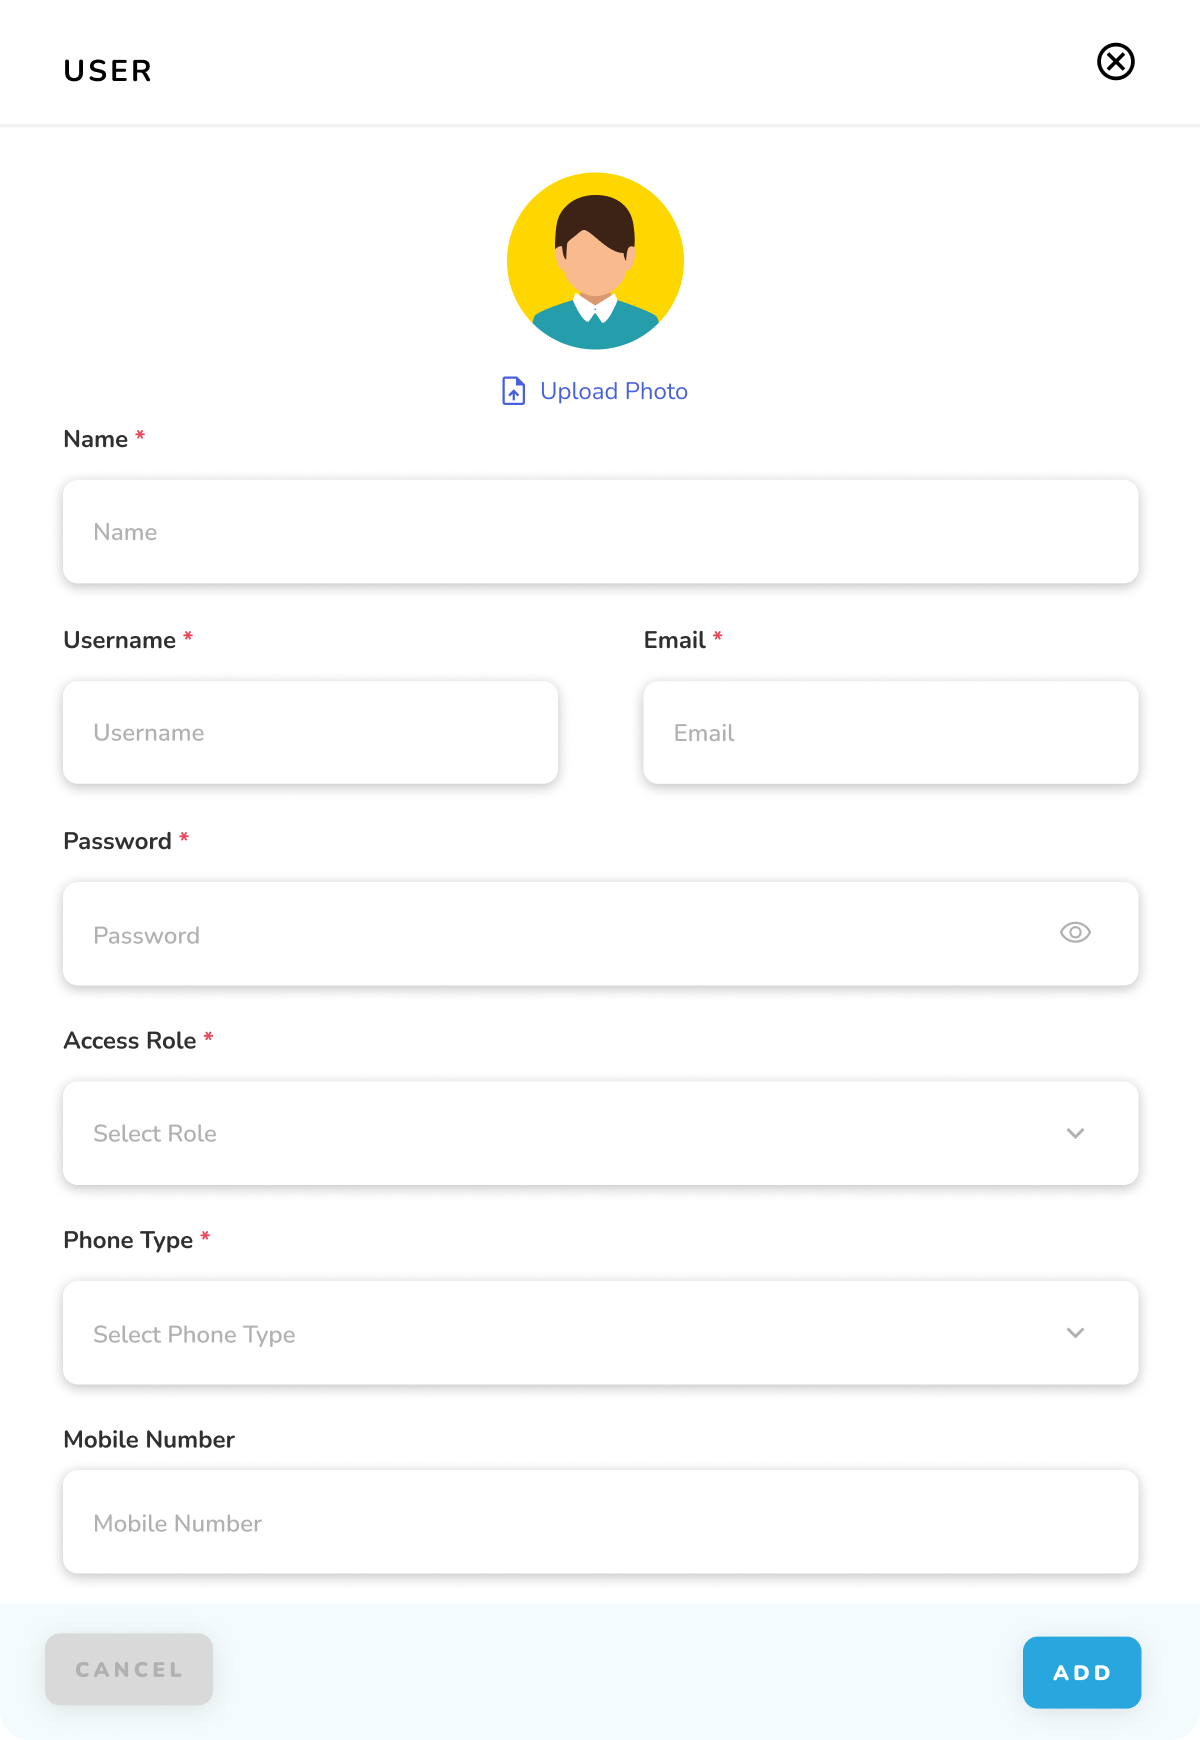
To create a new user for the organization the following details are required to enter the fields.
| Field Name | Description |
|---|---|
| Name | Enter the User’s full name |
| Username | Create a unique username for admin login access |
| Enter user’s email address for account notifications and recovery | |
| Password | Set a secure password for user login |
| Access Role | Select the user’s role |
| Phone Type | Choose how user will handle calls: 1) Browser Phone: Take calls through web browser 2) Mobile: Use personal mobile phone 3) Mobile Bridge: Use mobile phone with system bridge 4) SIP Phone: Use SIP-compatible desk phone |
| Mobile Number | Required only for Mobile, Mobile Bridge, or SIP Phone types. Enter the phone number where calls should be routed when user is assigned to a team. |