Salesforce Integration User Guide
Introduction
This guide provides comprehensive instructions for integrating Salesforce with StreamSpace Dataflow, enabling automated workflow management and data synchronization.
1. Accessing StreamSpace Dataflow
Dashboard Overview
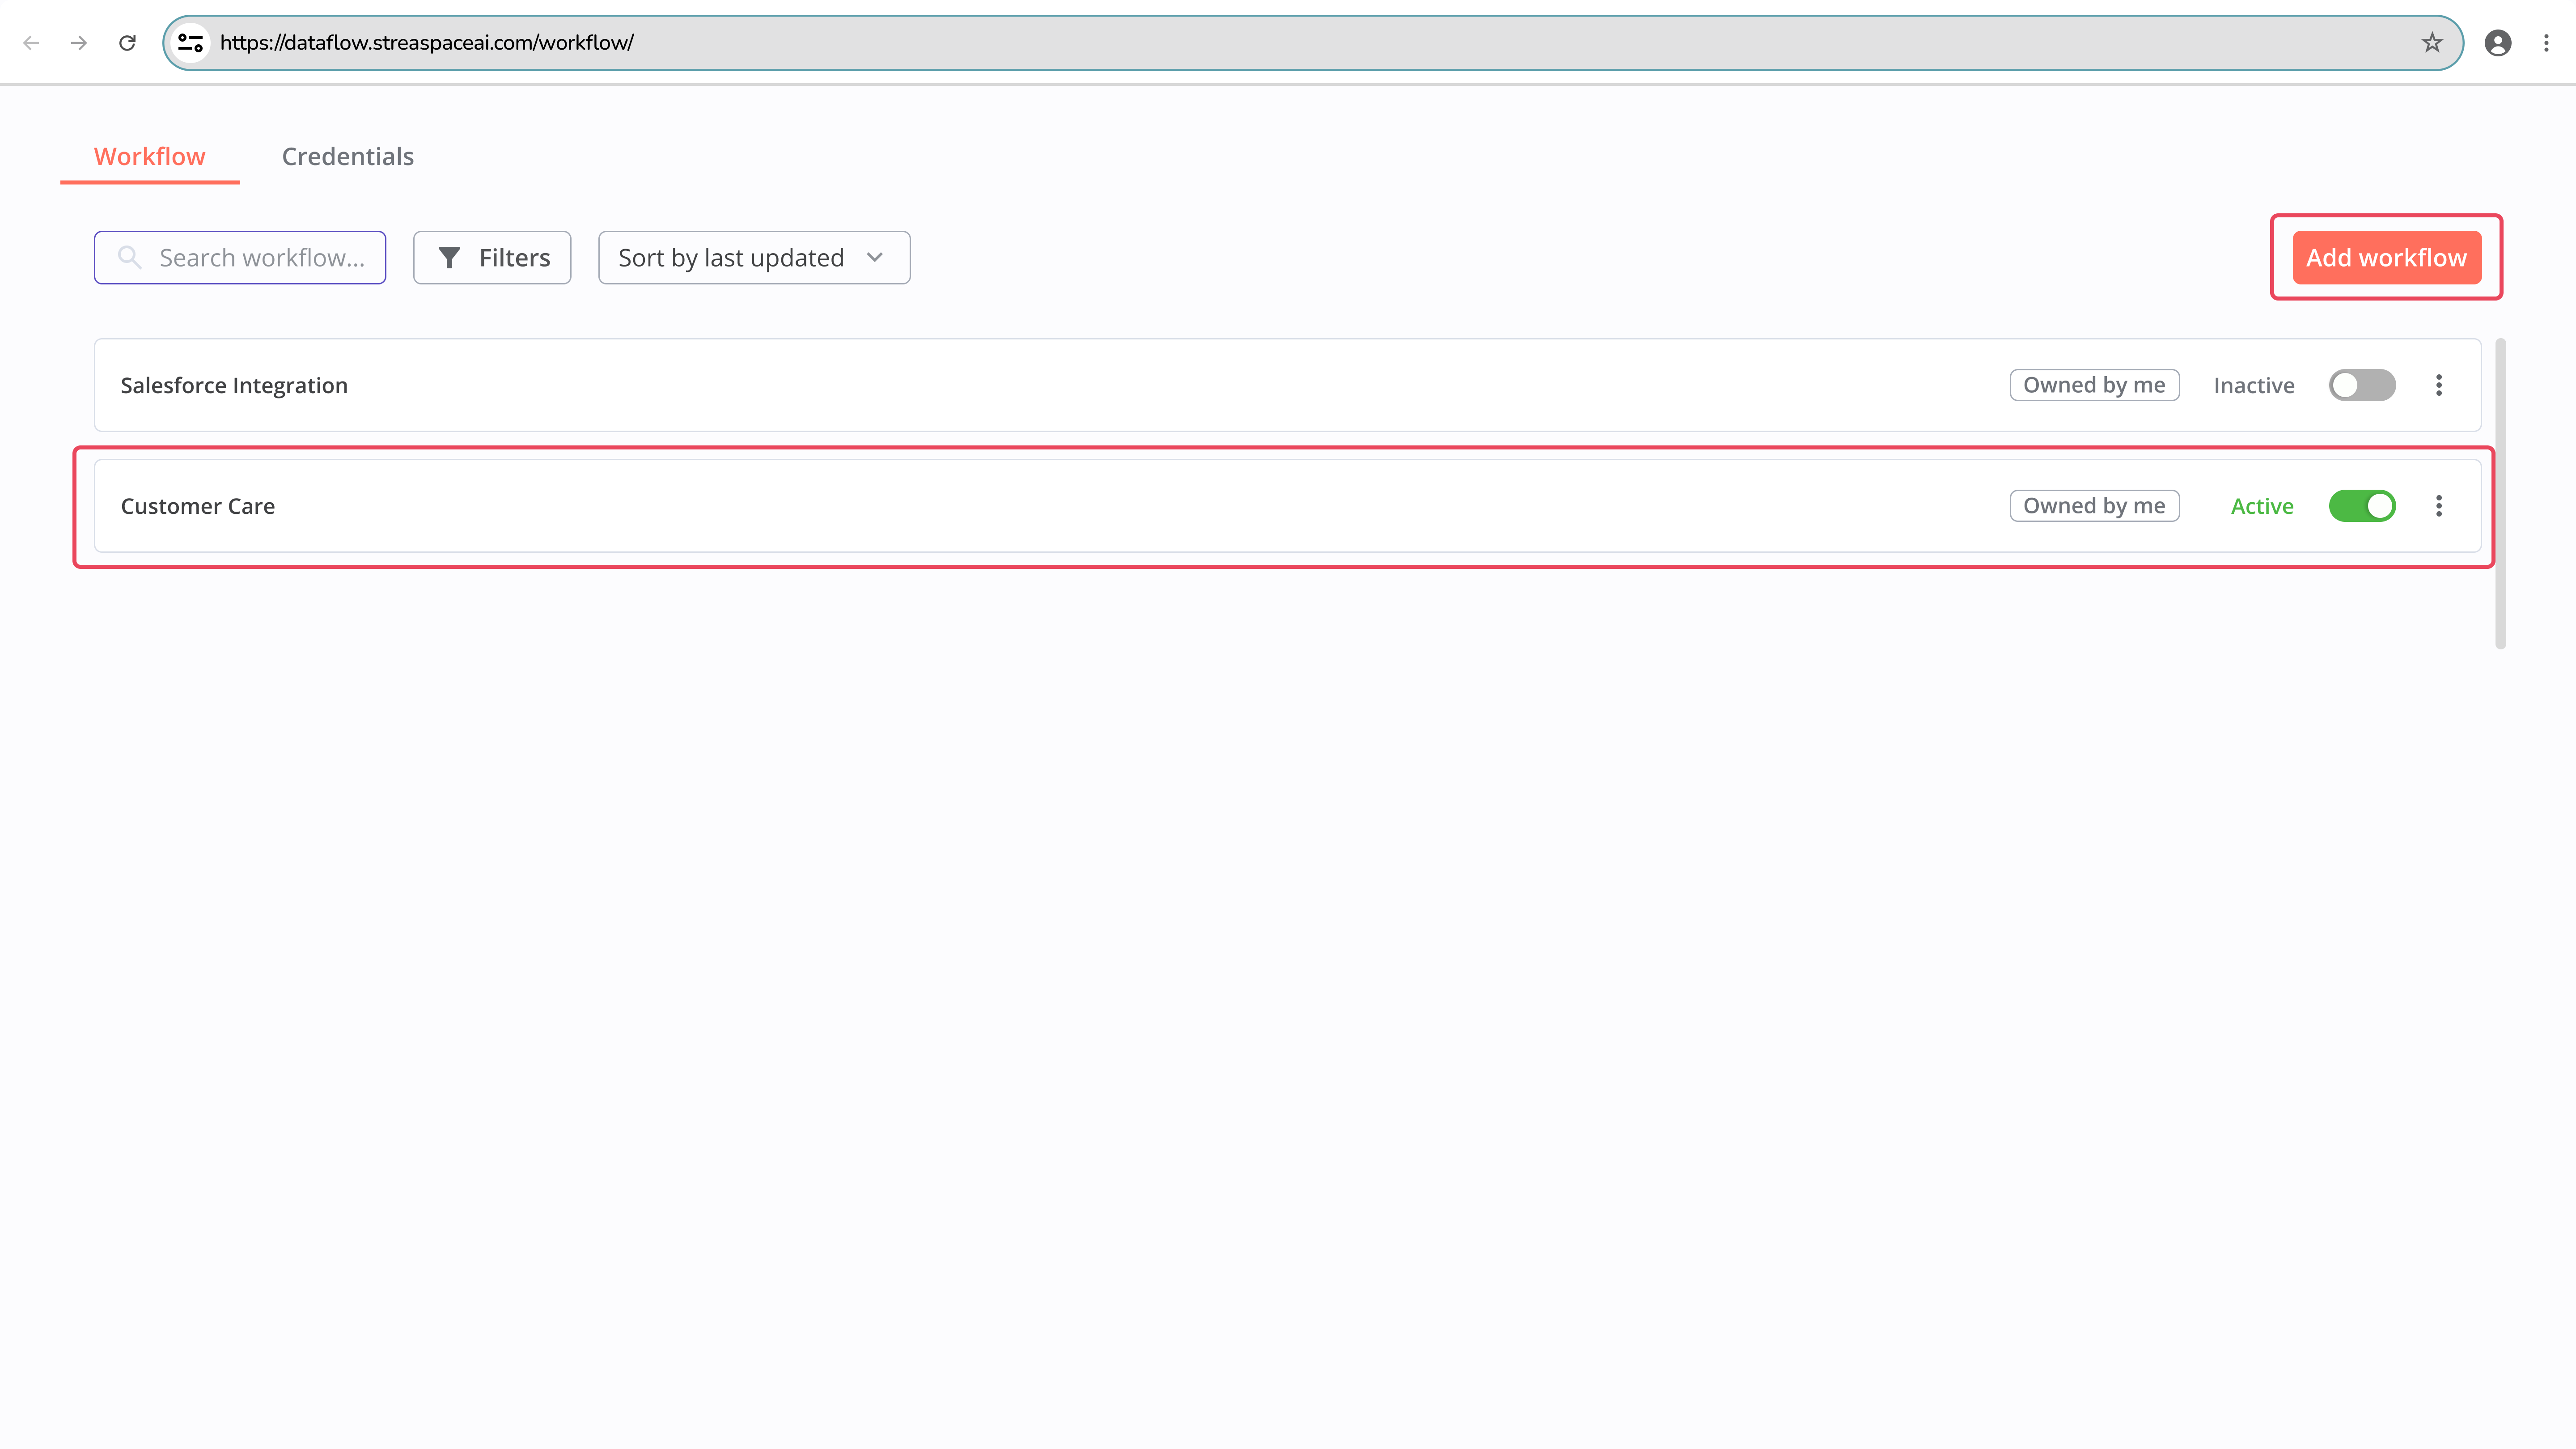
- Access the StreamSpace Dataflow dashboard
- View existing workflows including 'Customer Care'
- Locate the "Add workflow" button in the top right corner
2. Creating New Workflow
Initial Setup
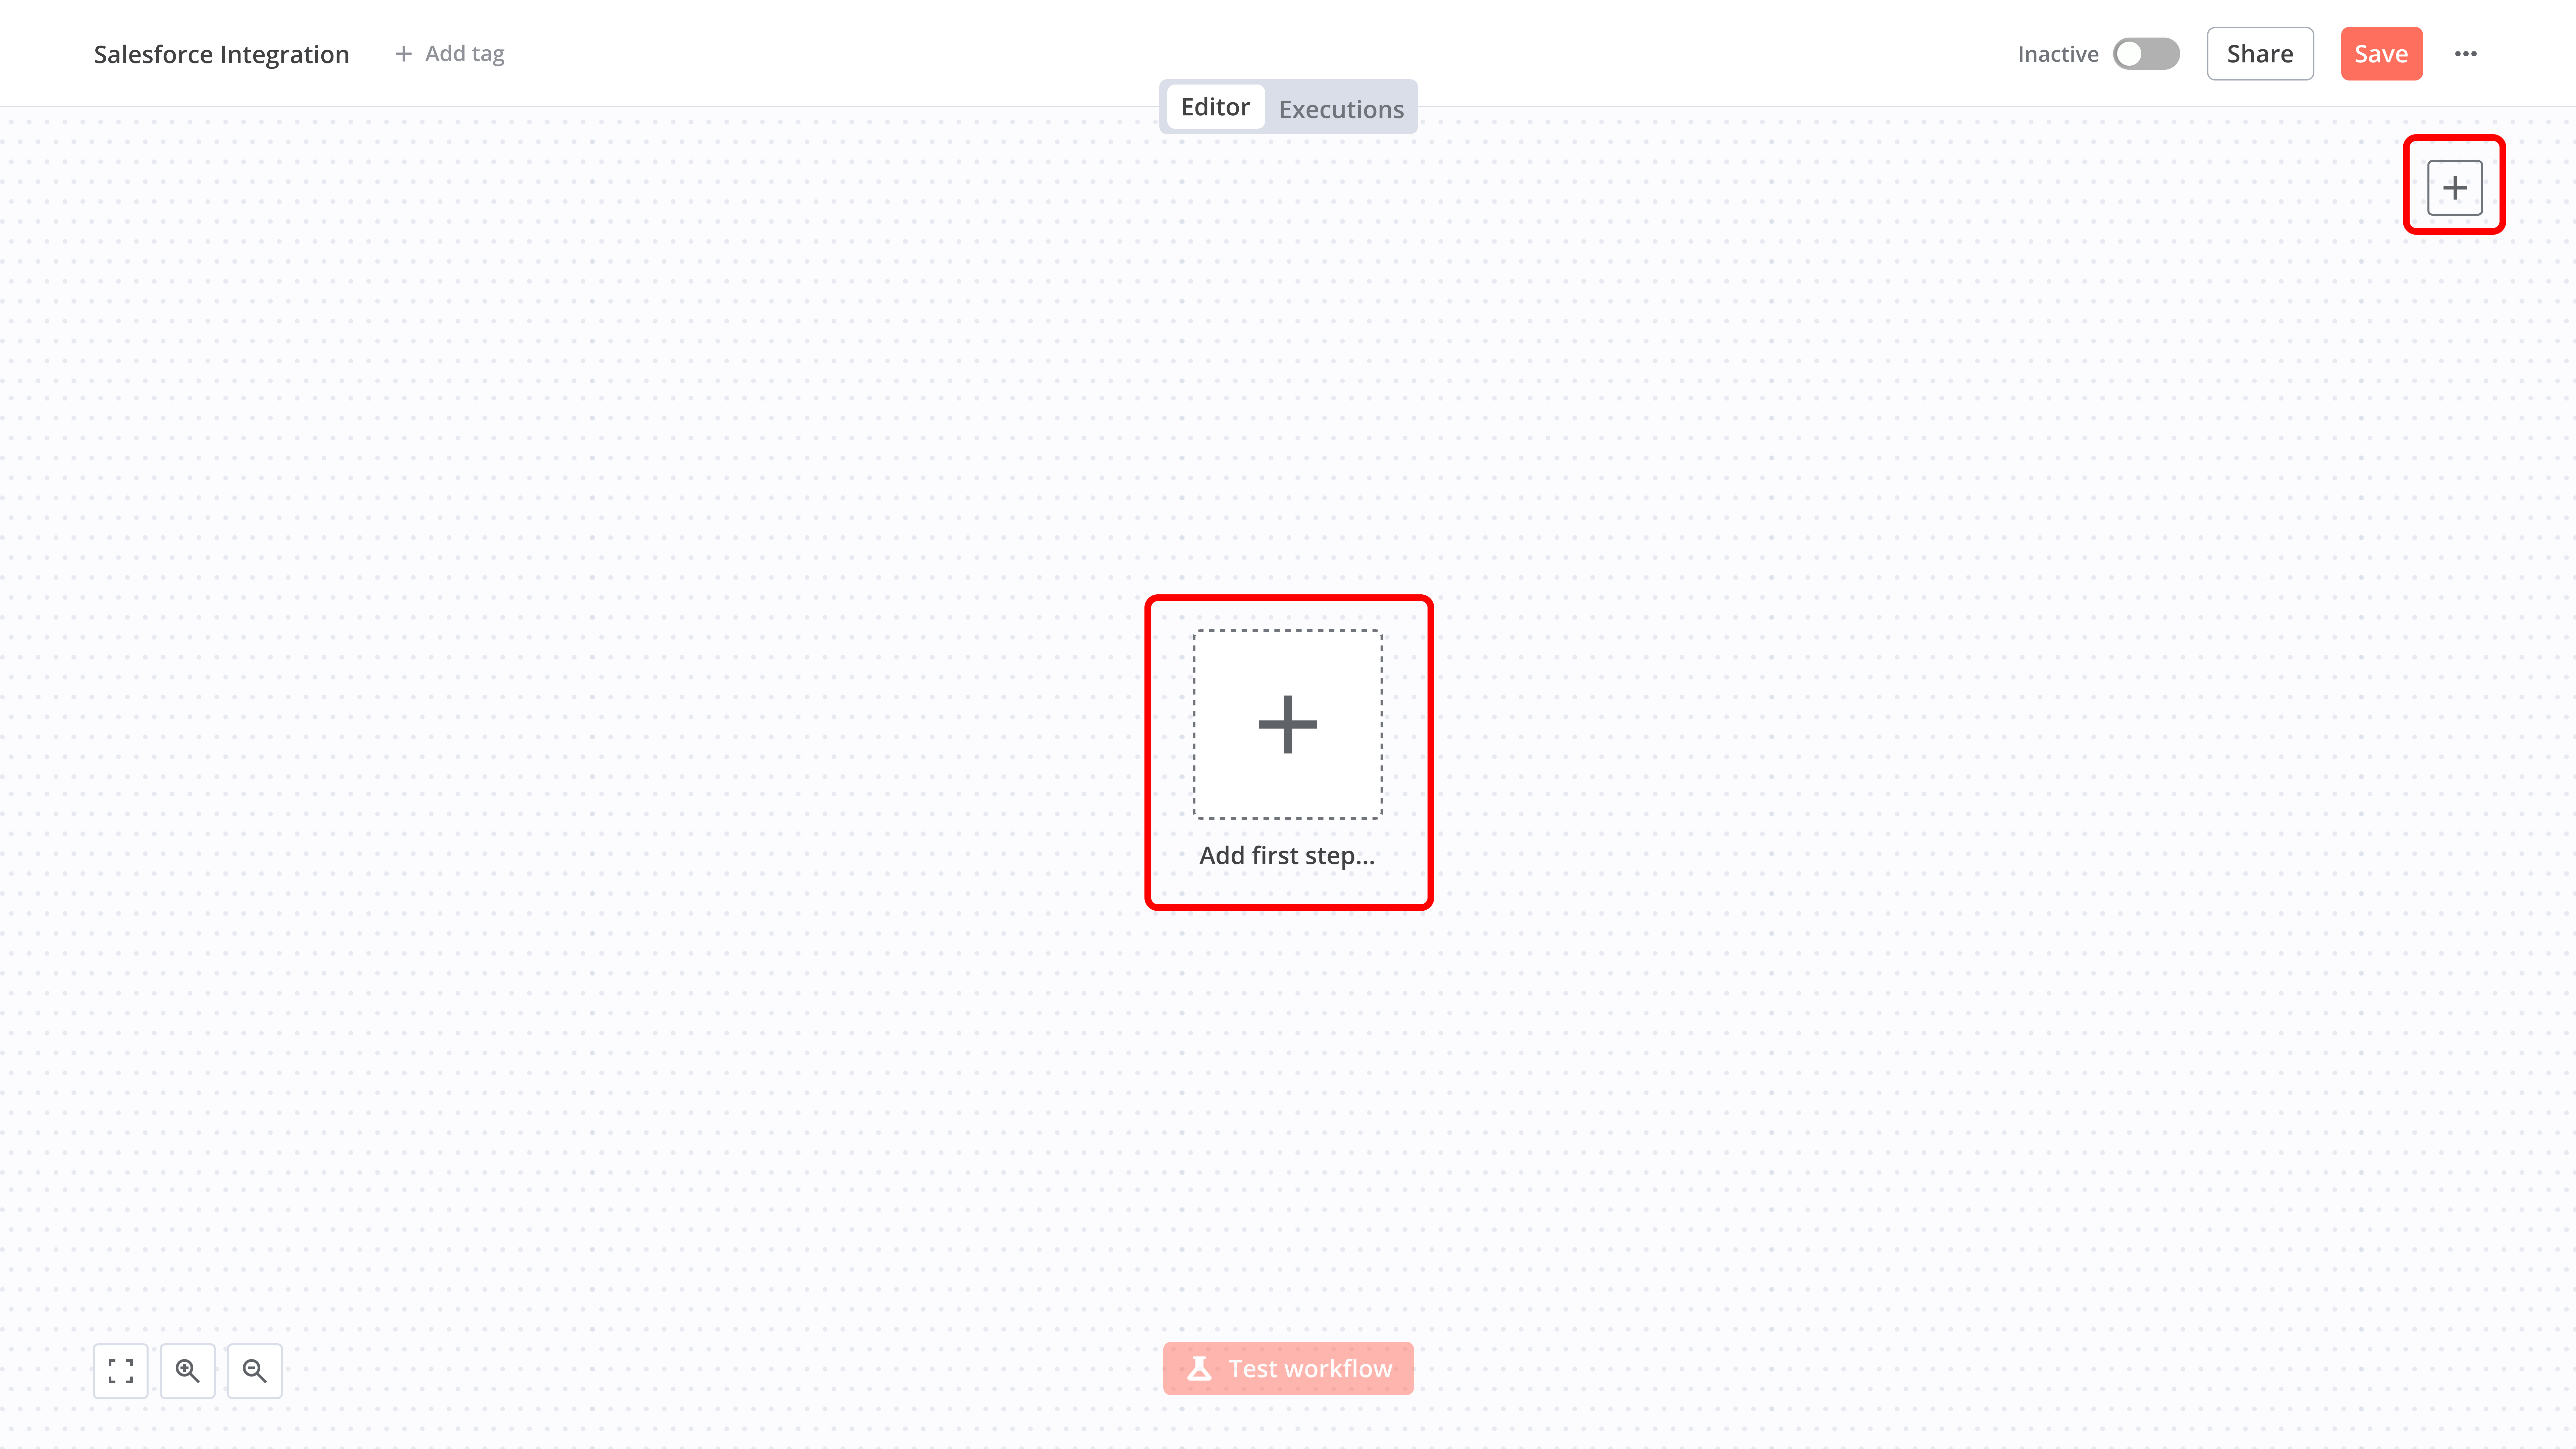
- Click "Add workflow" to access blank canvas
- Note the clean interface ready for configuration
- Observe the toolbar and available options
3. Adding First Node
Webhook Configuration
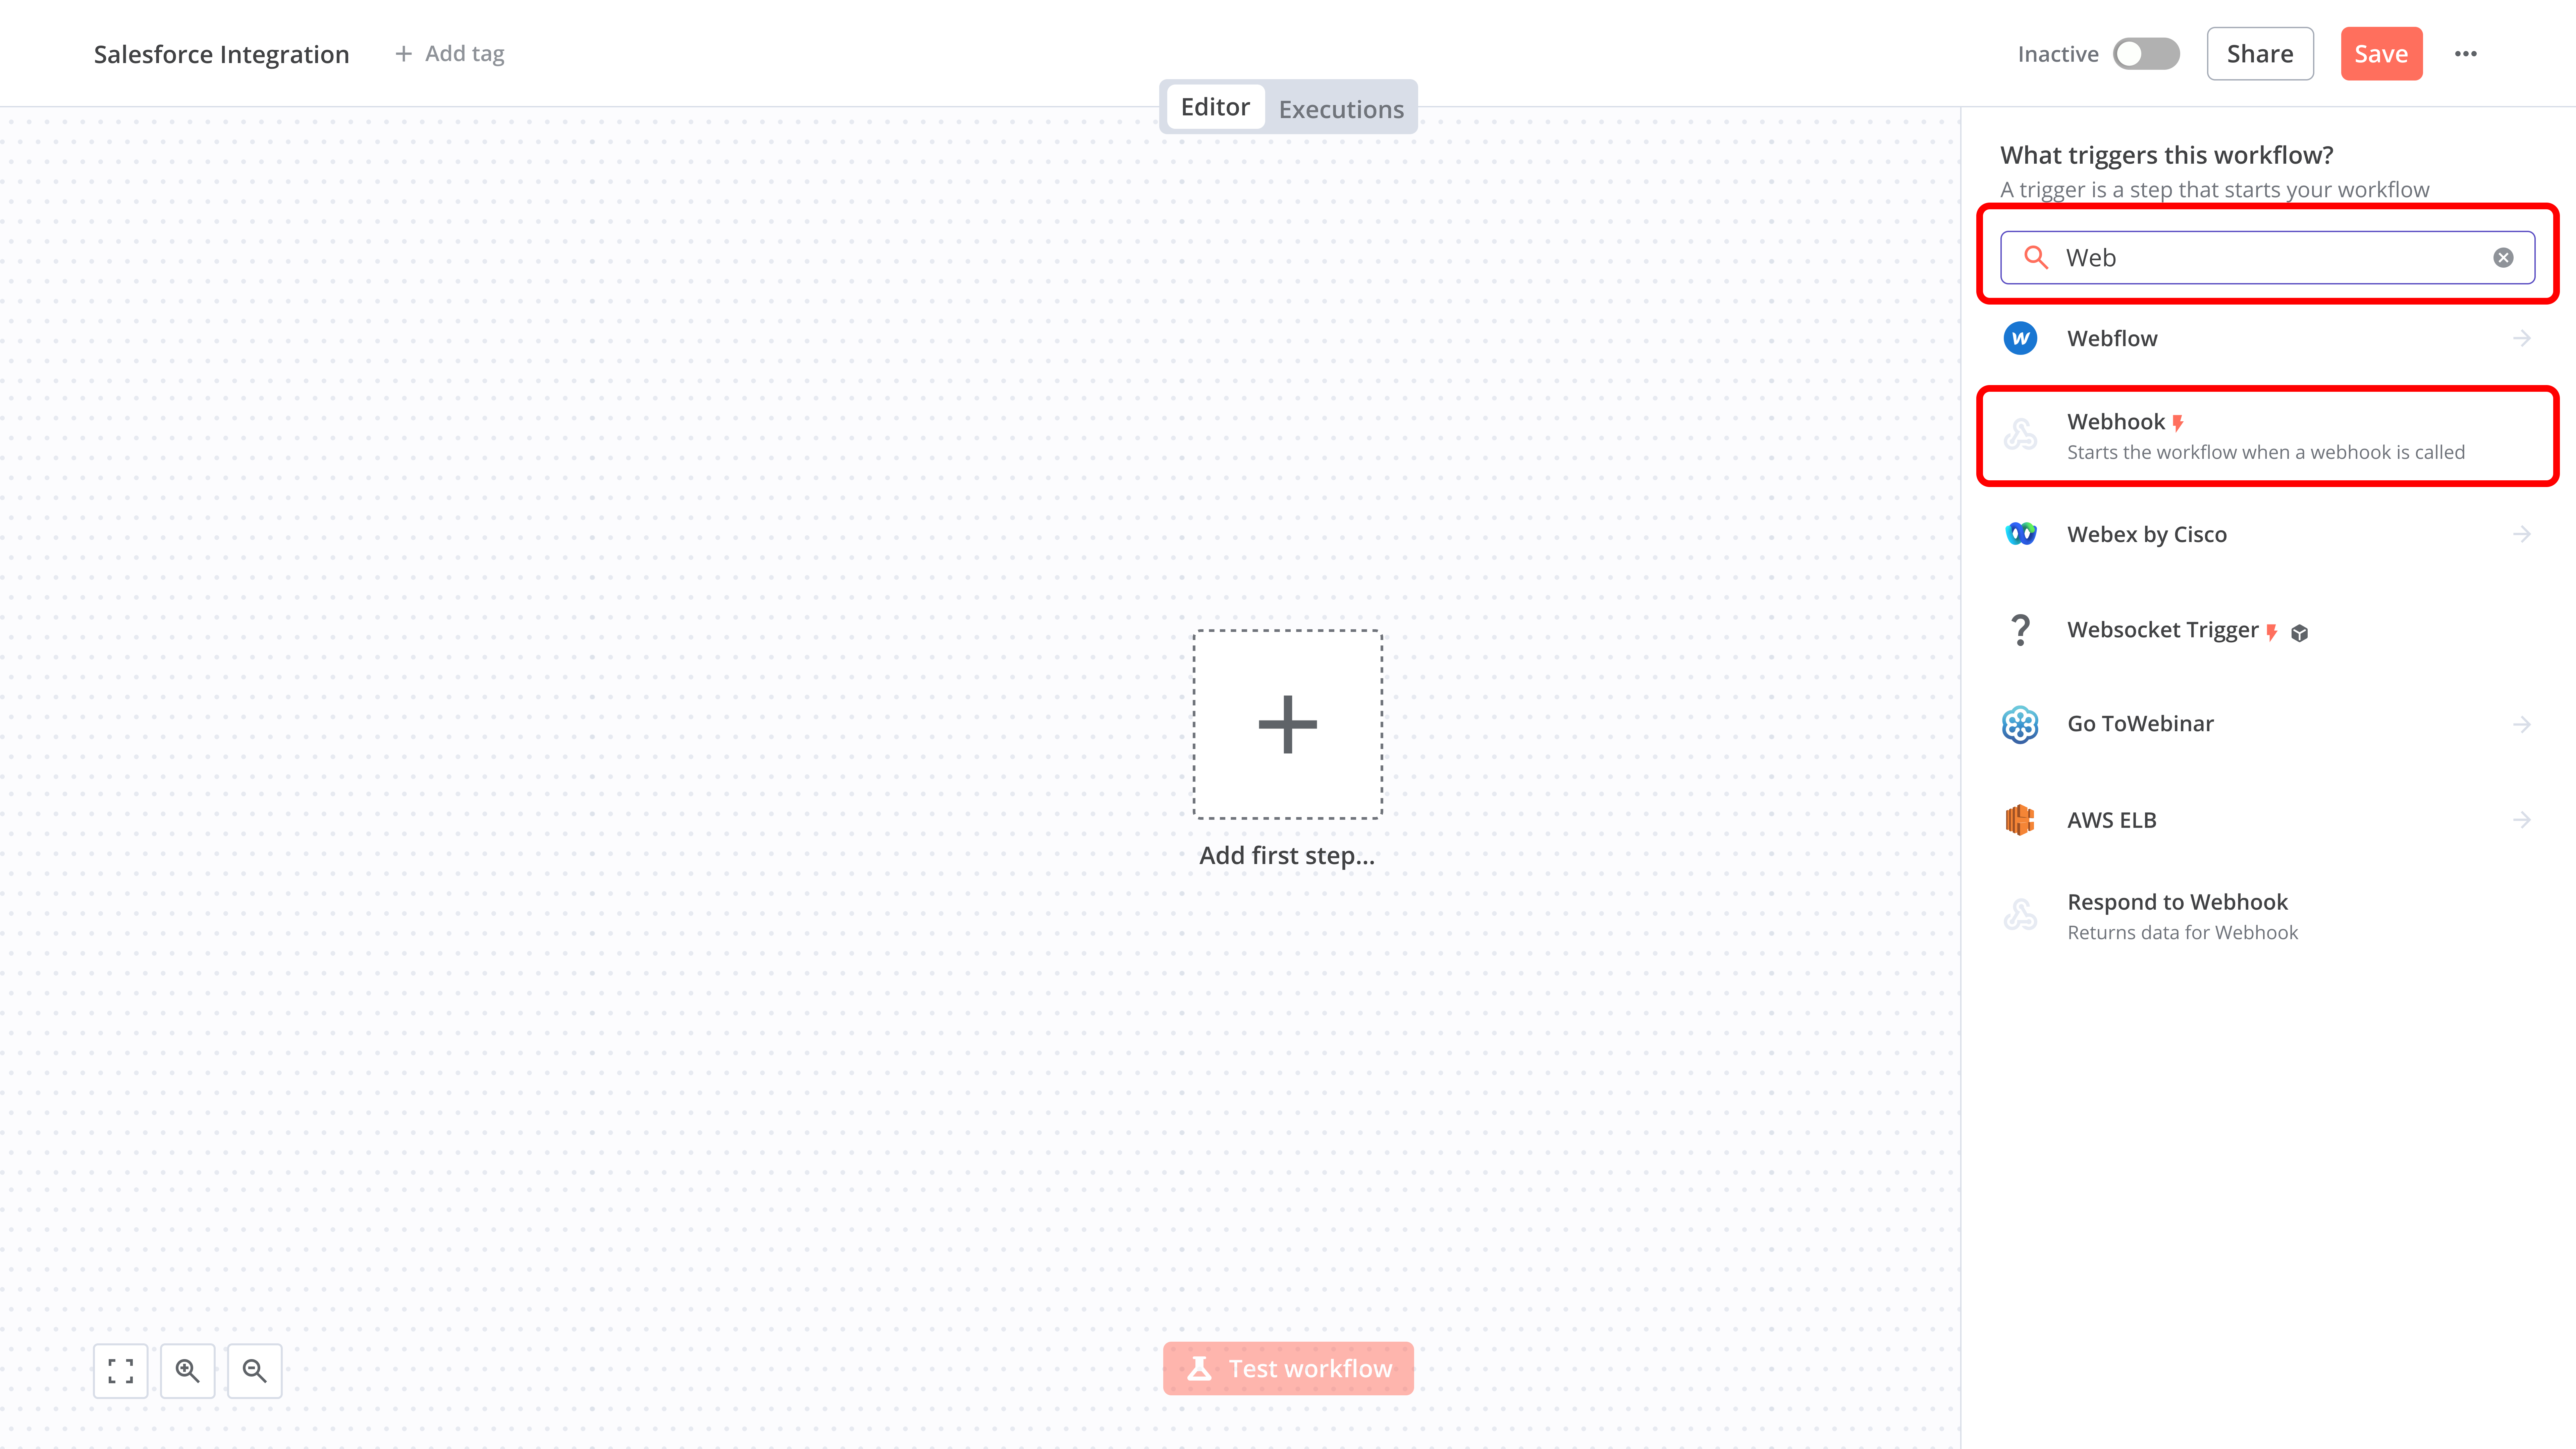
- Click "Add first step" or the "+" button
- Access right-side menu for node selection
- Search for and select "Webhook"
Webhook Settings
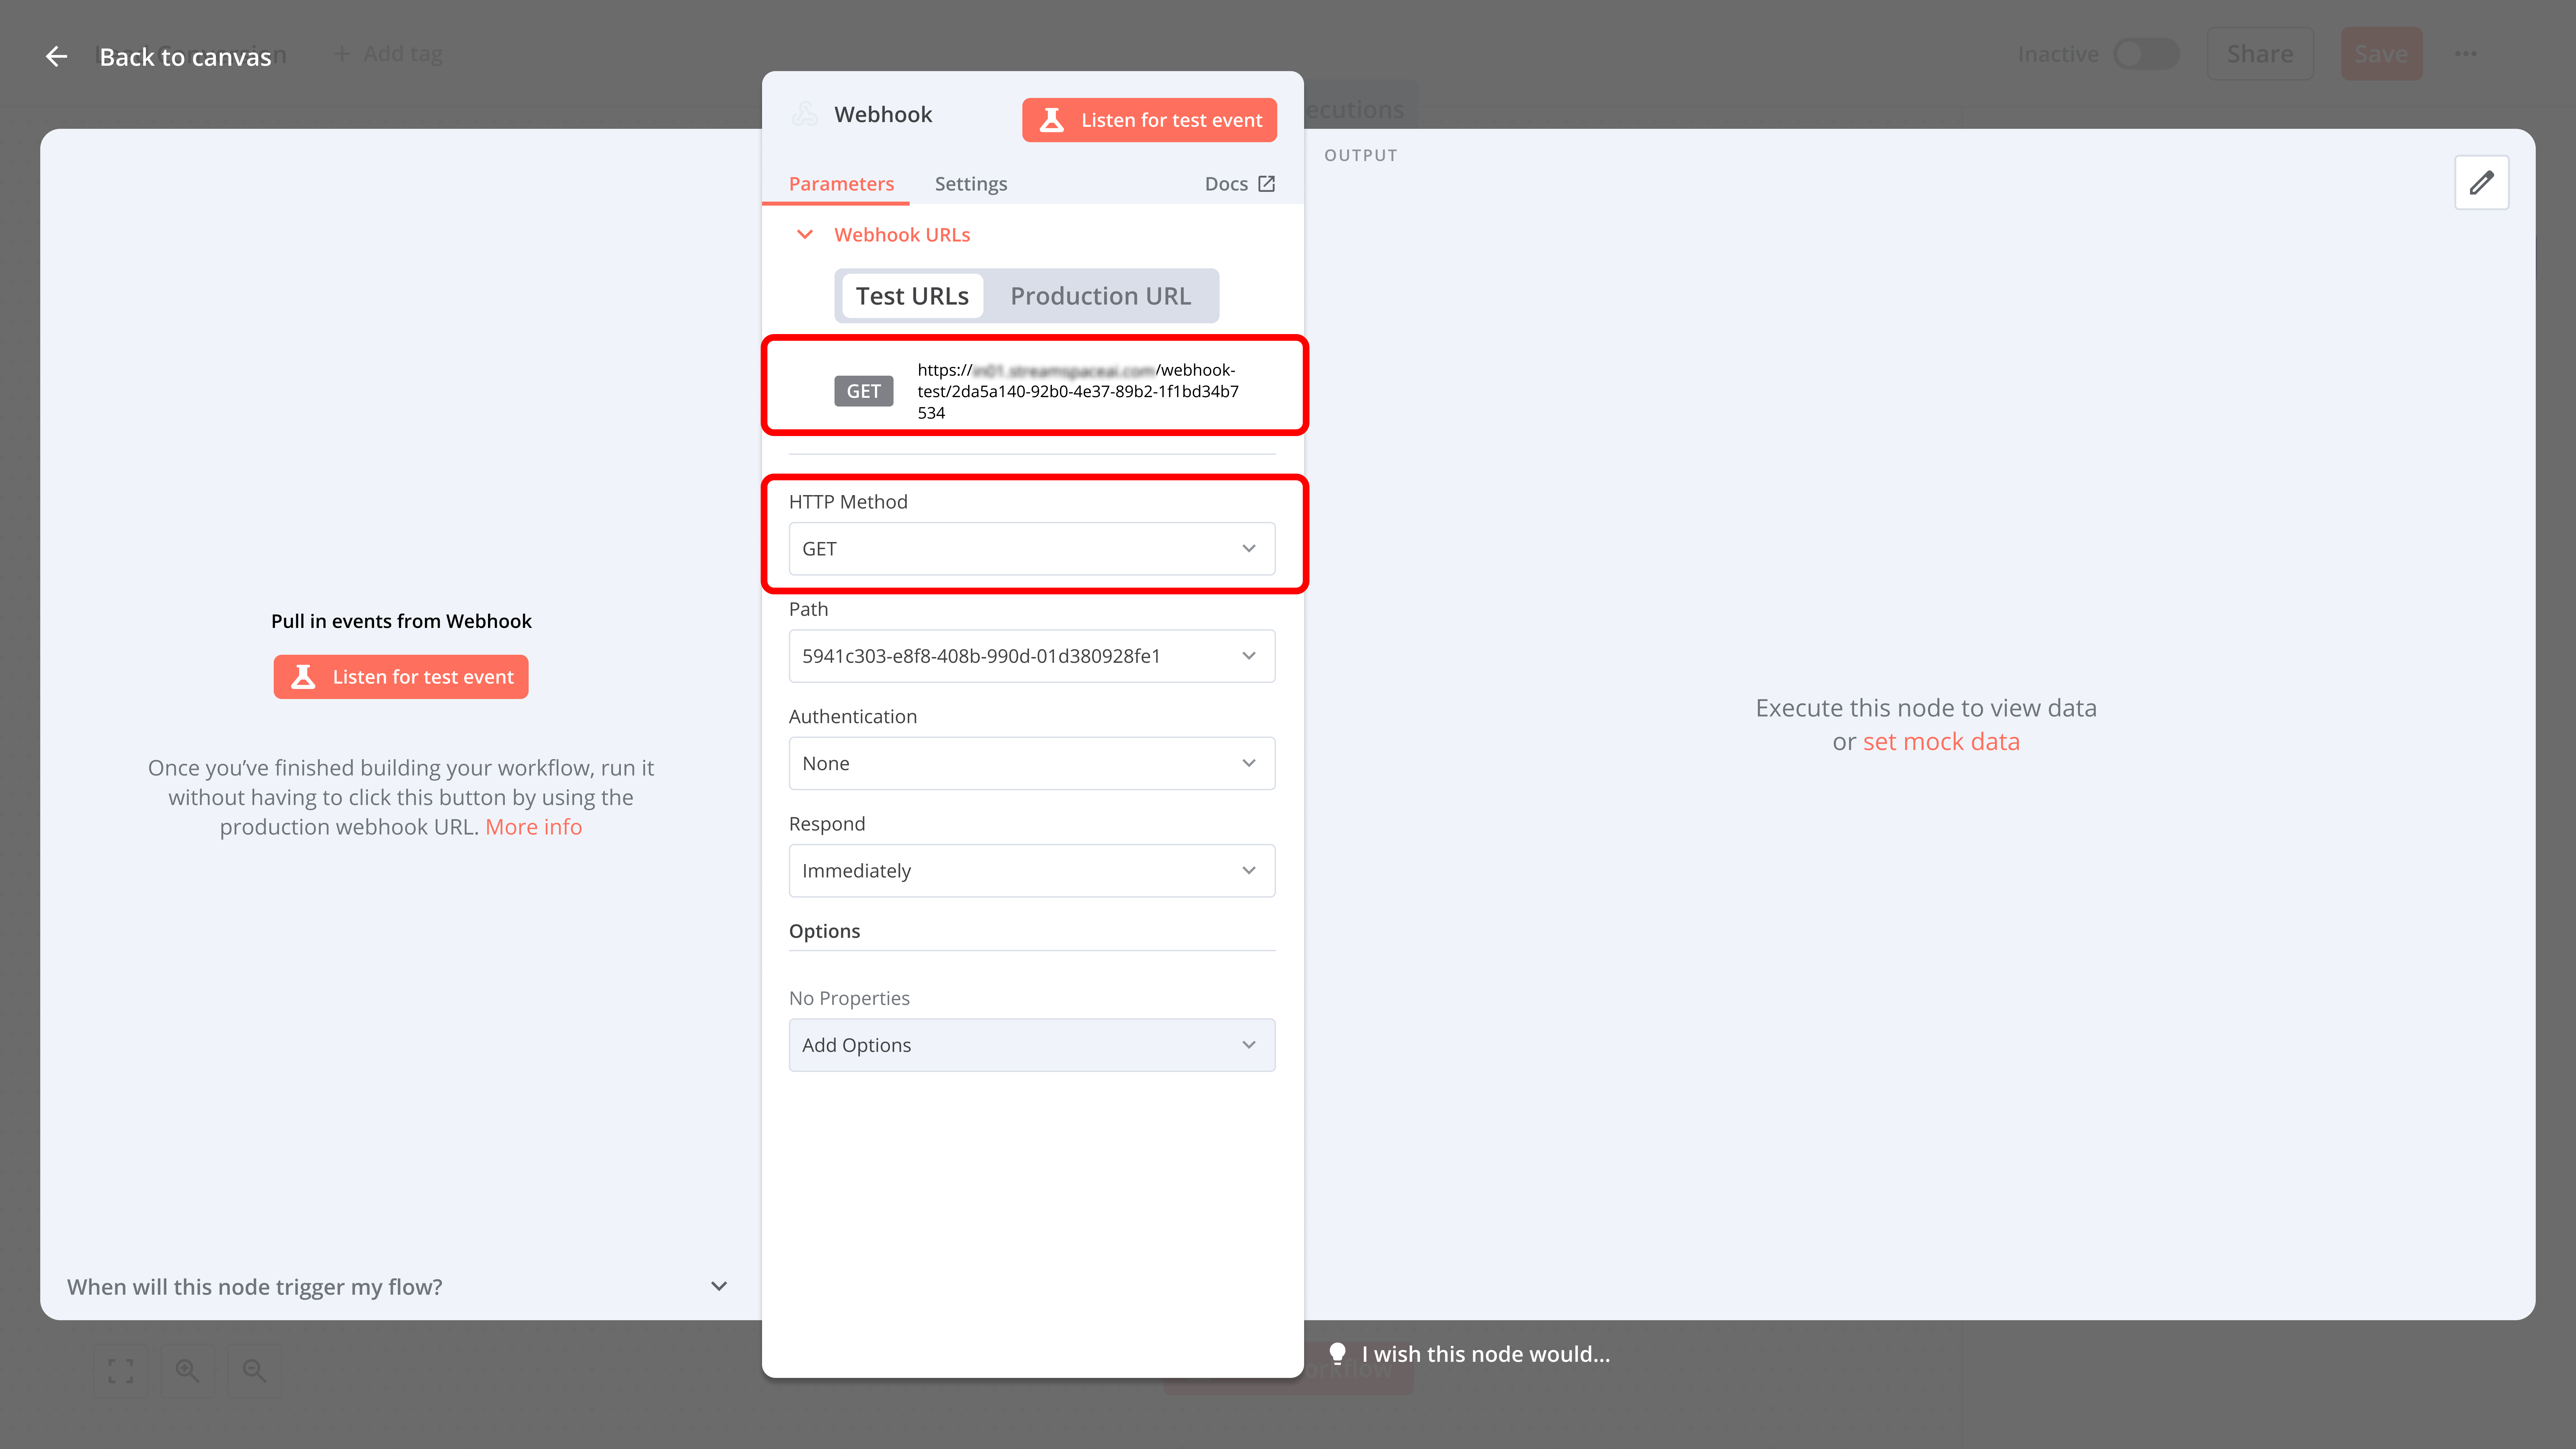
- Configure webhook with auto-generated URL
- Select HTTP method (GET/POST/PUT)
- Set security parameters if required
- Configure authentication options
4. Salesforce Integration
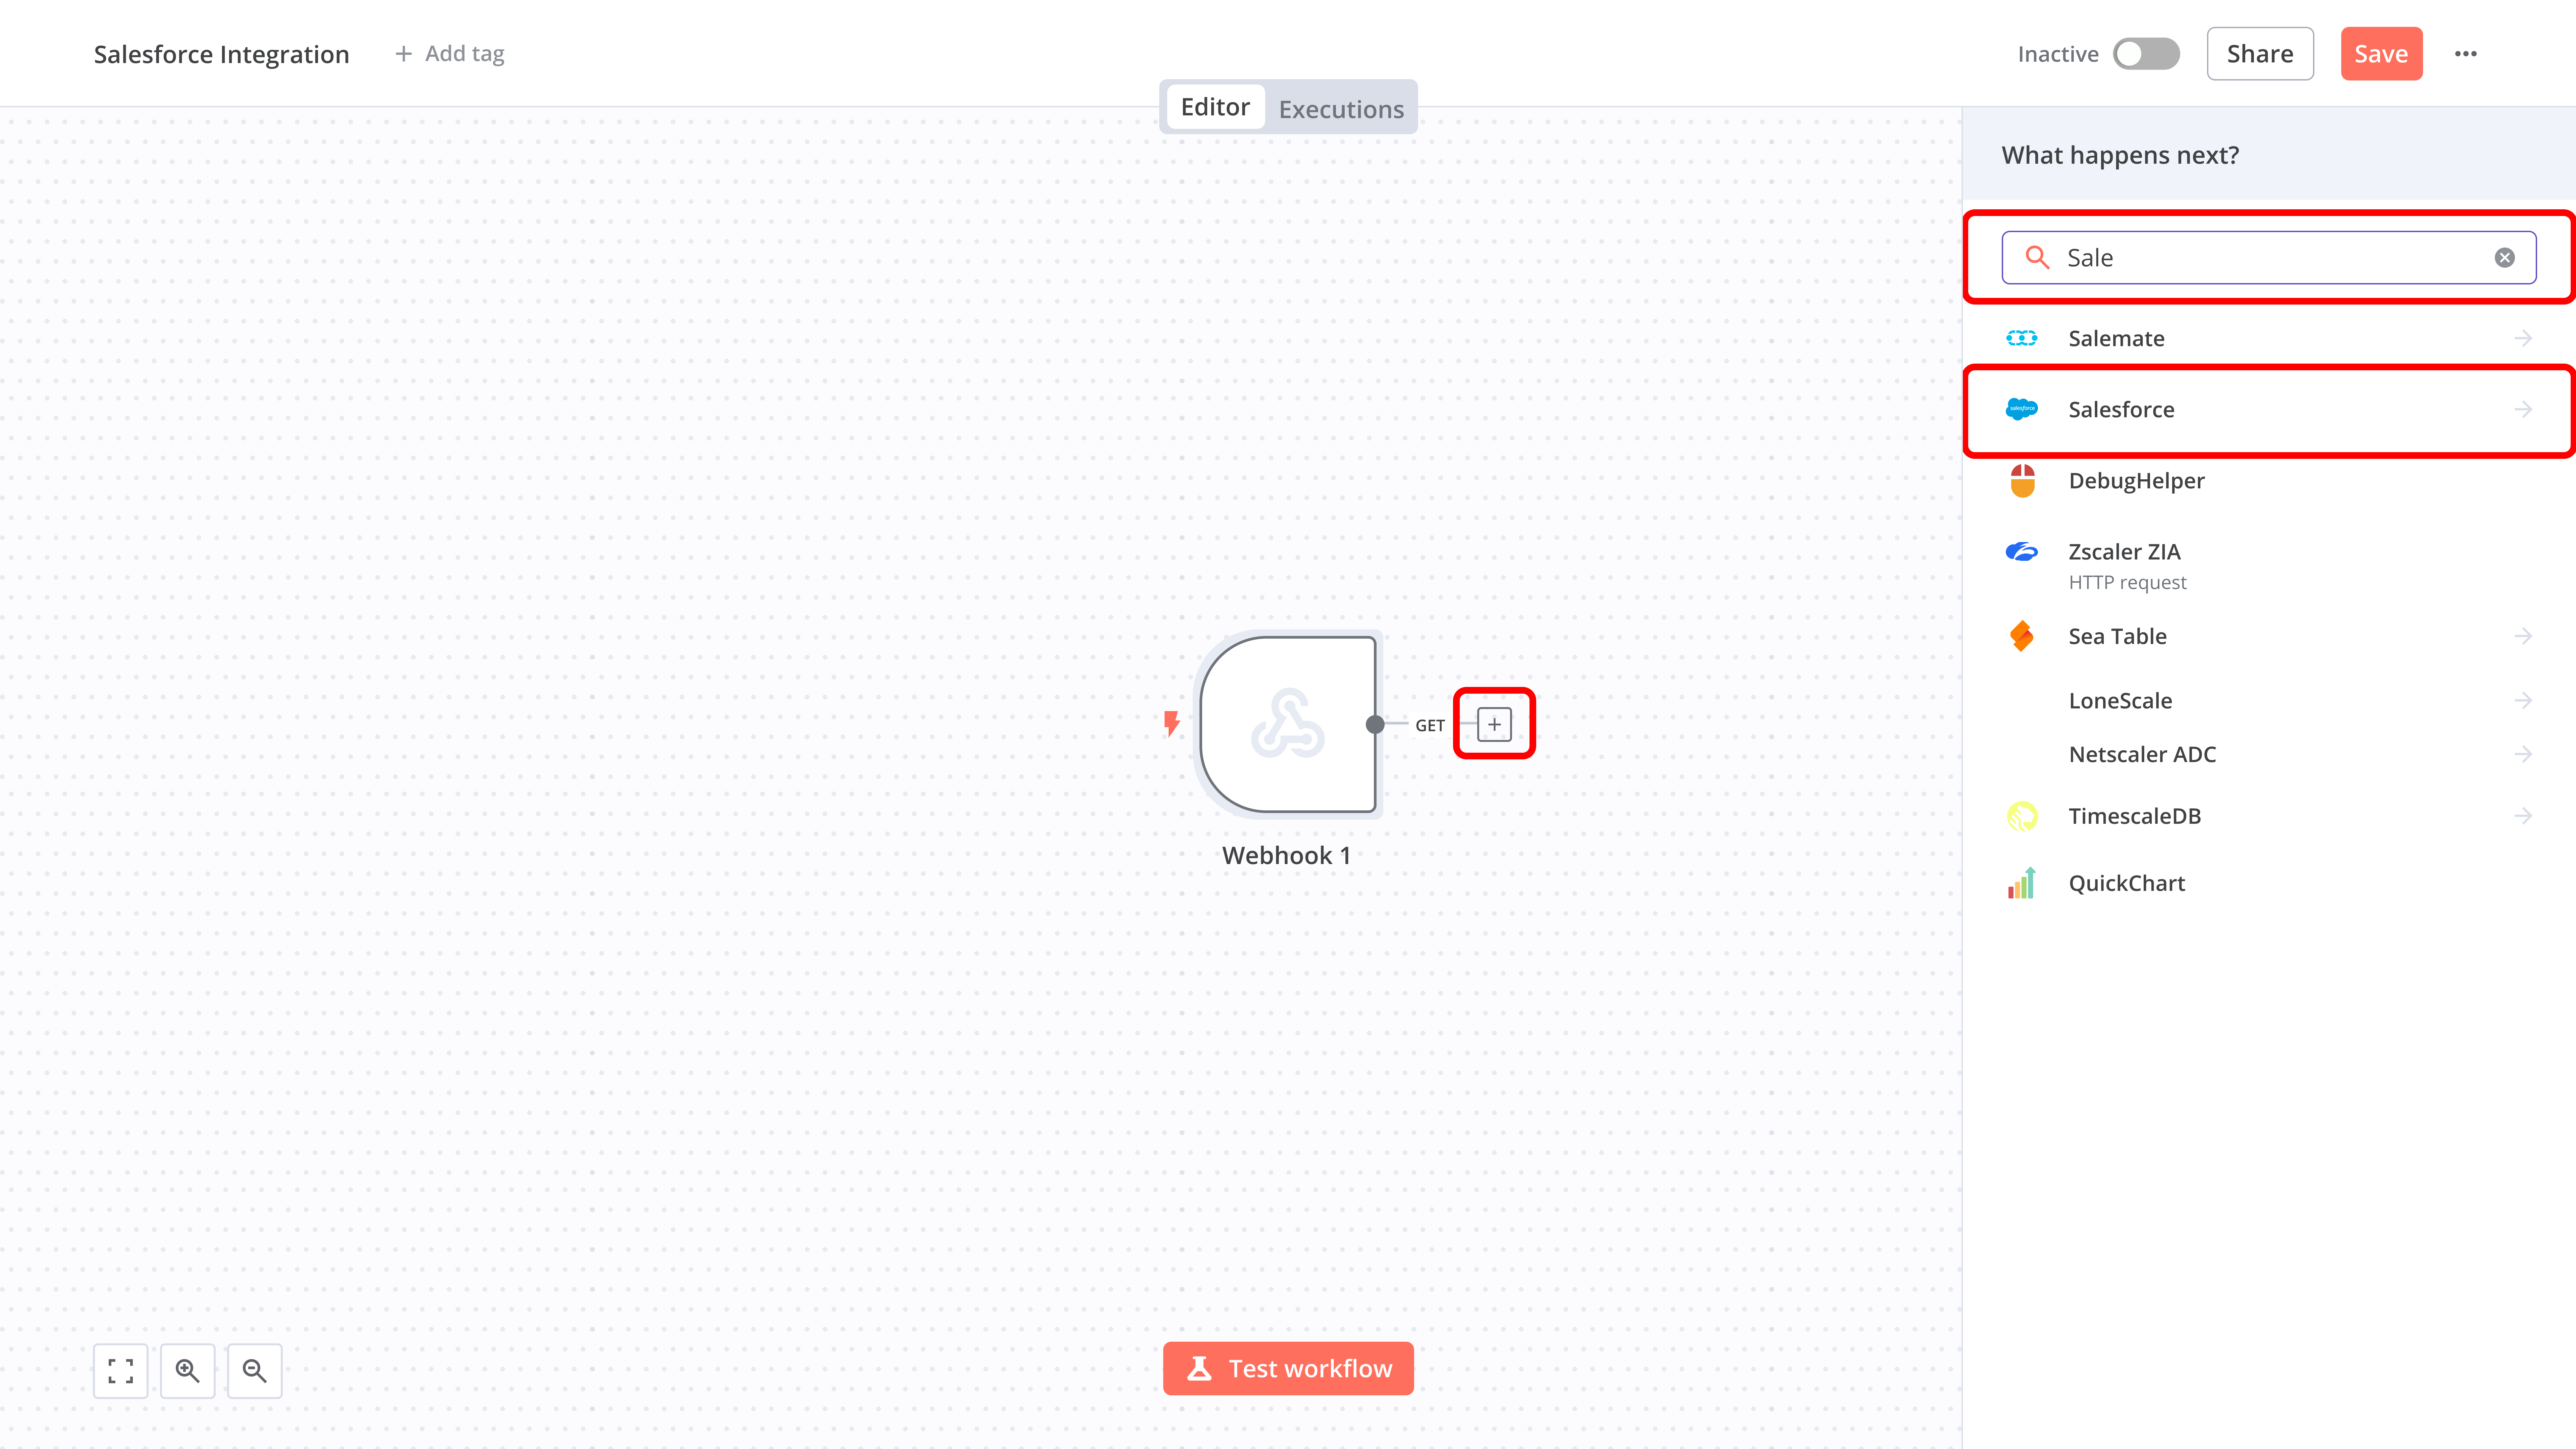
Adding Salesforce Node
- Click "+" after webhook node
- Search for "Salesforce"
- Select Salesforce from search results
Core Salesforce Capabilities
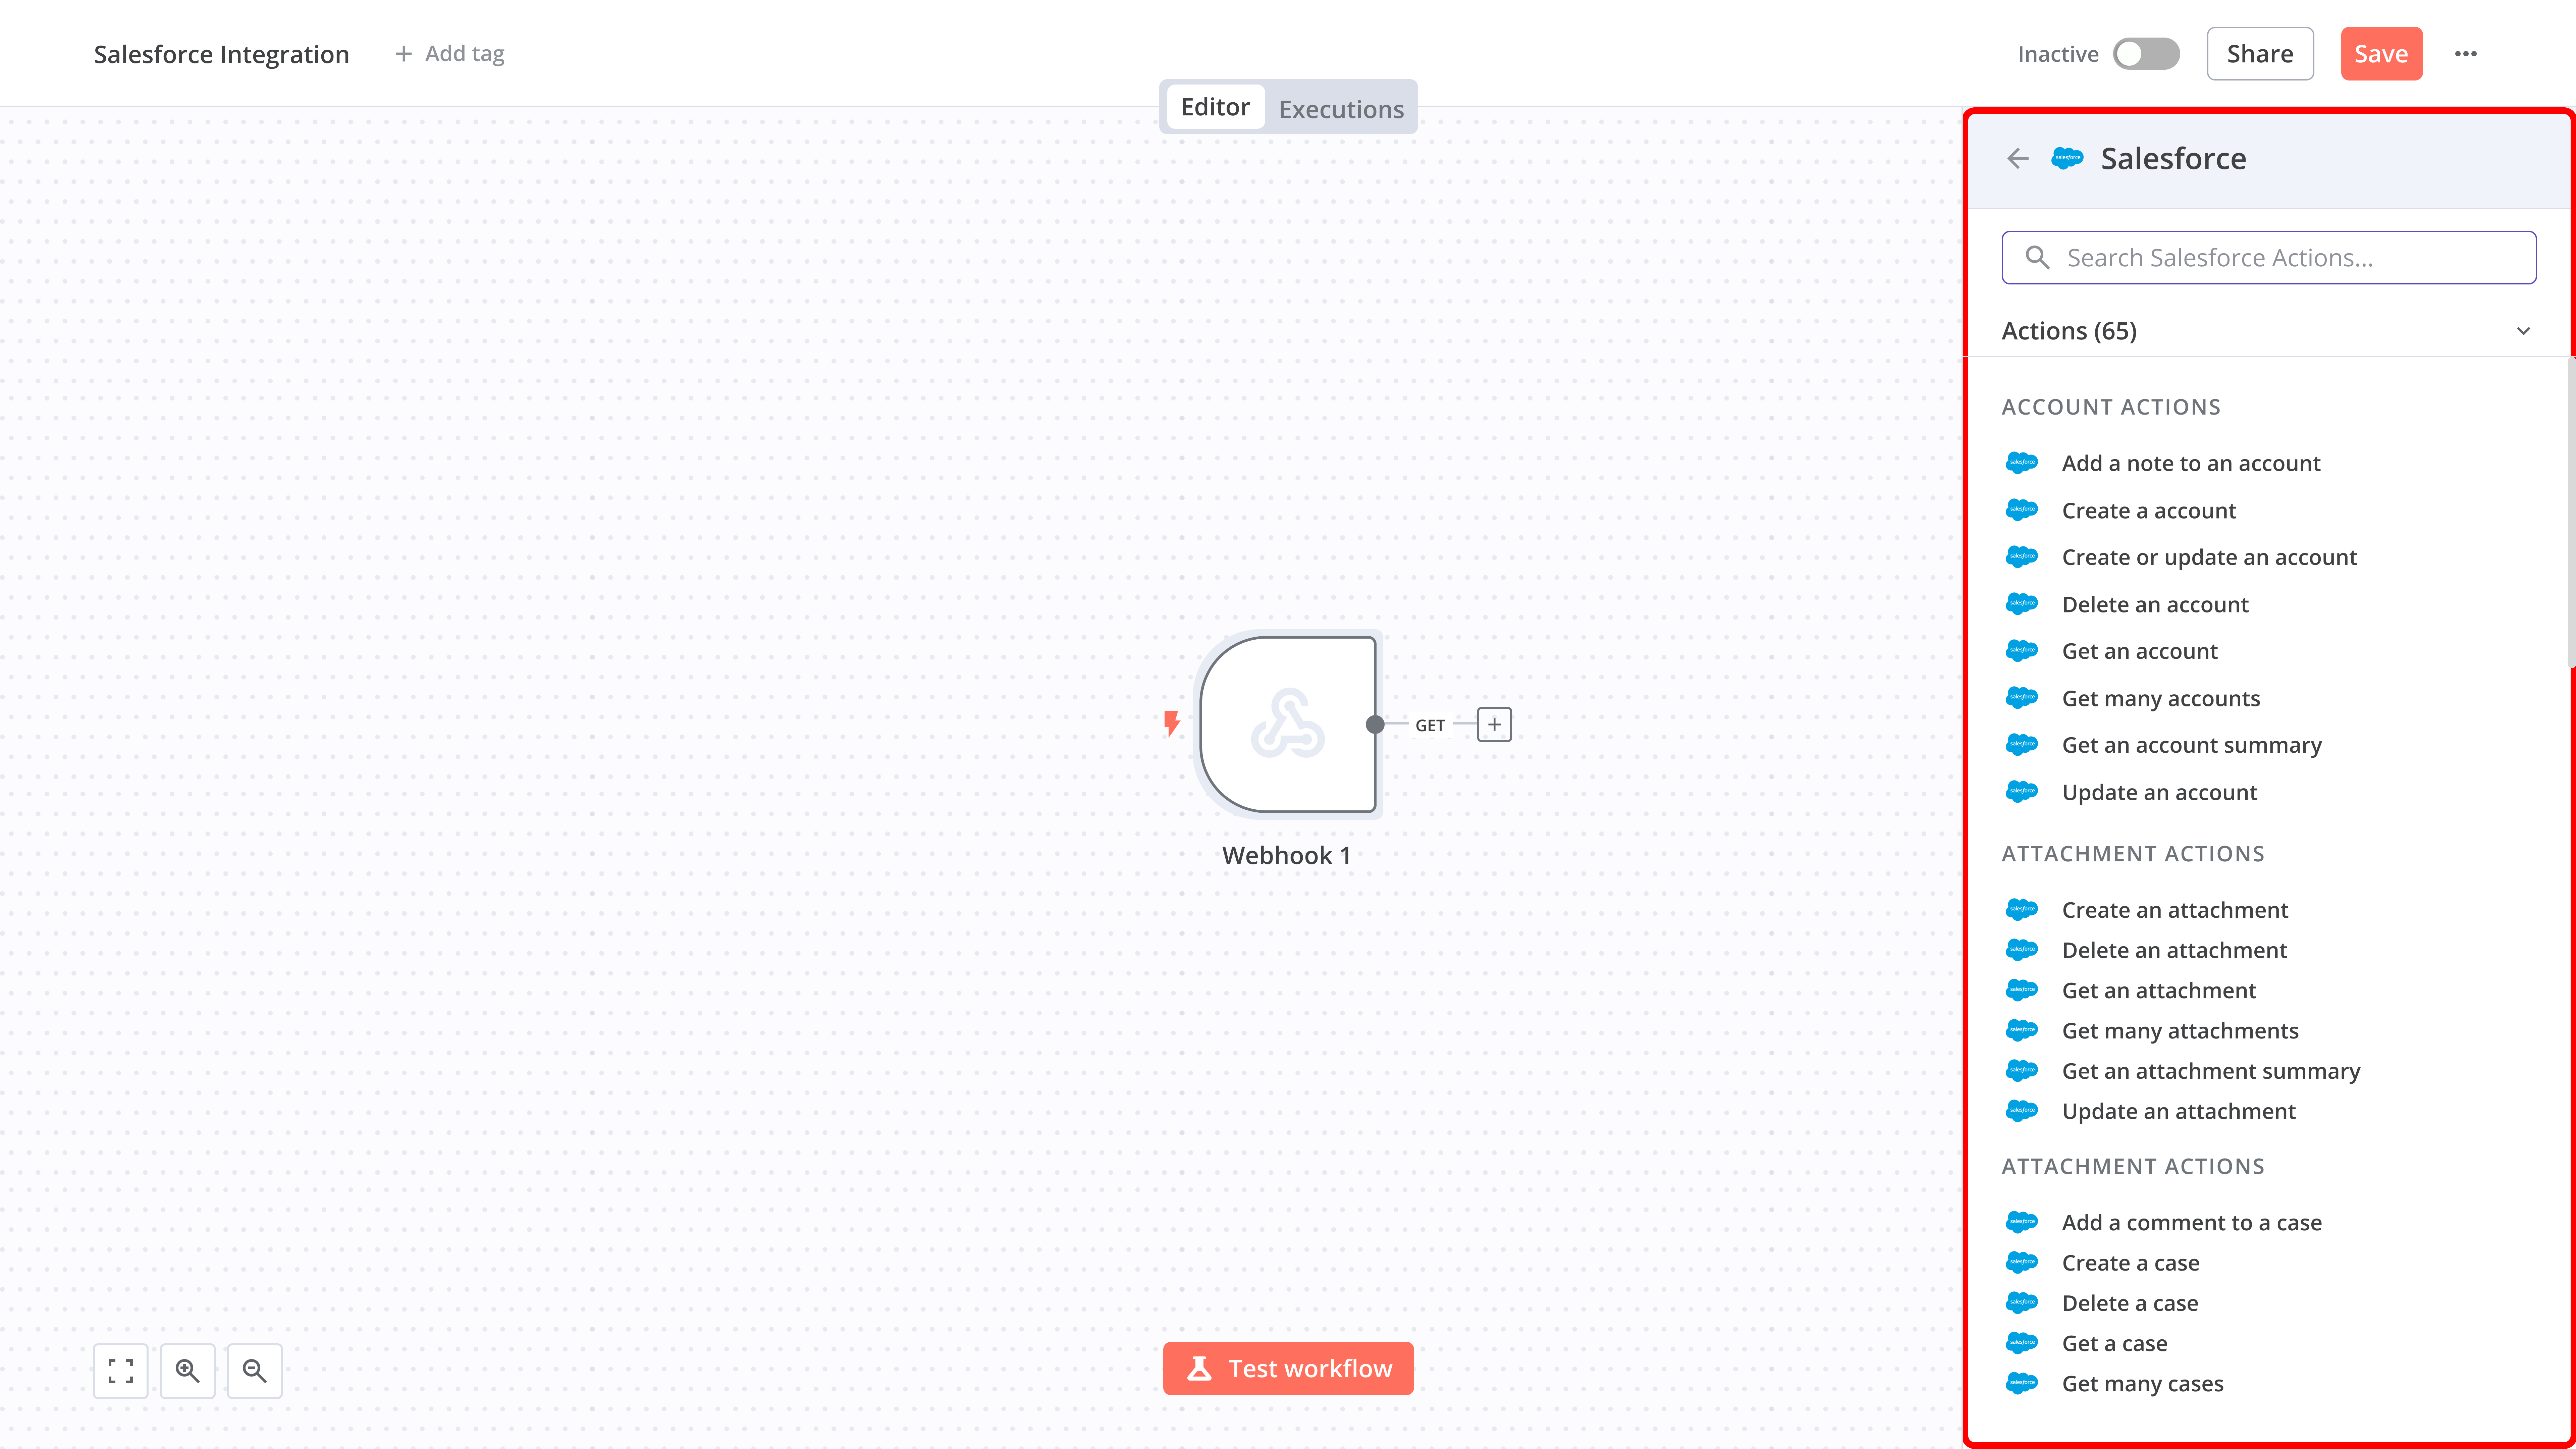
The integration enables management of:
- Contacts: Full contact lifecycle management
- Cases: Support case handling
- Tasks: Task creation and tracking
- Custom Objects: Custom object operations
Trigger Events
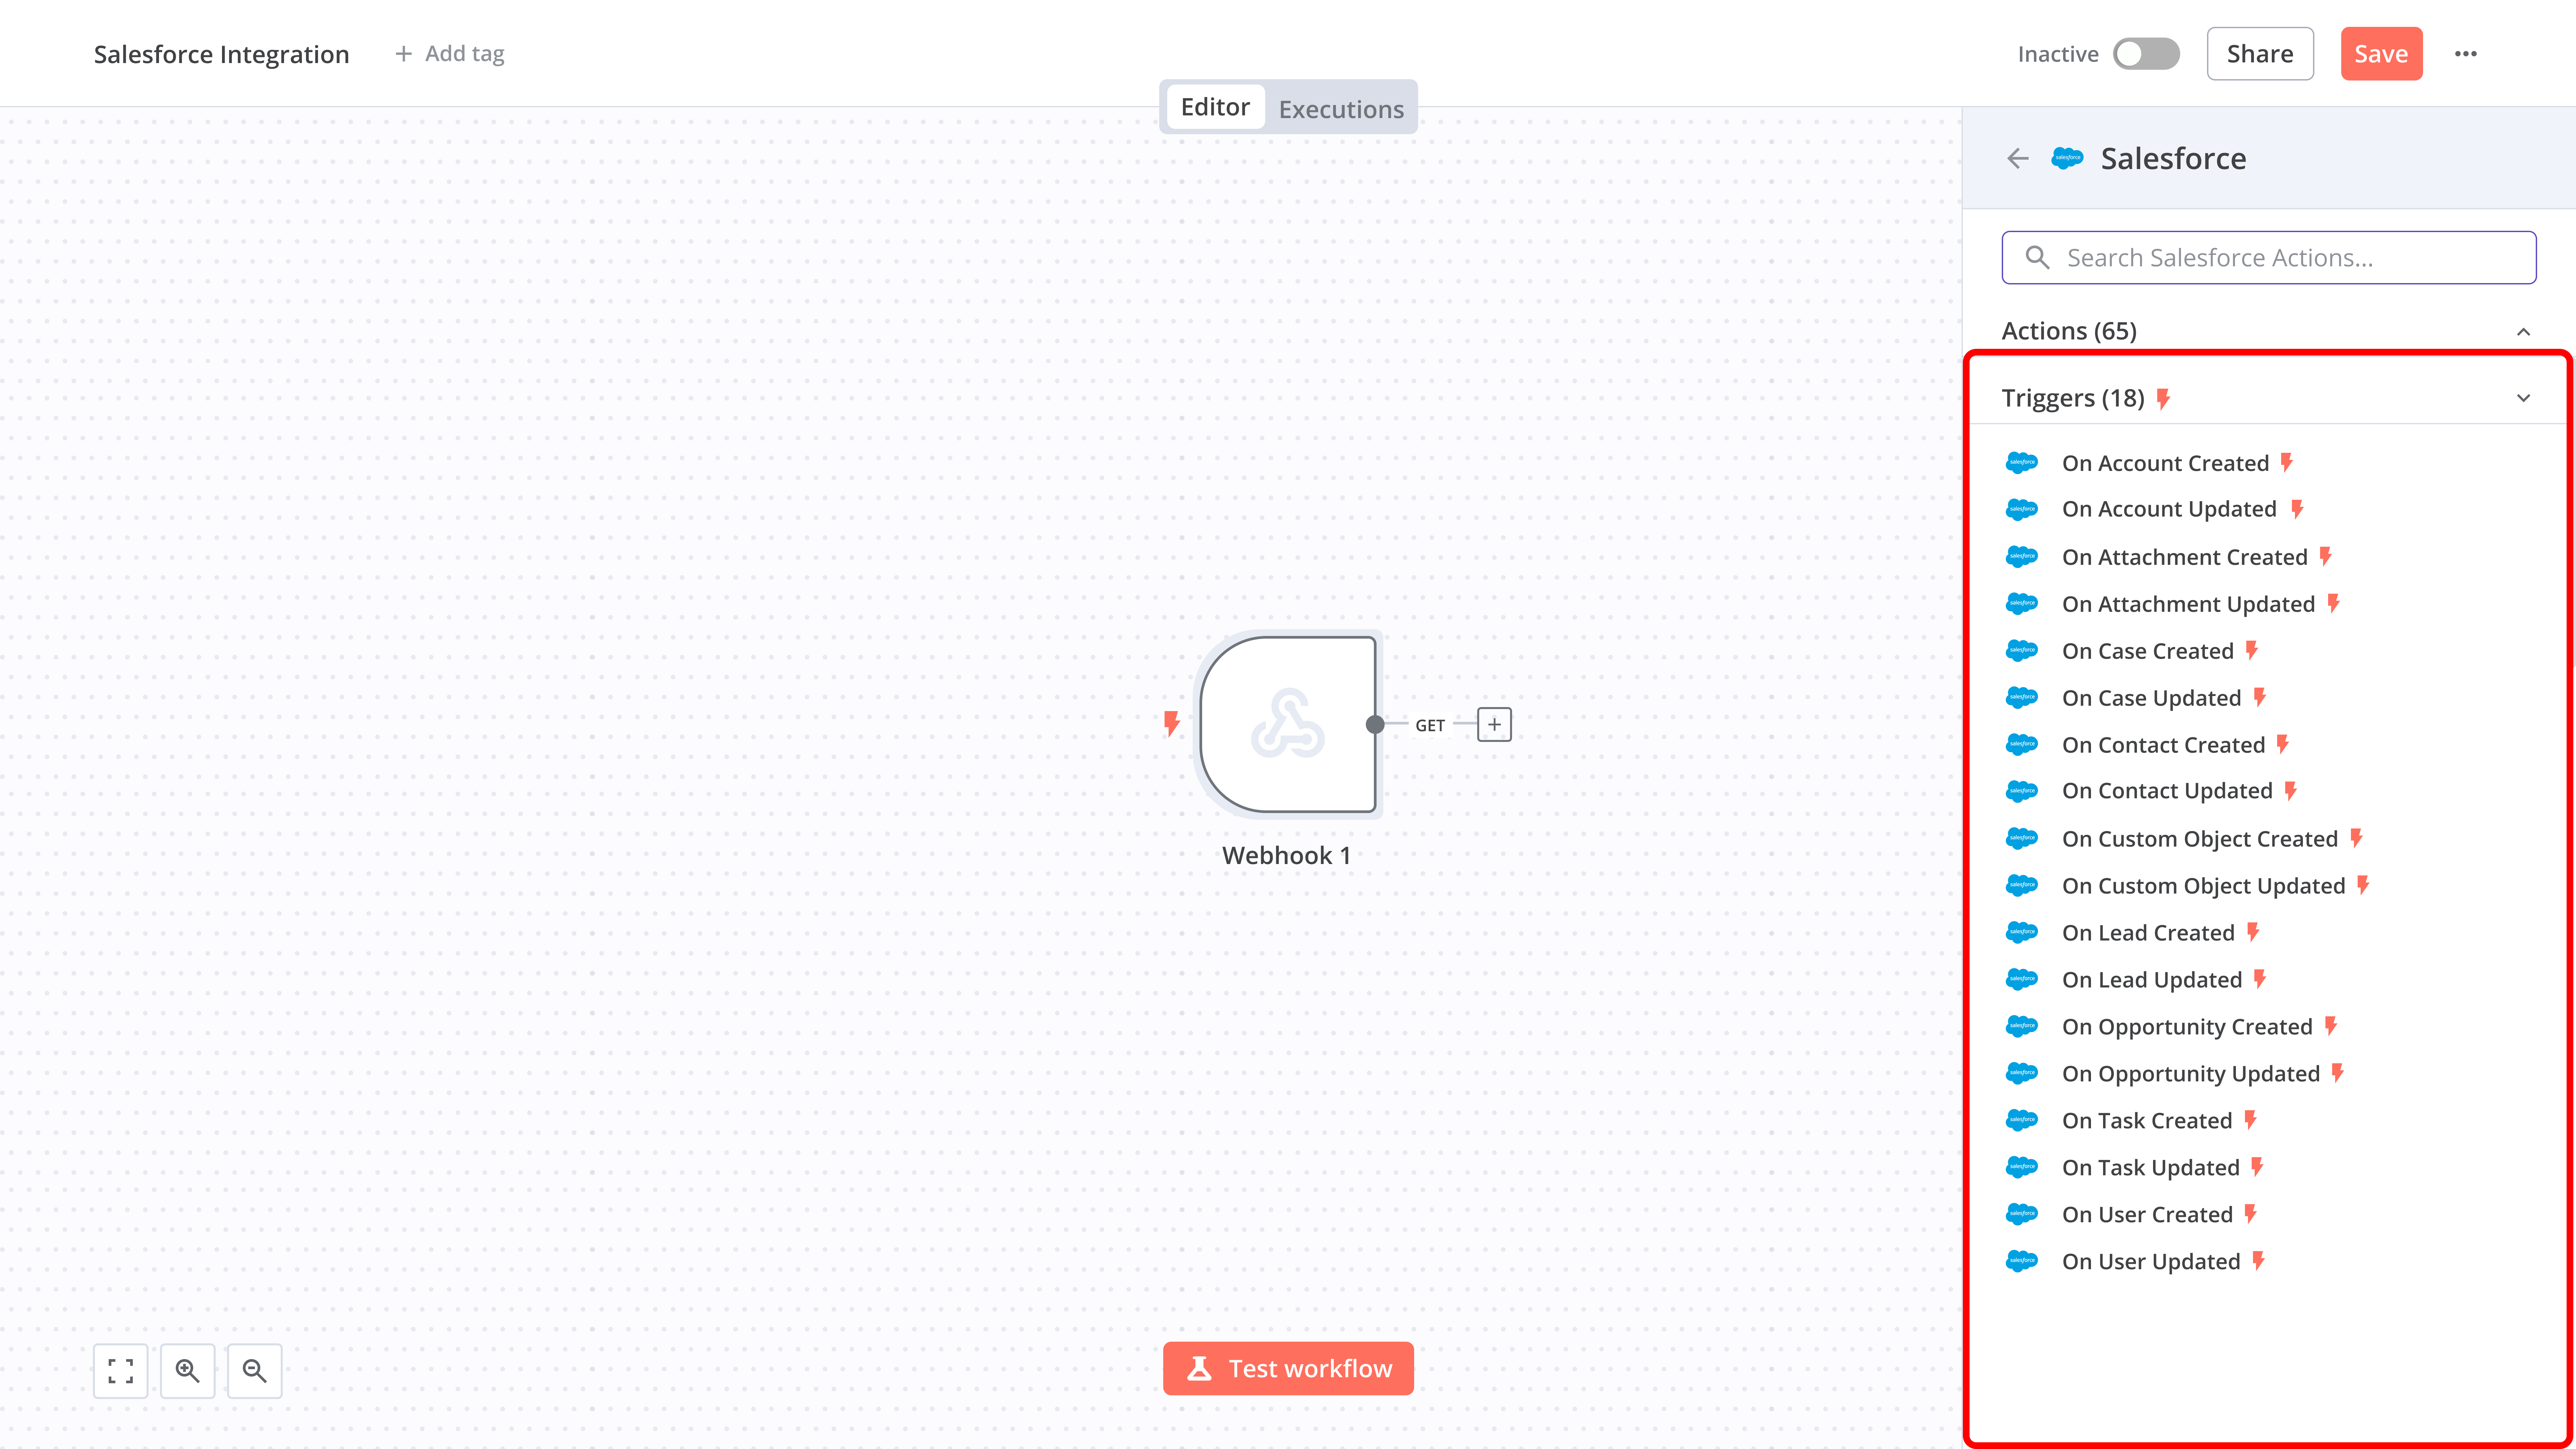
Automated responses to:
- Contact creation/updates
- Case modifications
- Task status changes
- Custom object updates/creation
5. Salesforce Query Configuration
When accessing Salesforce configuration:
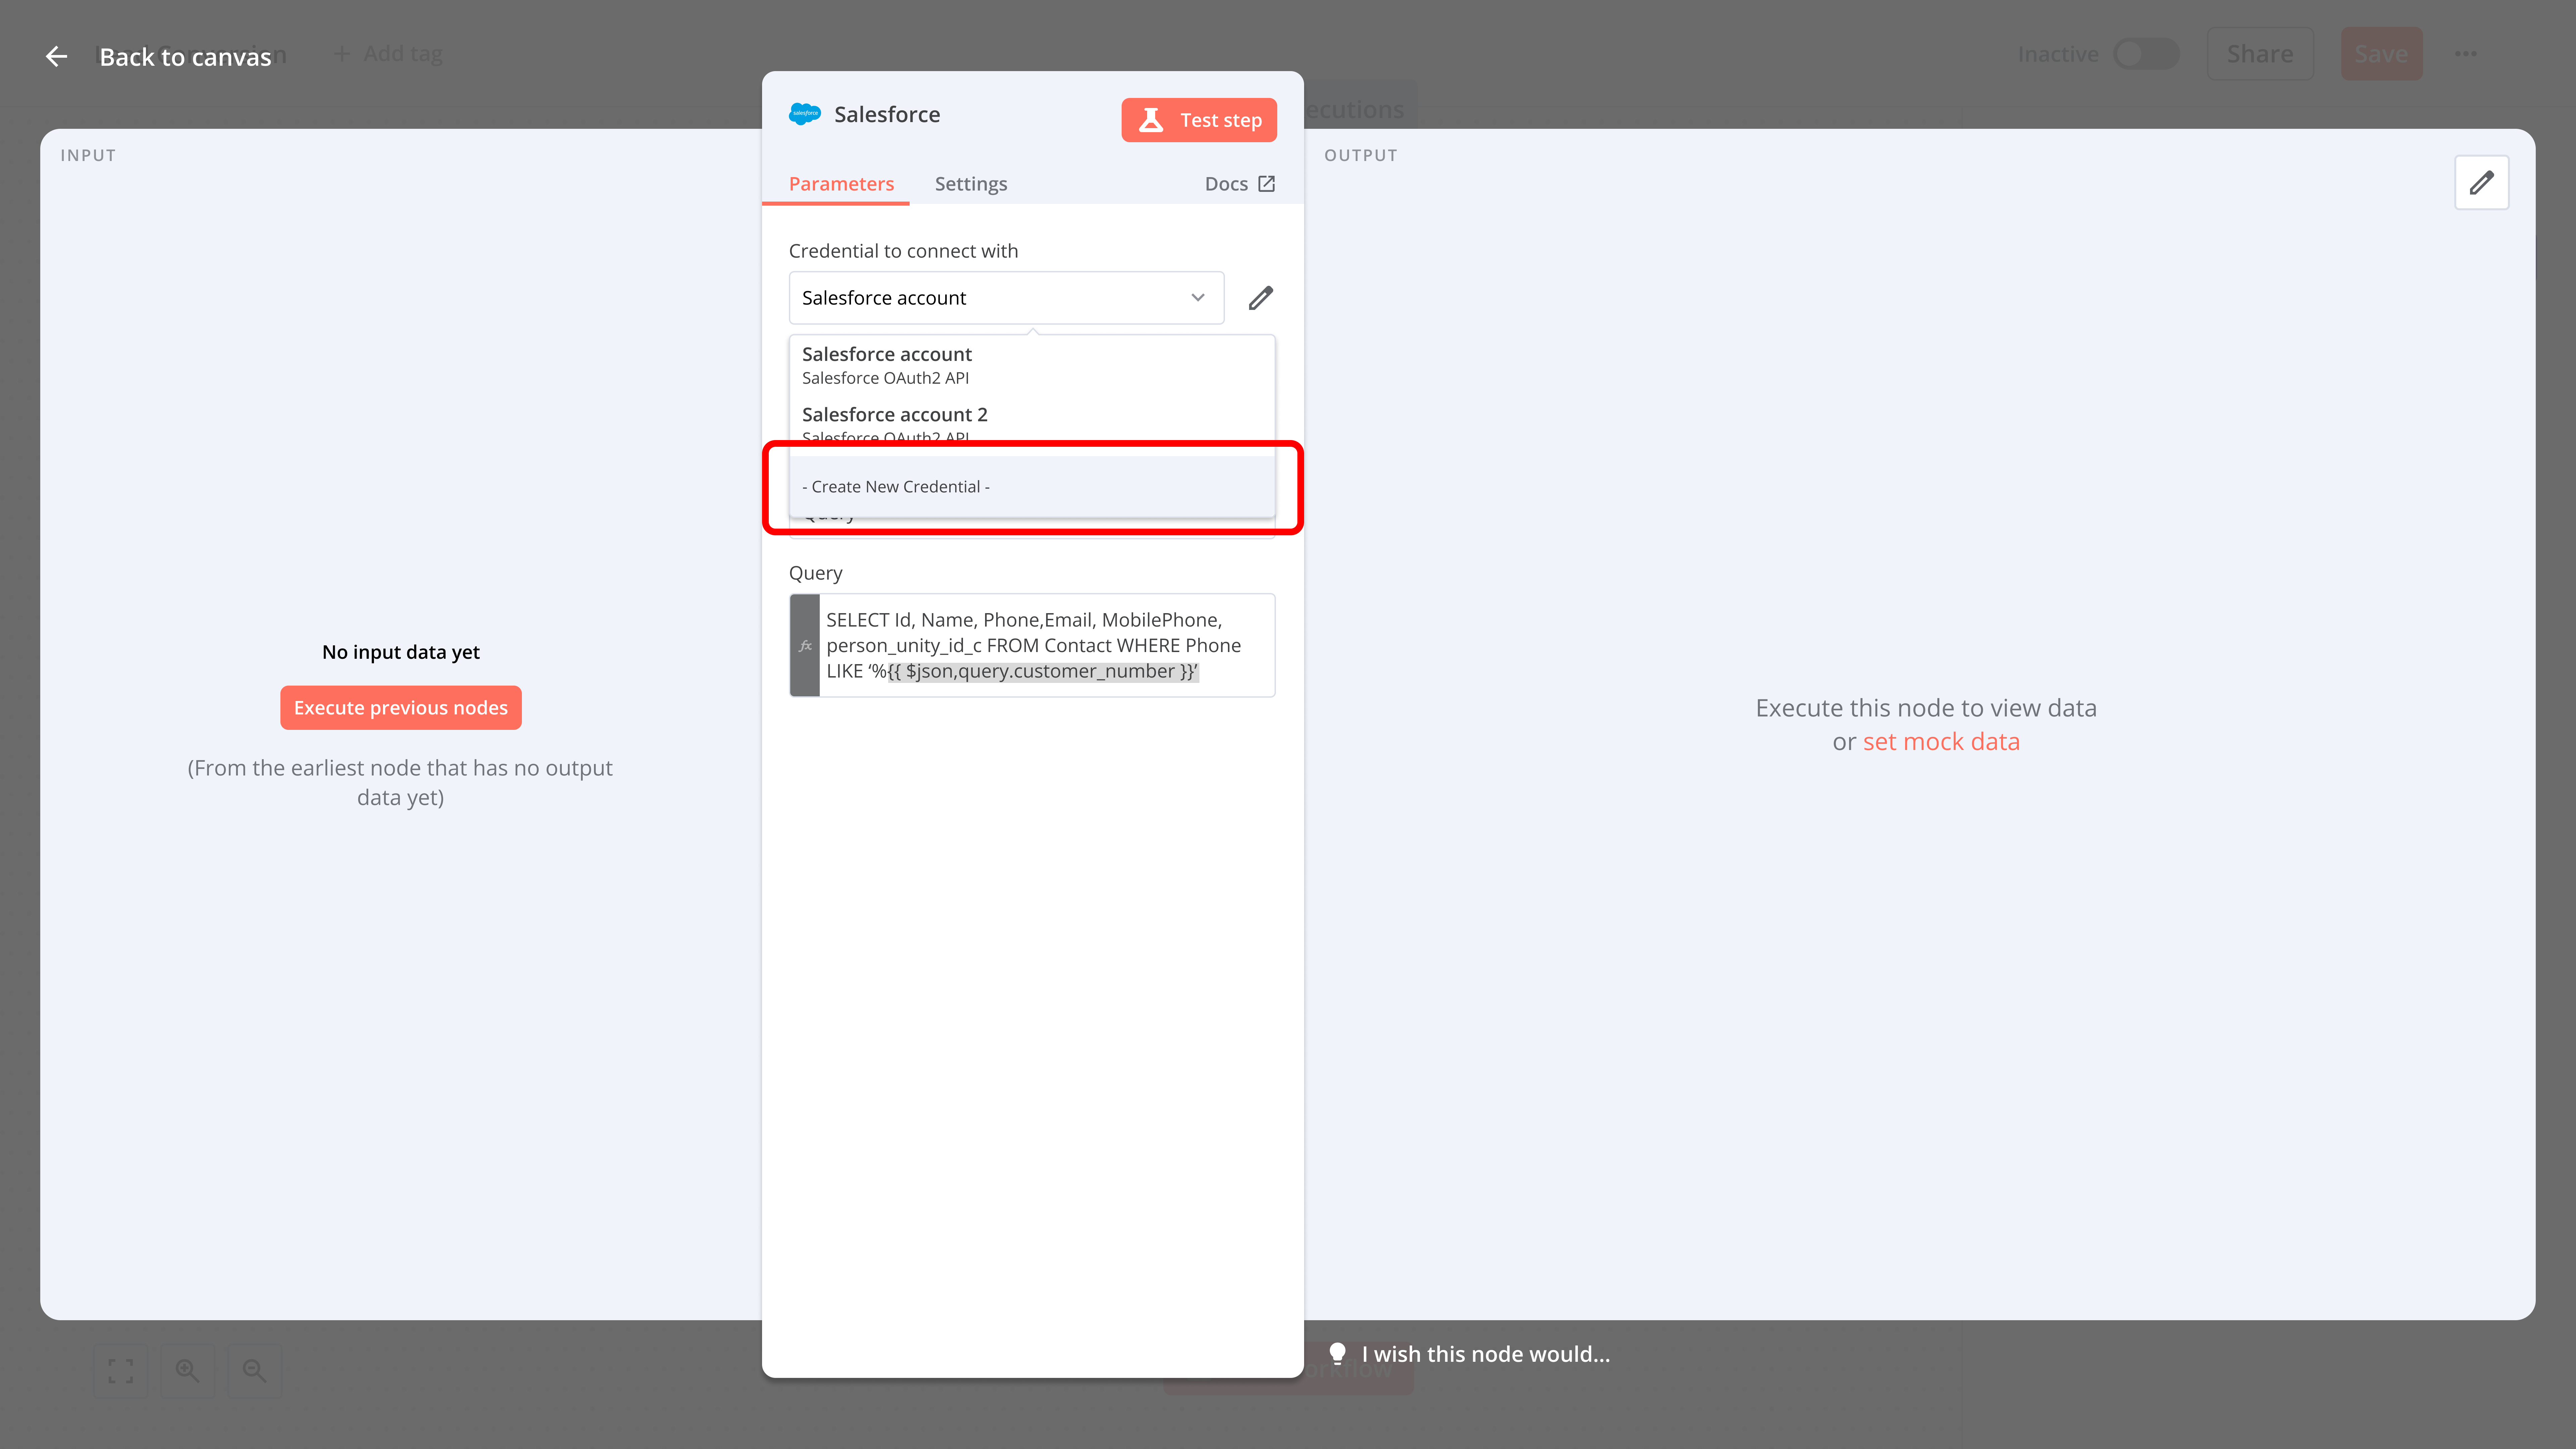
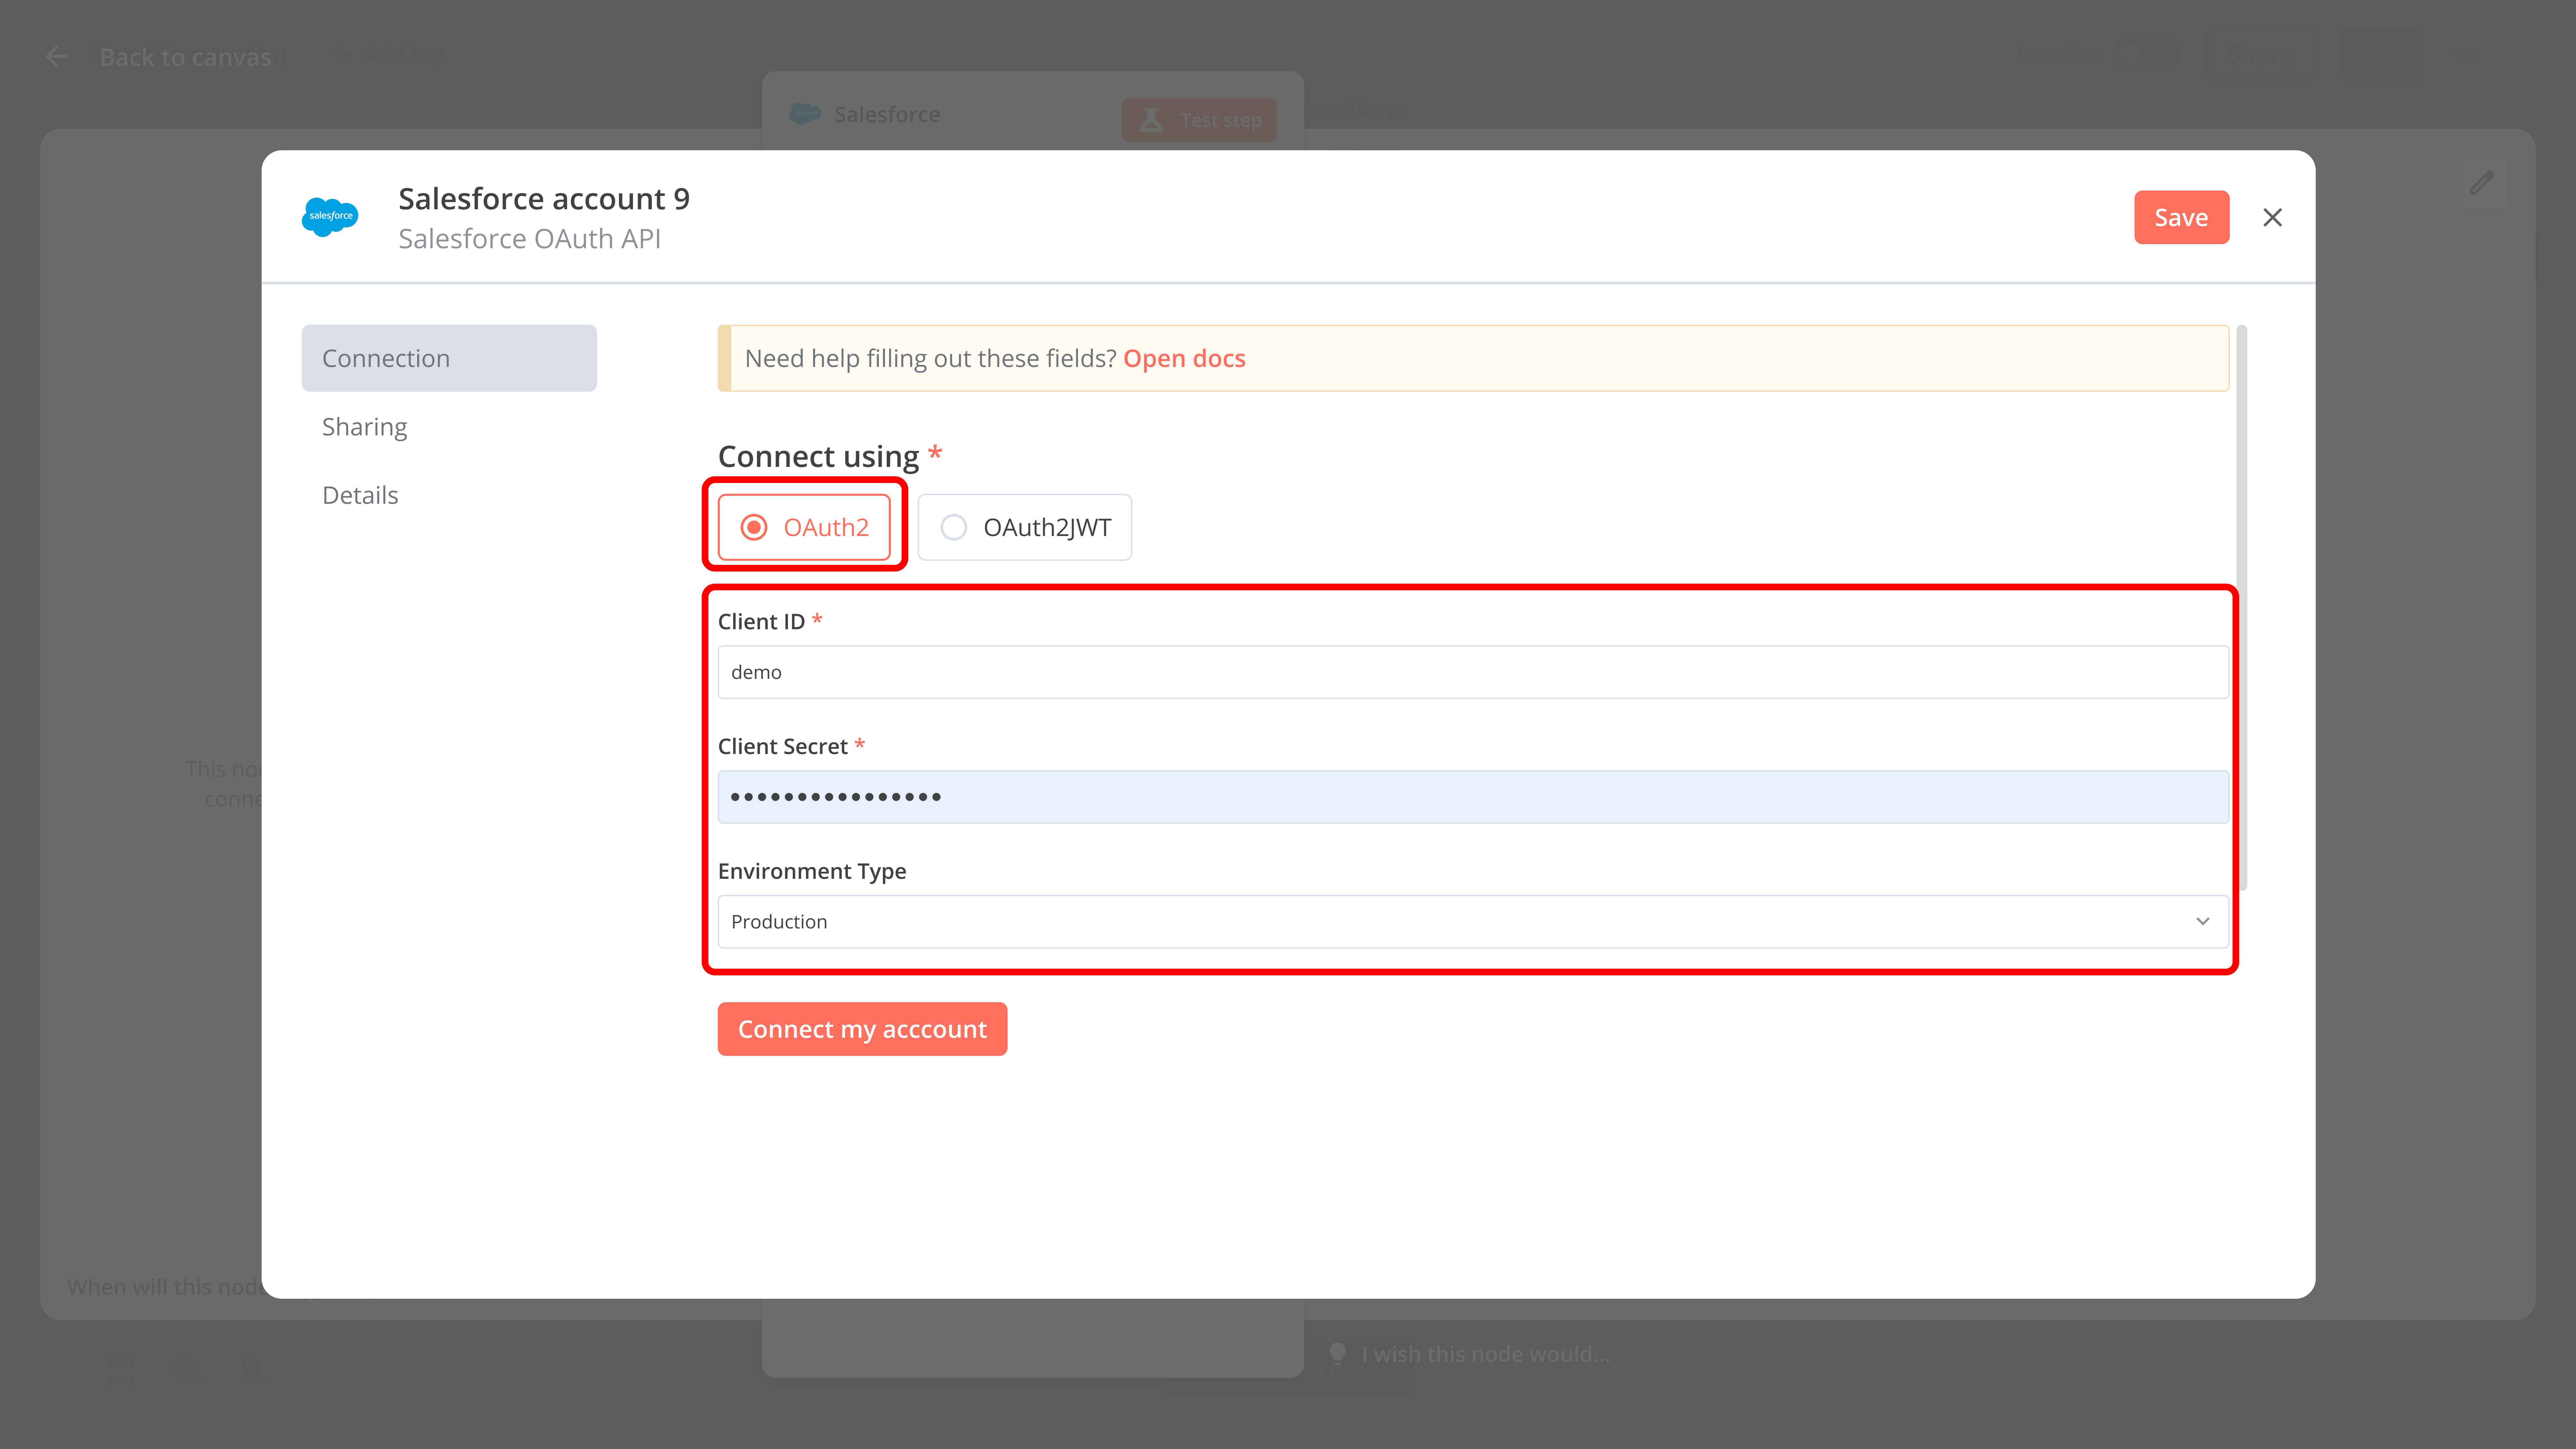
5.1. Account Setup:
- Select existing Salesforce account from dropdown OR
- Configure new account:
- Enter OAuth Redirect URL
- Provide Client ID
- Input Client Secret
- Select Environment Type
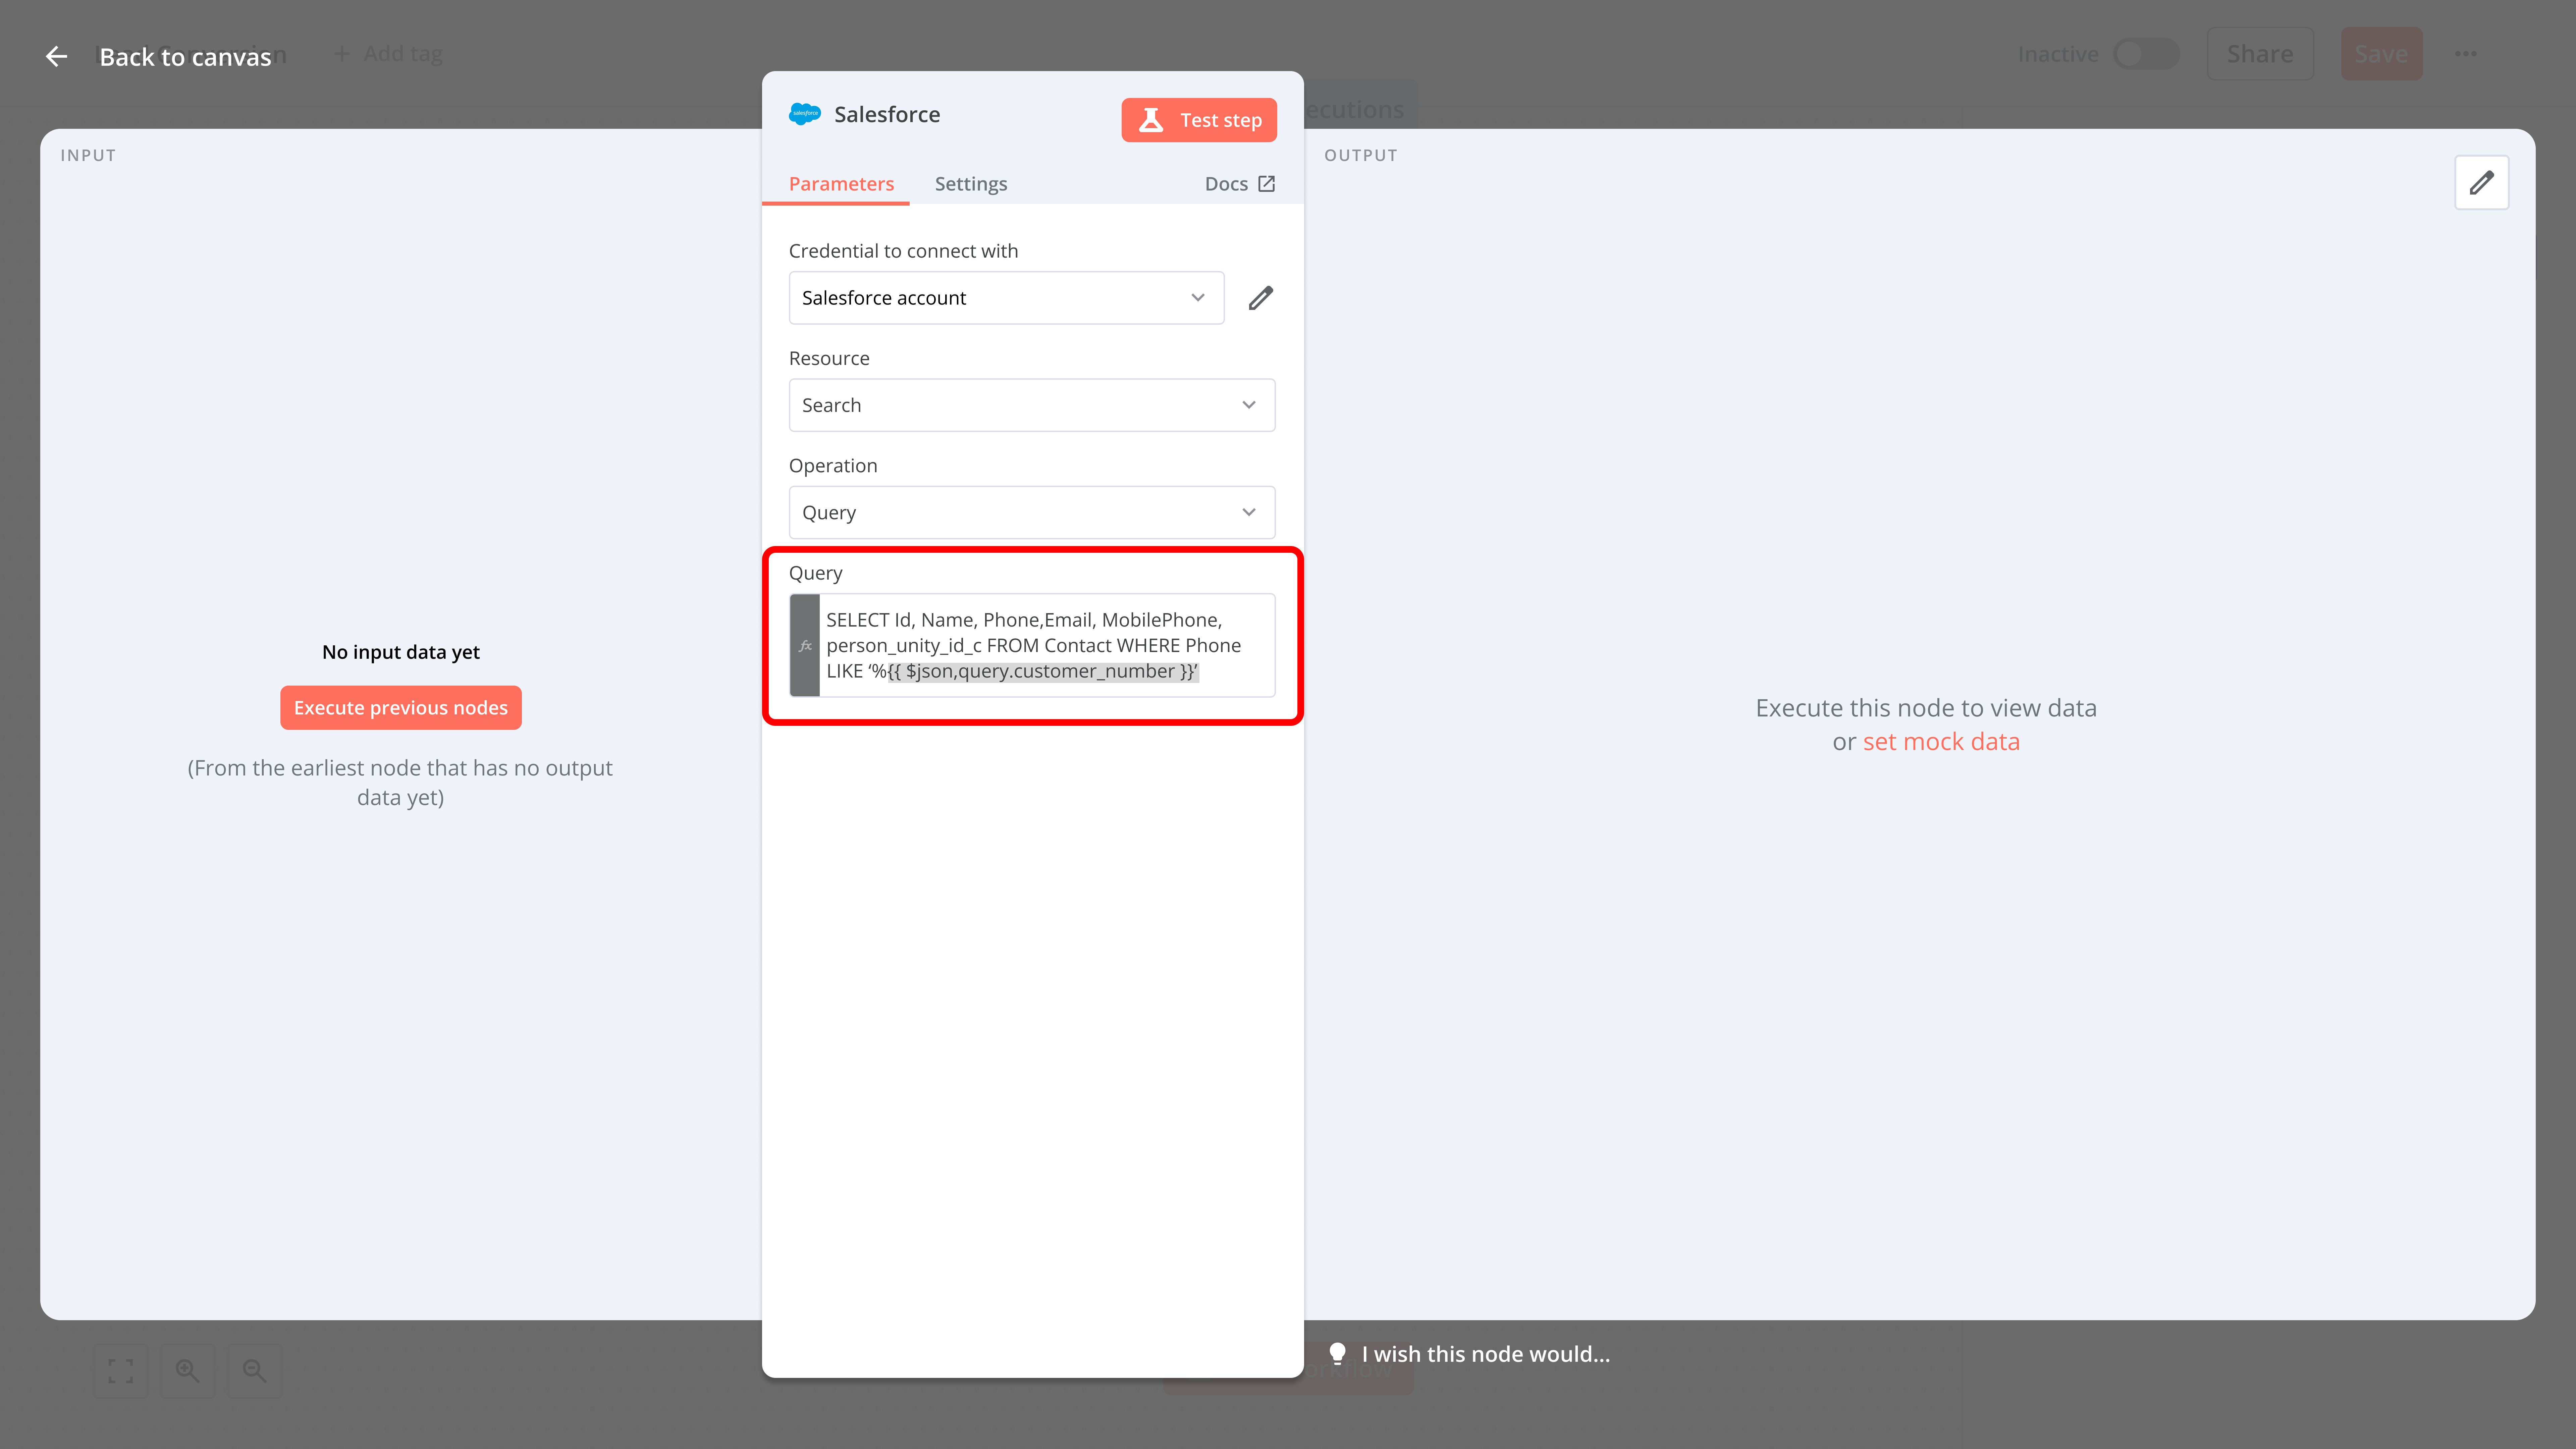
5.2 Query Setup:
- Select operation type
- Enter custom query parameters
- Configure search criteria
6. Response Configuration
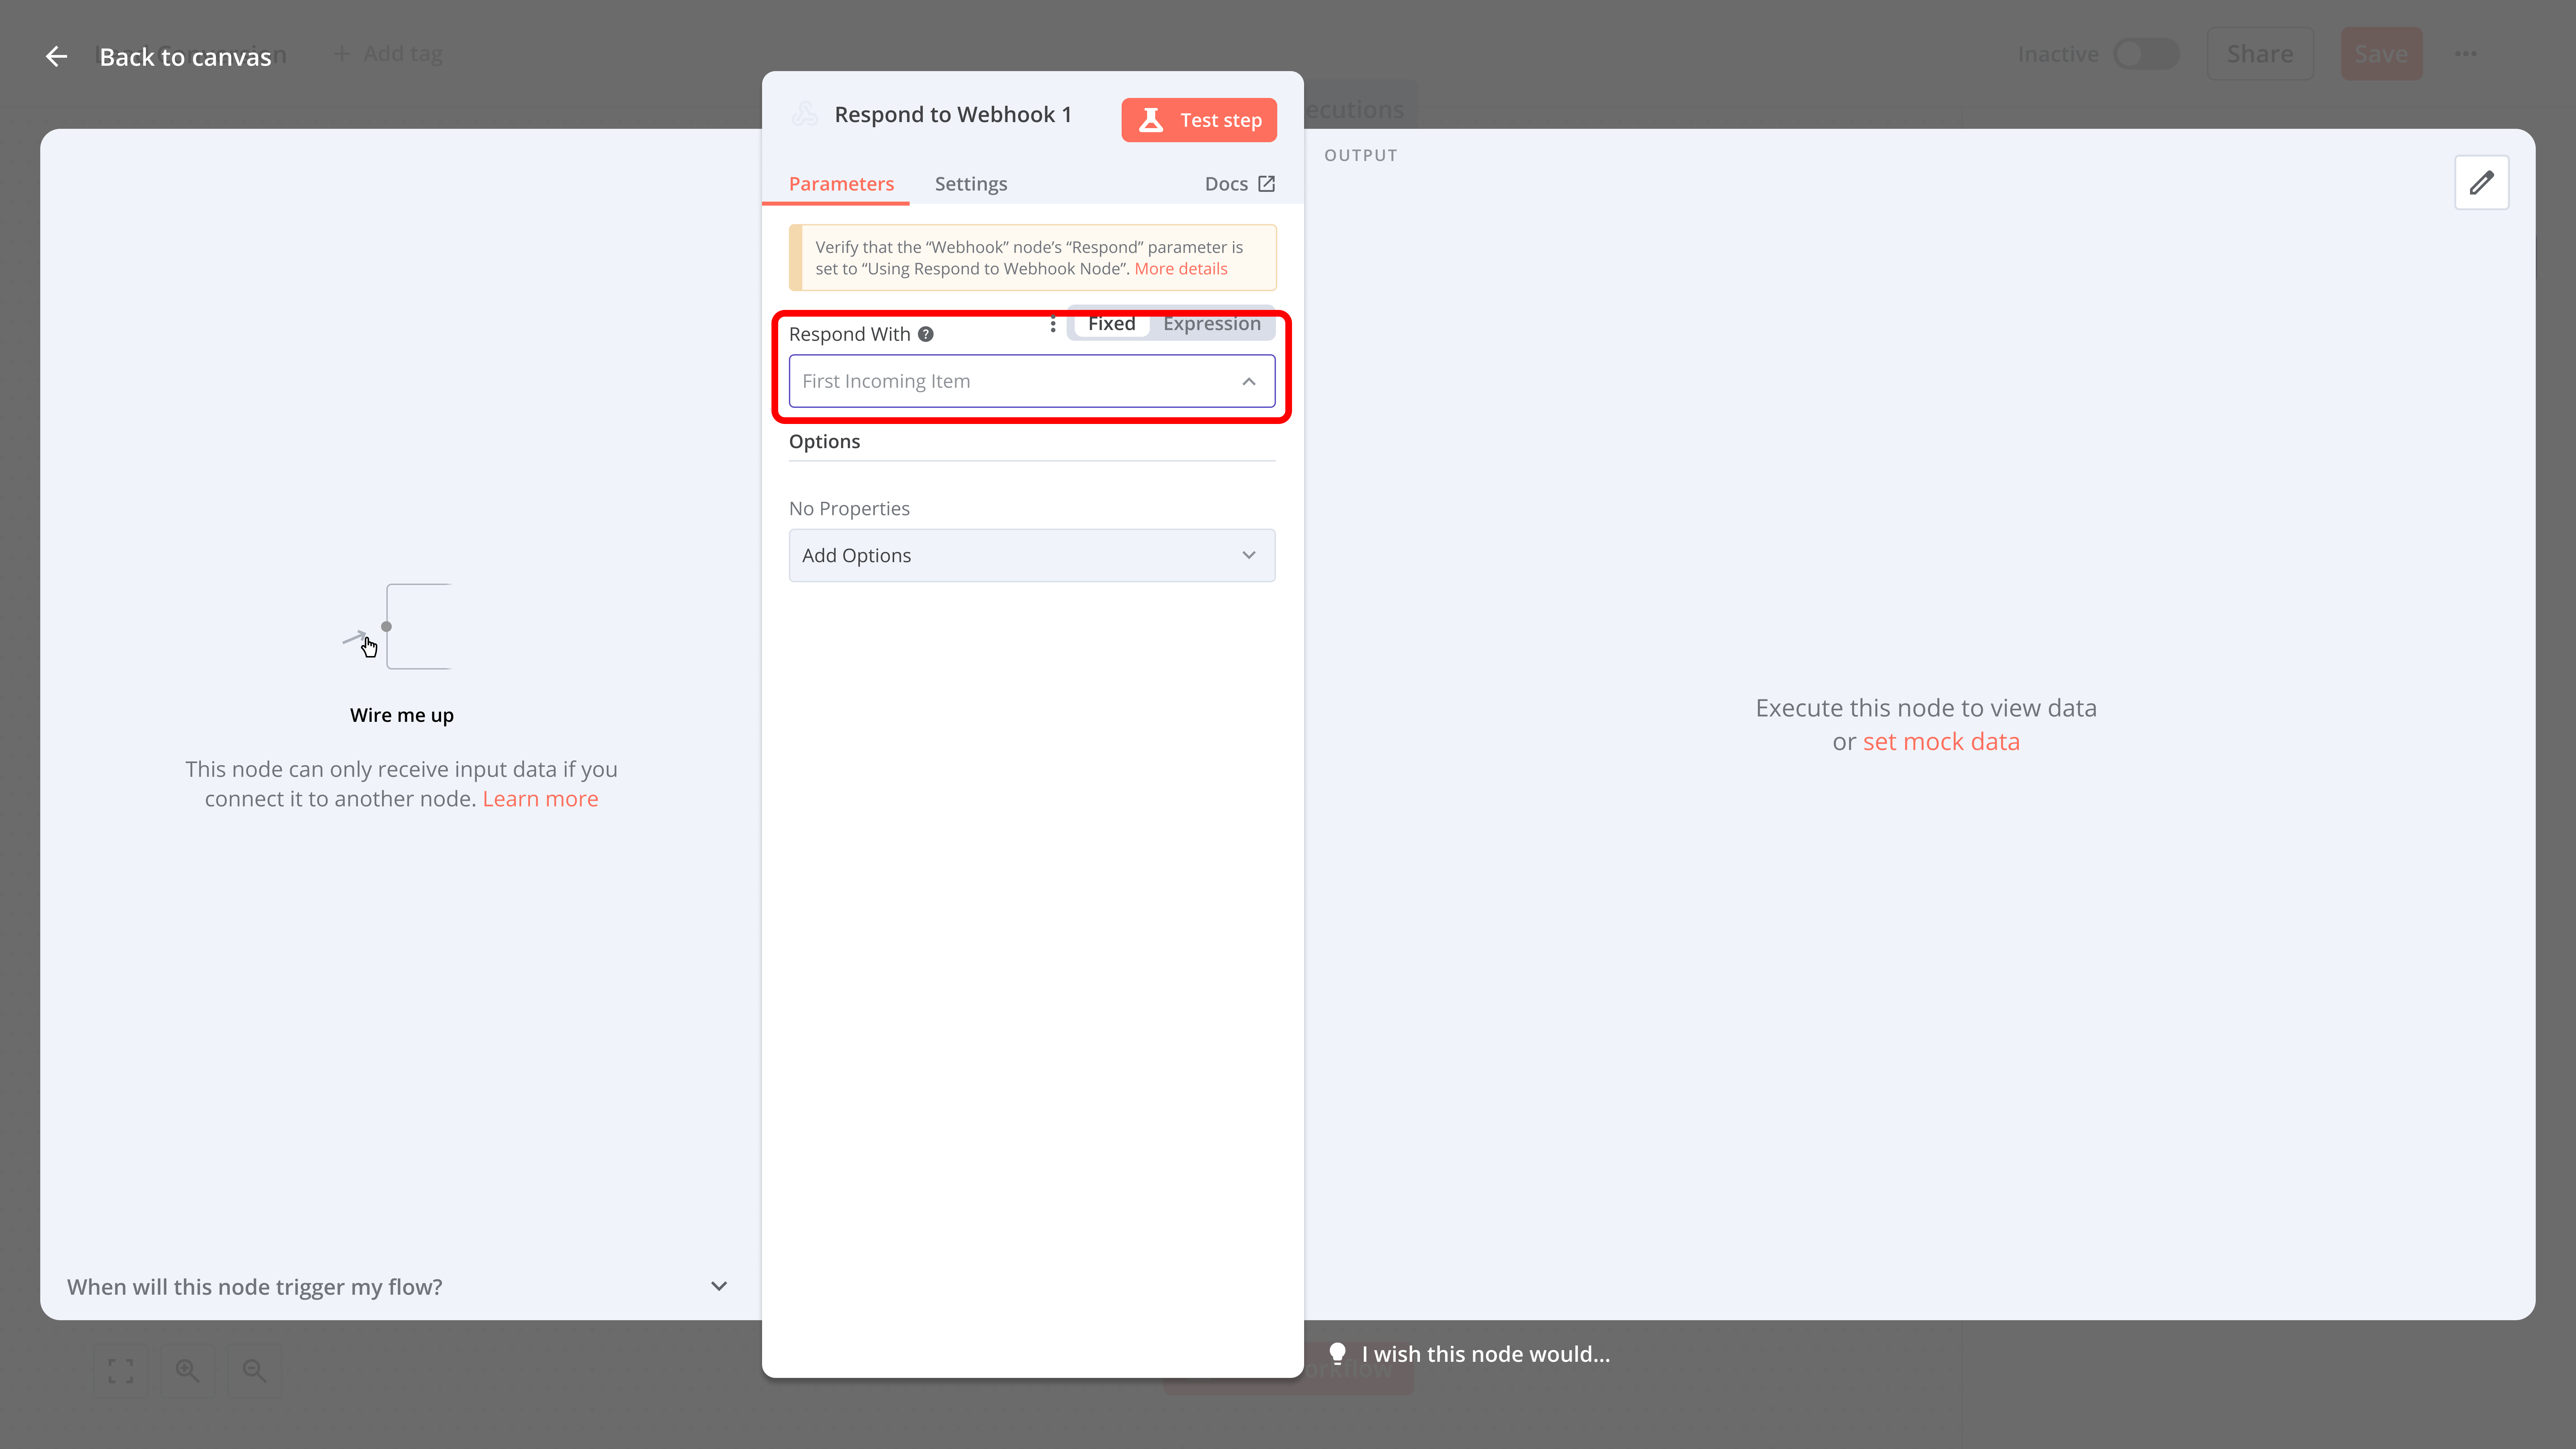
Setting Up Response Node
- Add "Respond to Webhook" node
- Select "First Incoming Item" from dropdown
- Configure response parameters
7. Flow Configuration
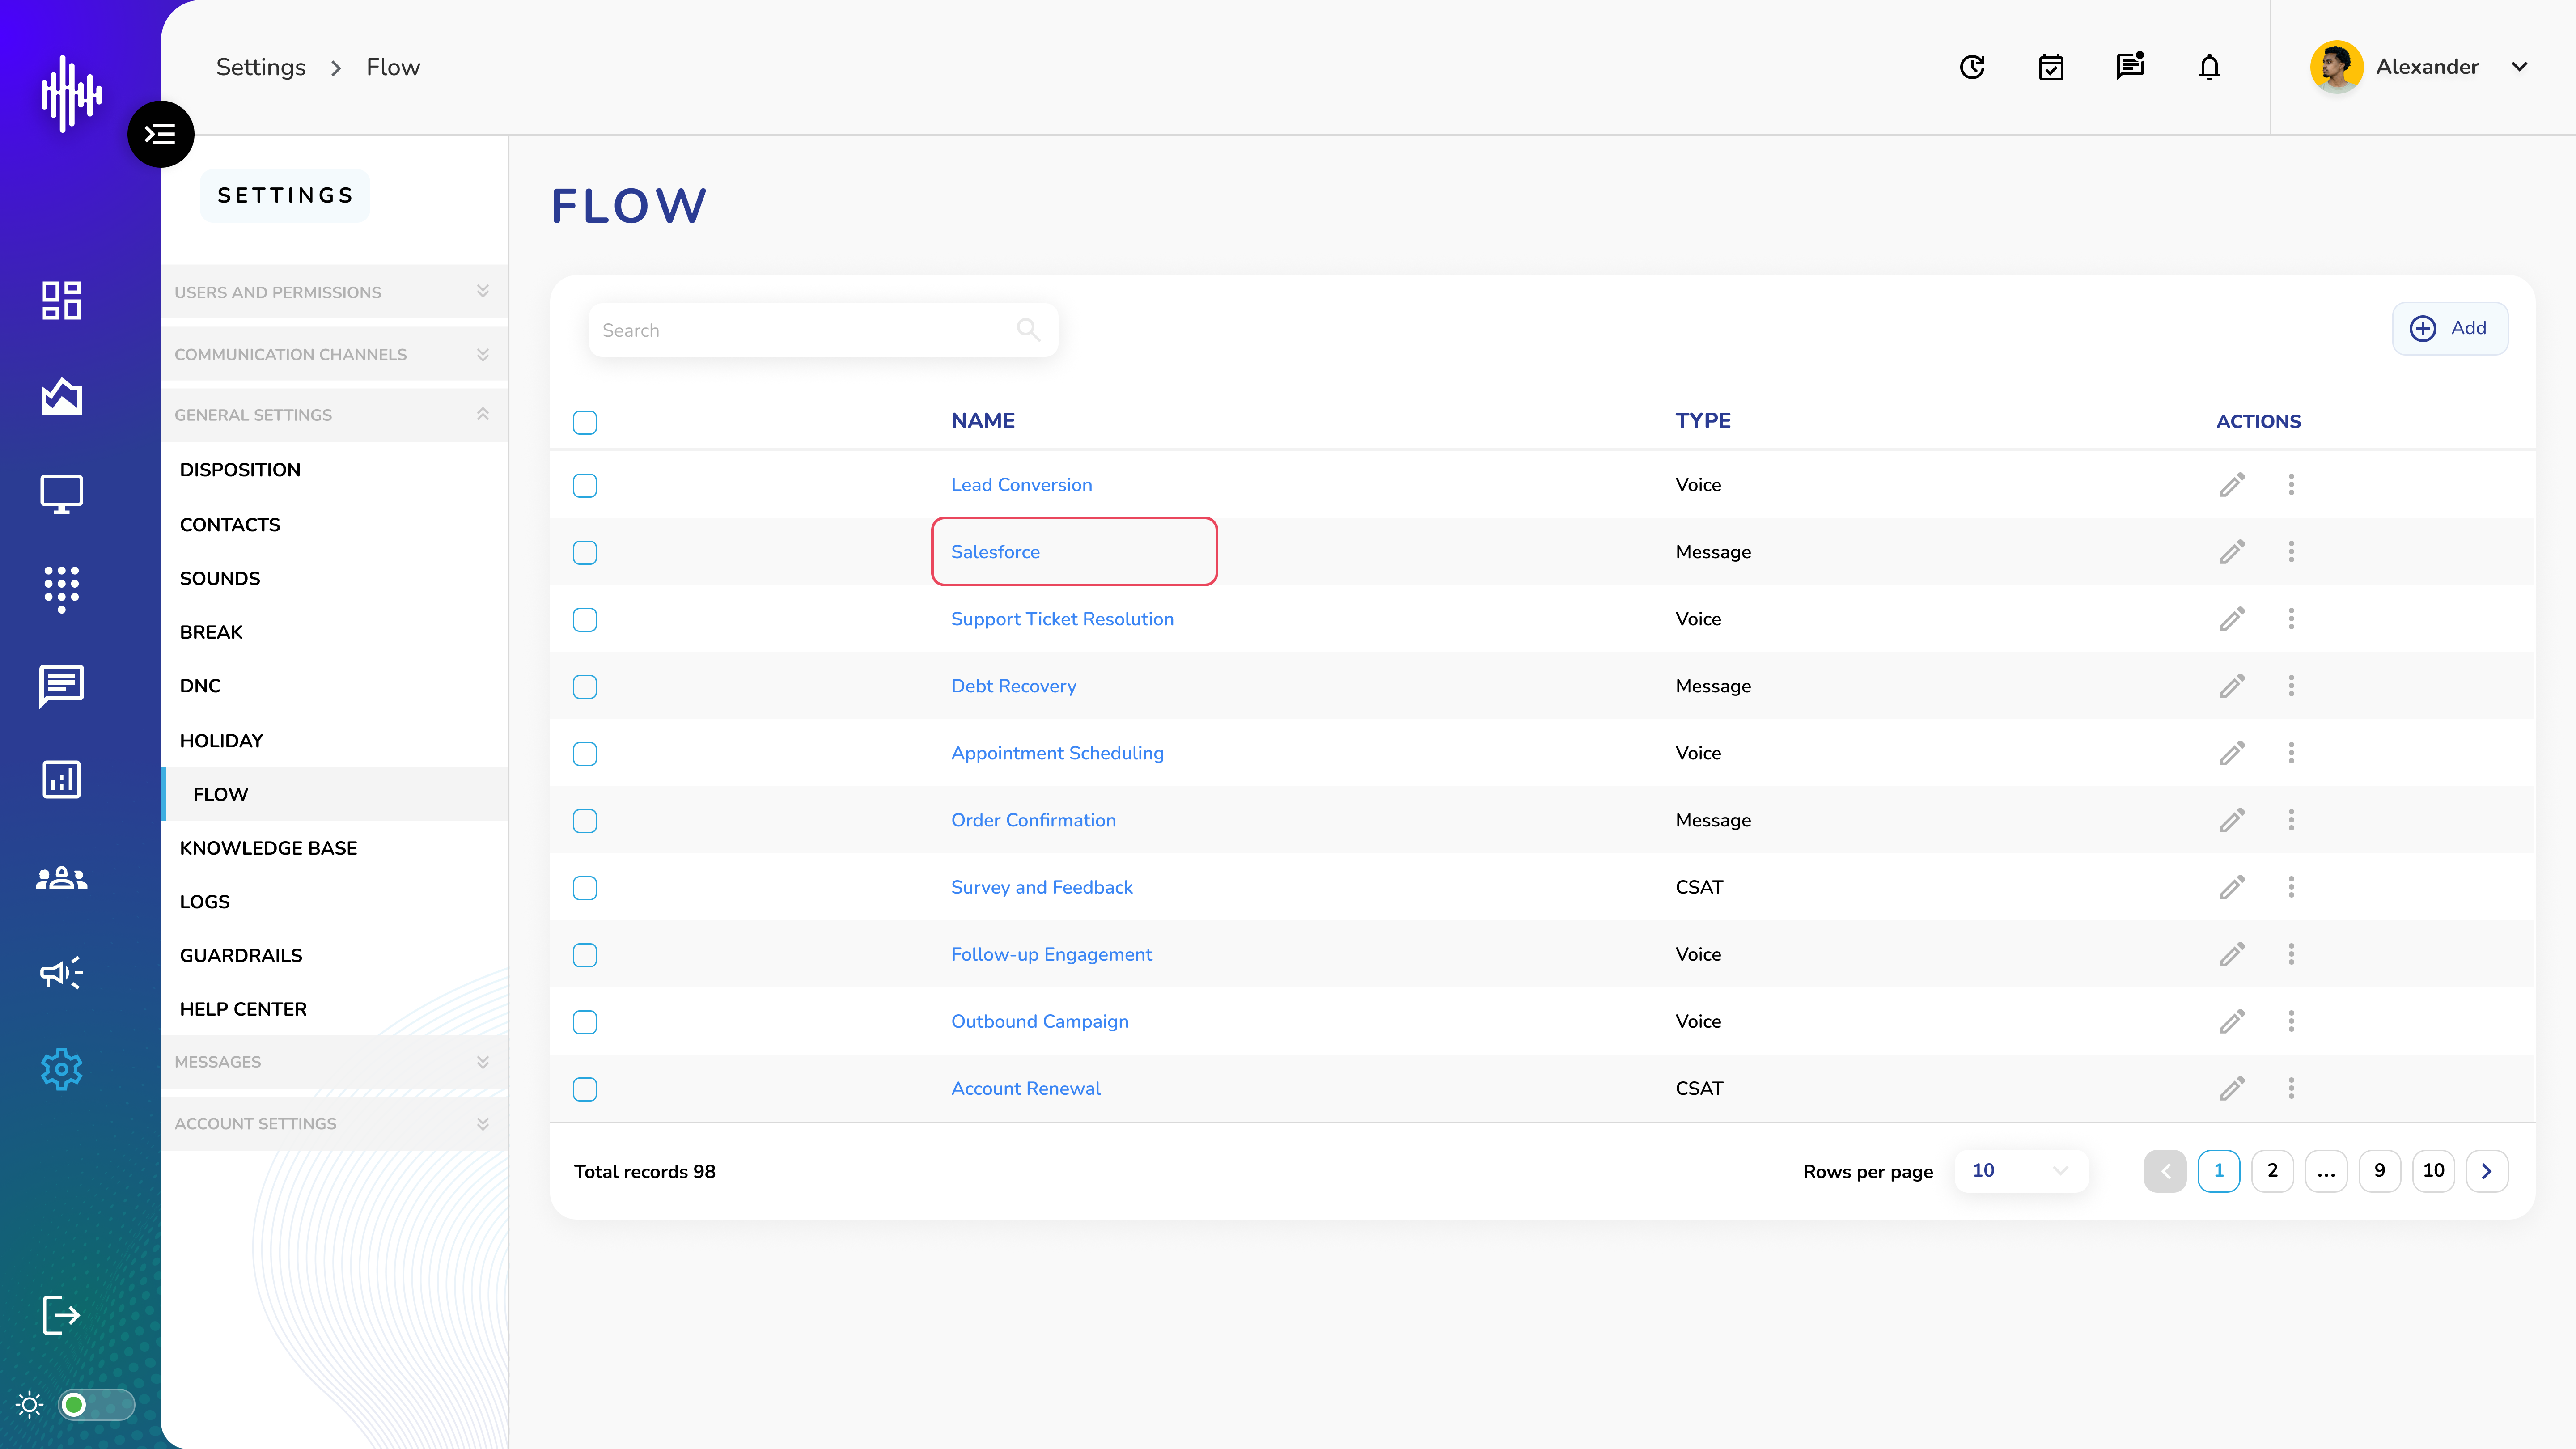
Accessing Flow Settings
- Navigate to Settings menu
- Select Flow option
- View existing flows list
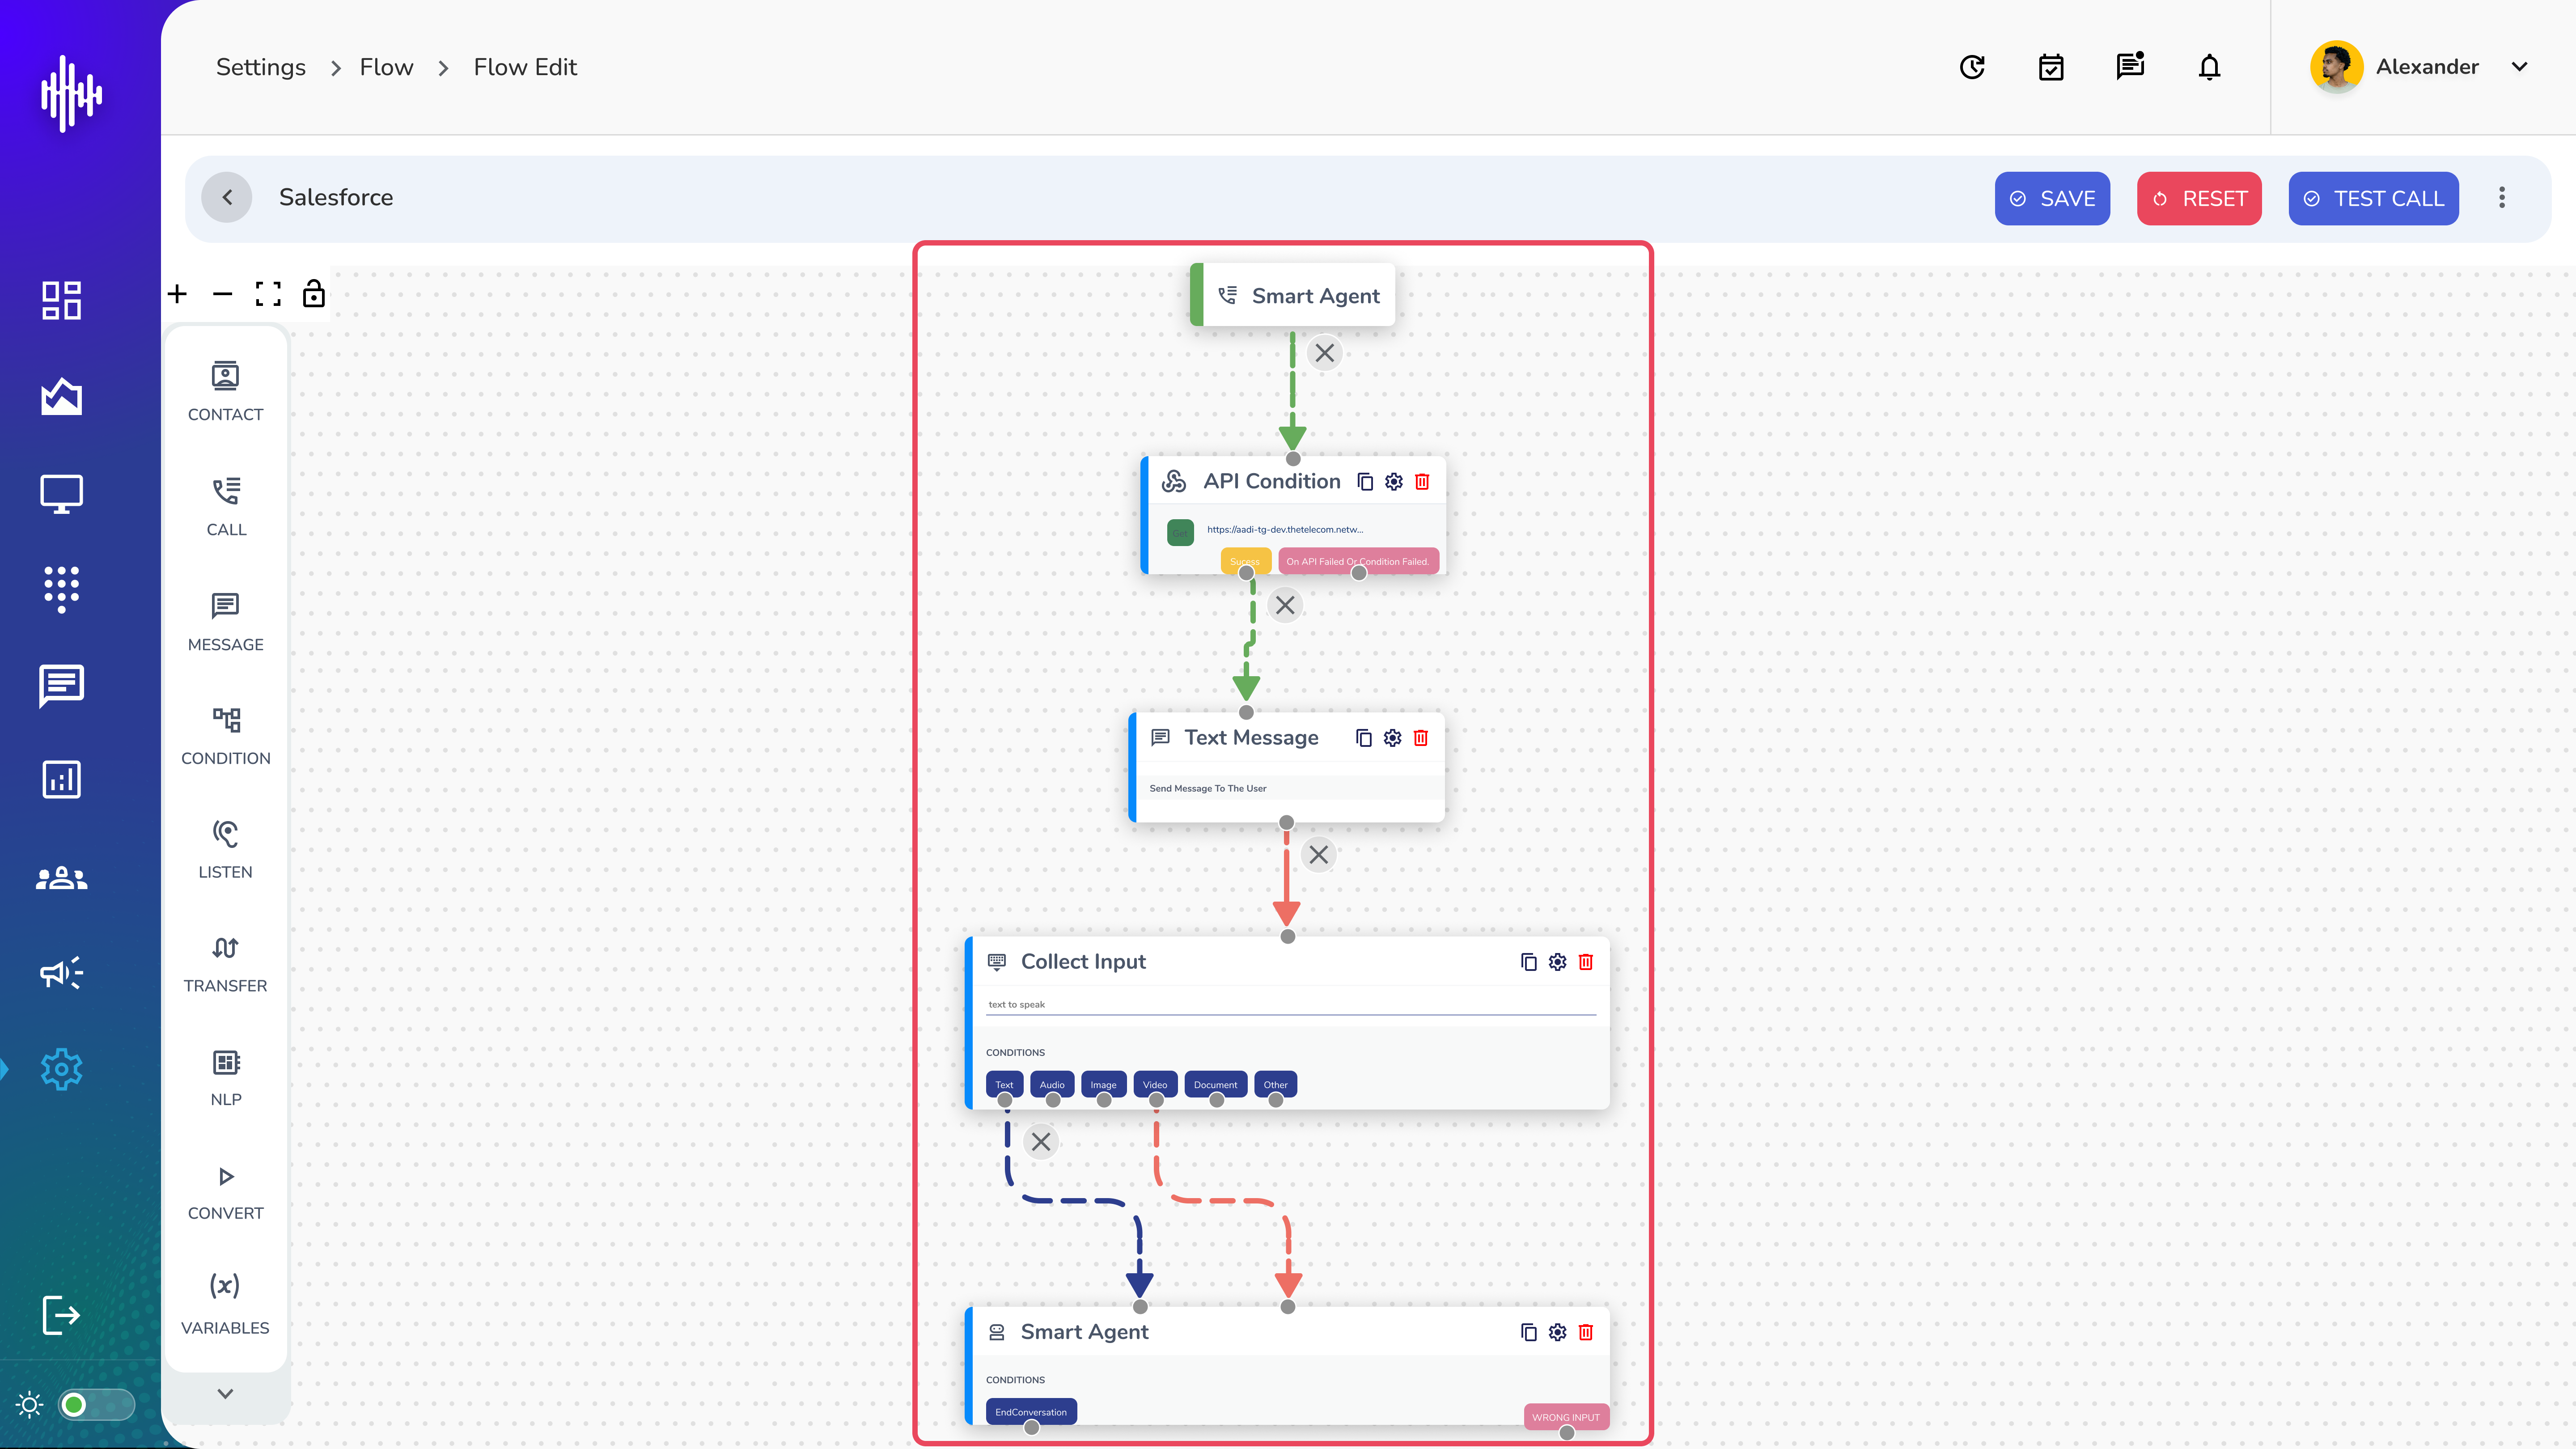
Visual Flow Editor
- Start Message initiates the flow
- API Condition manages integrations
- Additional nodes create complete workflow
- Connected pathways show data flow
API Configuration
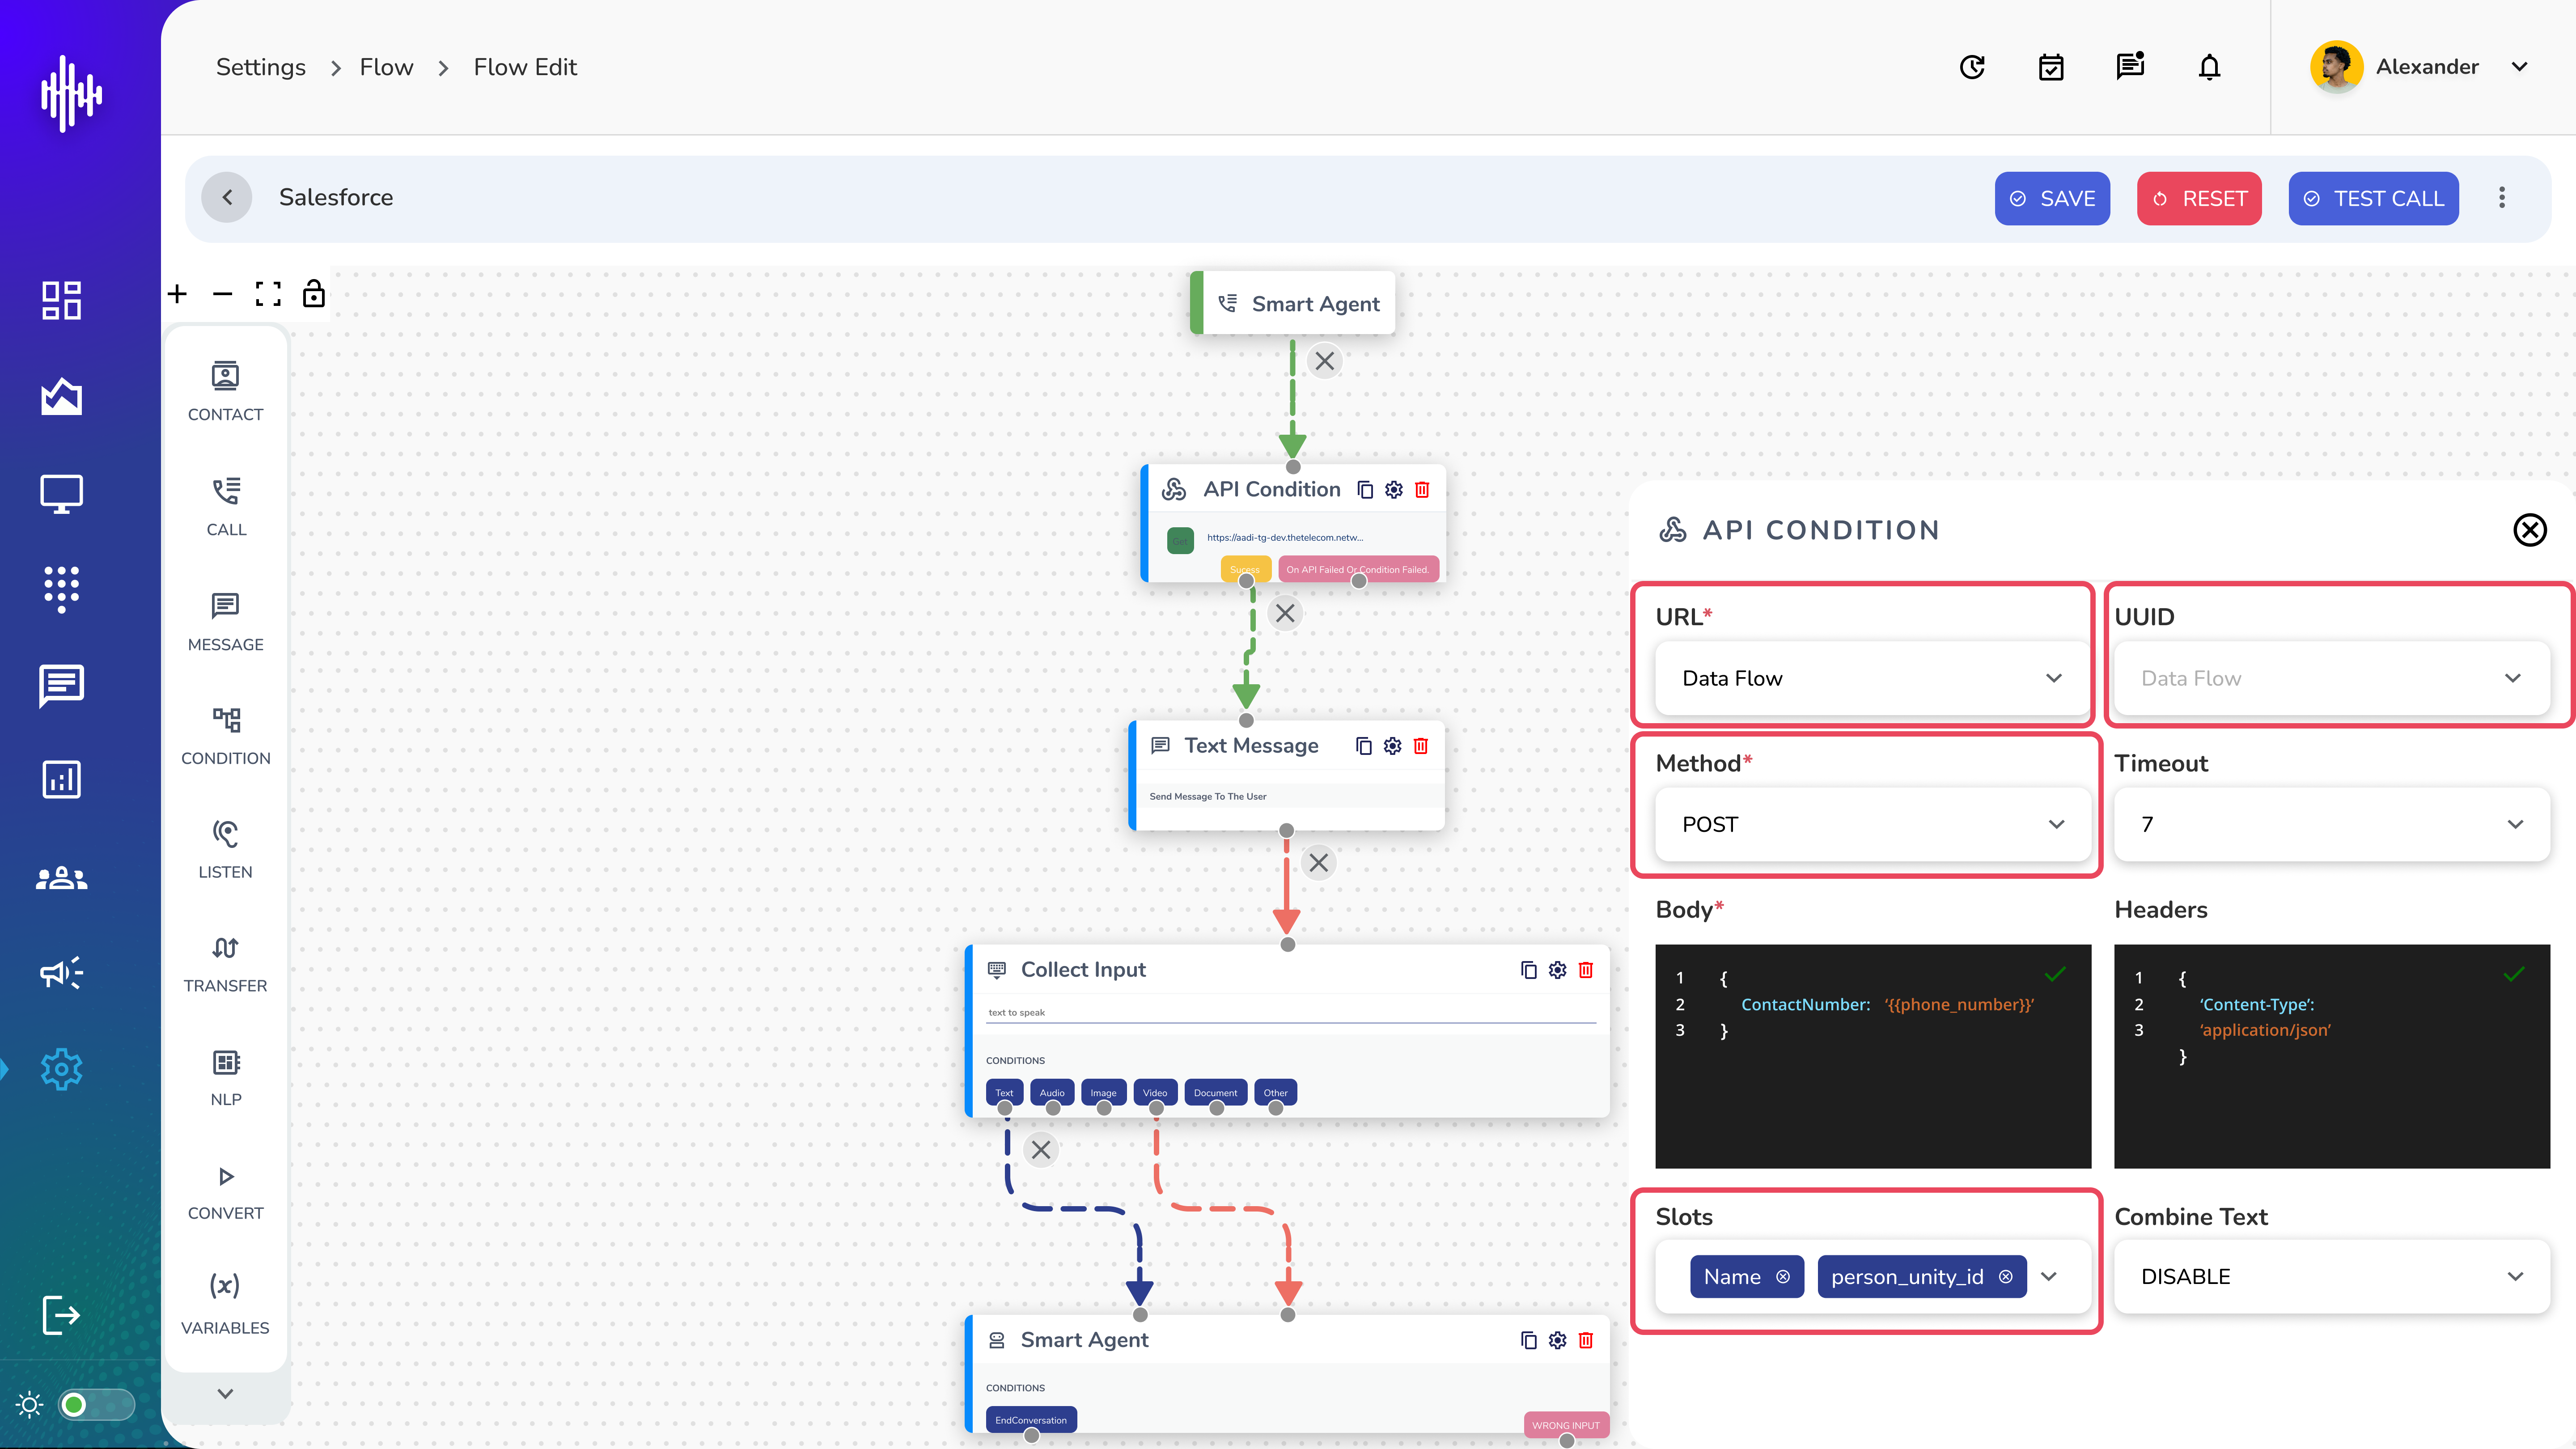
- Click settings gear on API Condition node
- Configure:
- Select dataflow
- Enter workflow UUID
- Choose method
- Define data slots
8. Testing and Deployment
Workflow Testing
- Use "Test workflow" button
- Verify all connections
- Validate data flow
- Check trigger responses
Activation Process
- Review configuration
- Test comprehensive workflow
- Monitor initial operations
- Activate for production use
9. Best Practices
Security Guidelines
- Implement proper authentication
- Secure webhook endpoints
- Regular security reviews
- Monitor access logs
Performance Optimization
- Optimize query structures
- Monitor response times
- Regular maintenance checks
- Validate data handling
10. Troubleshooting
Common Issues
- Connection failures
- Authentication errors
- Data synchronization issues
- Trigger response problems
Resolution Steps
- Verify credentials
- Check network connectivity
- Validate data formats
- Review system logs
Support Resources
- Technical documentation access
- API reference guides
- Support contact information
- Knowledge base resources
Maintenance
- Regular monitoring requirements
- Performance optimization tips
- Security update procedures
- Feature enhancement tracking