Contact
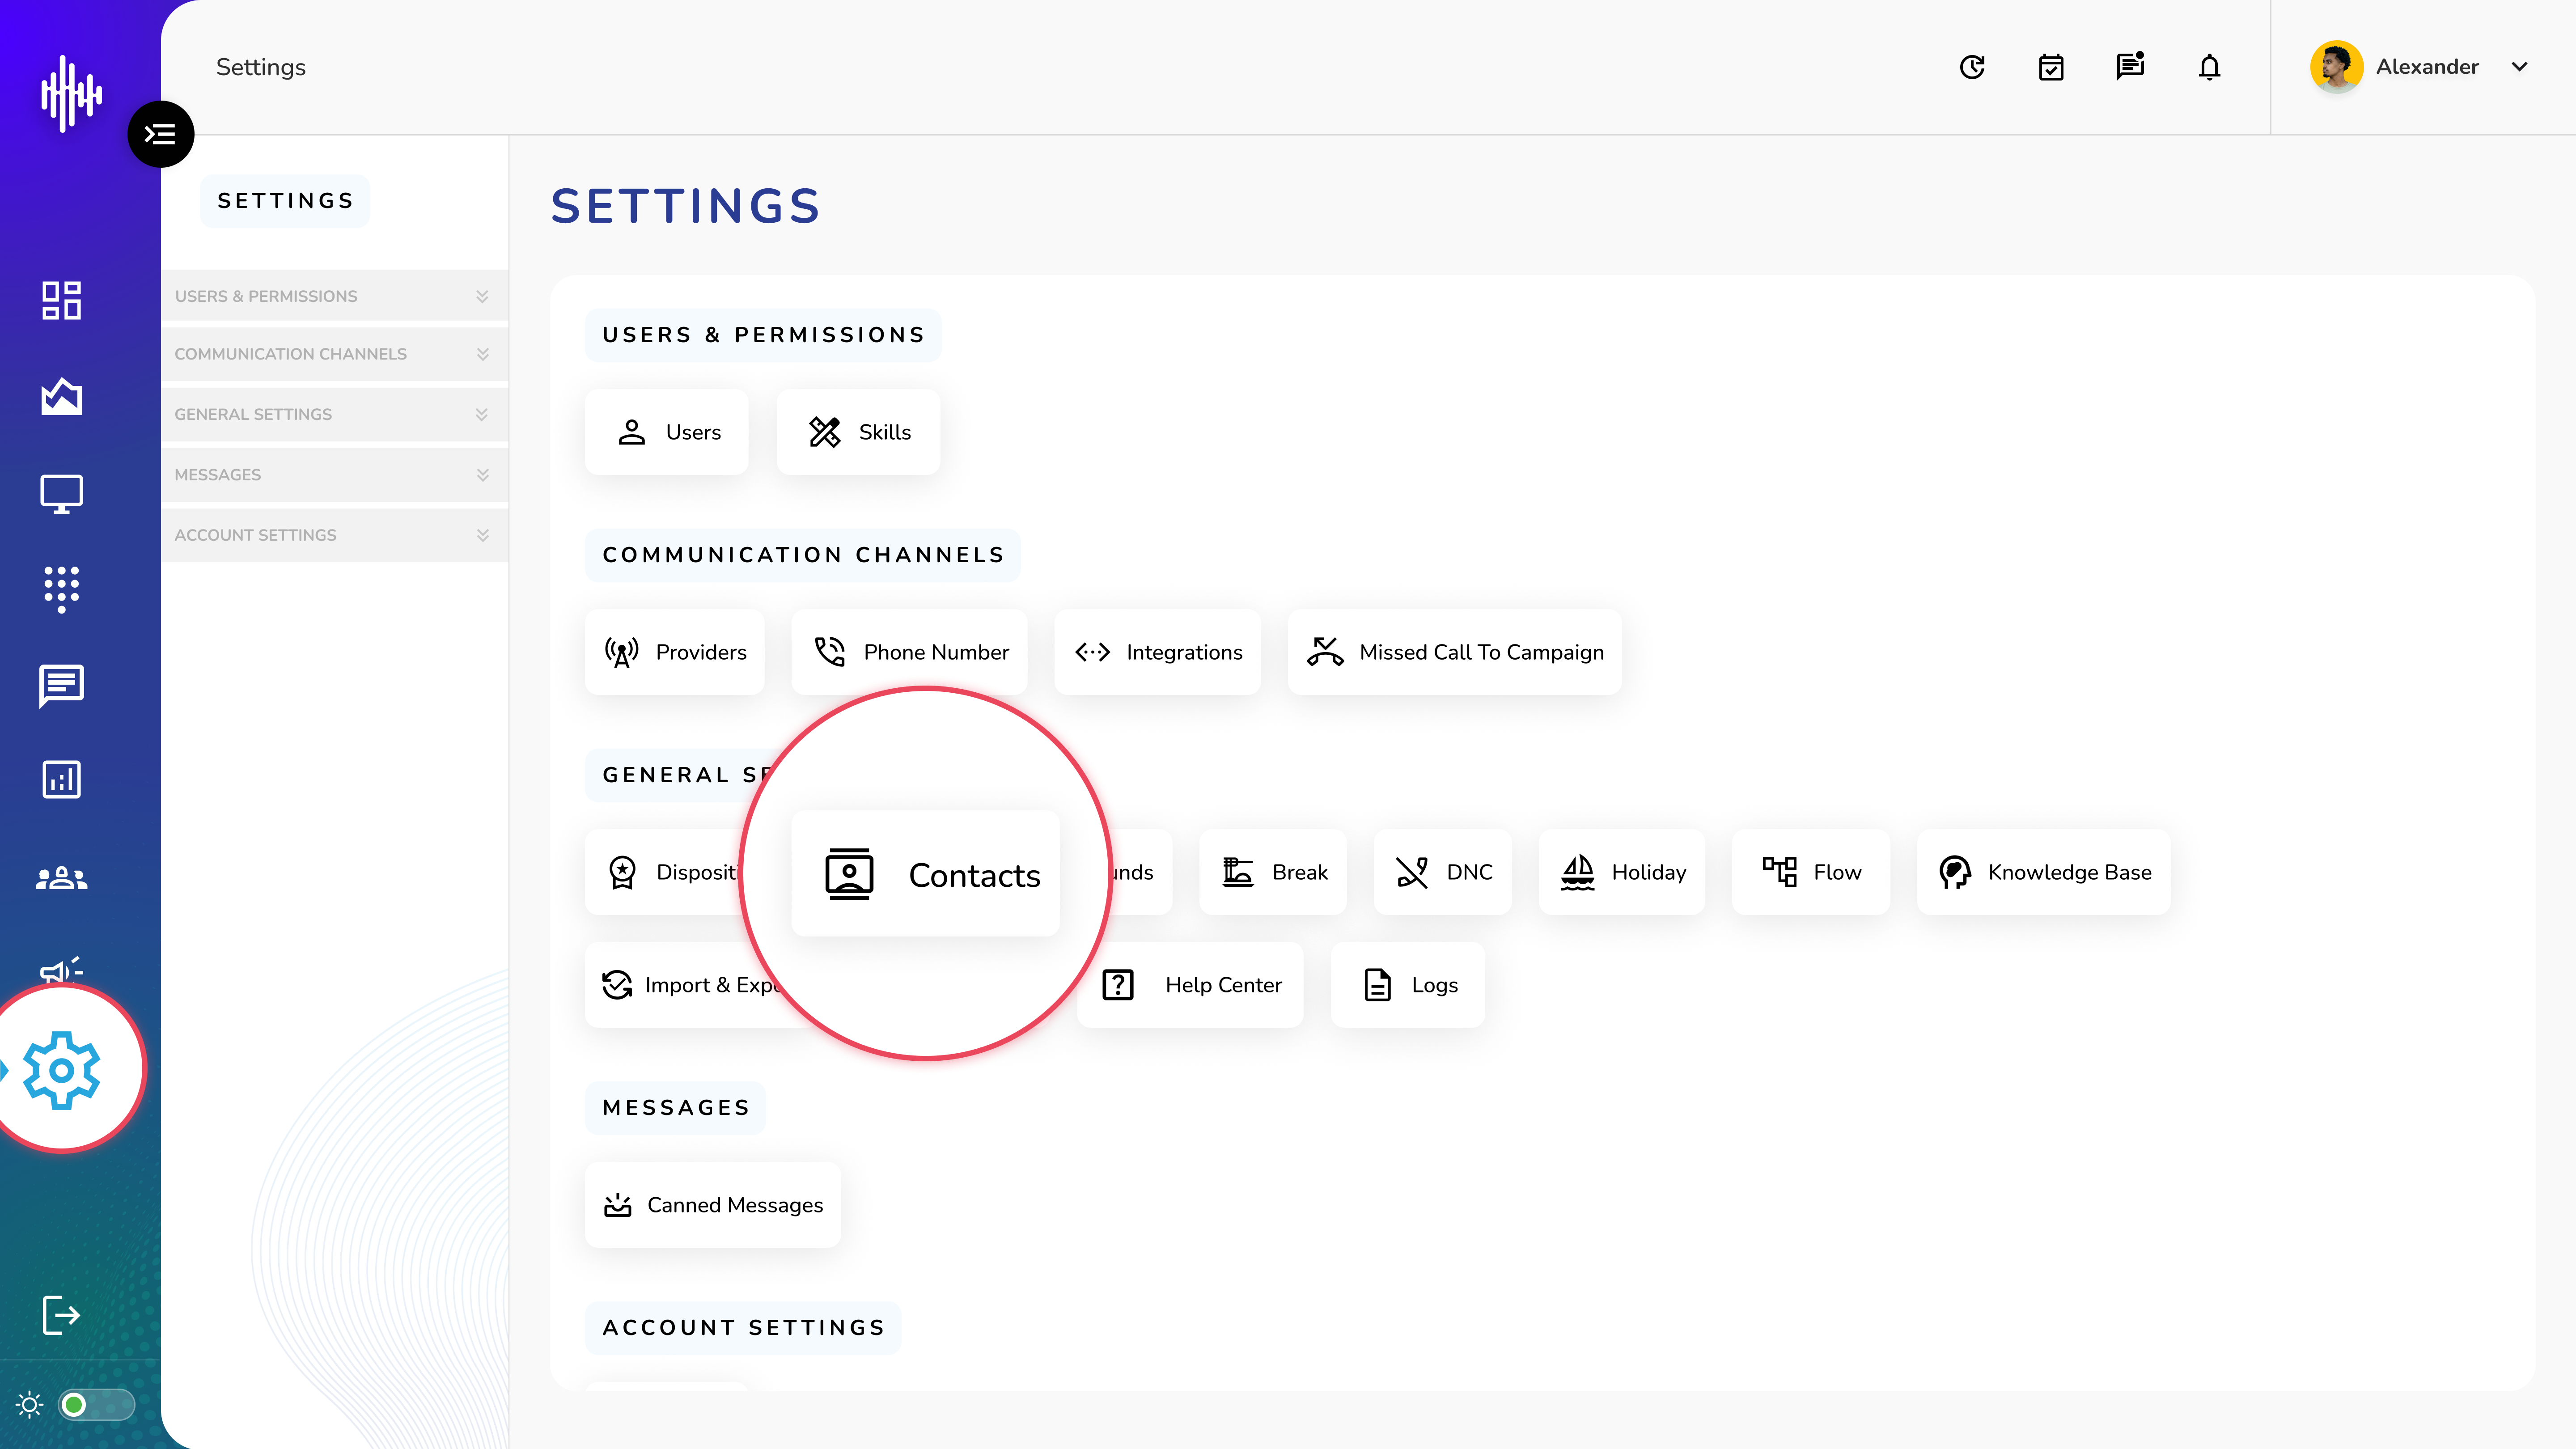
1. Login to your admin account
2. Click "Settings" from the left side menu
3. Click “Contacts” to access the Contact List's details.
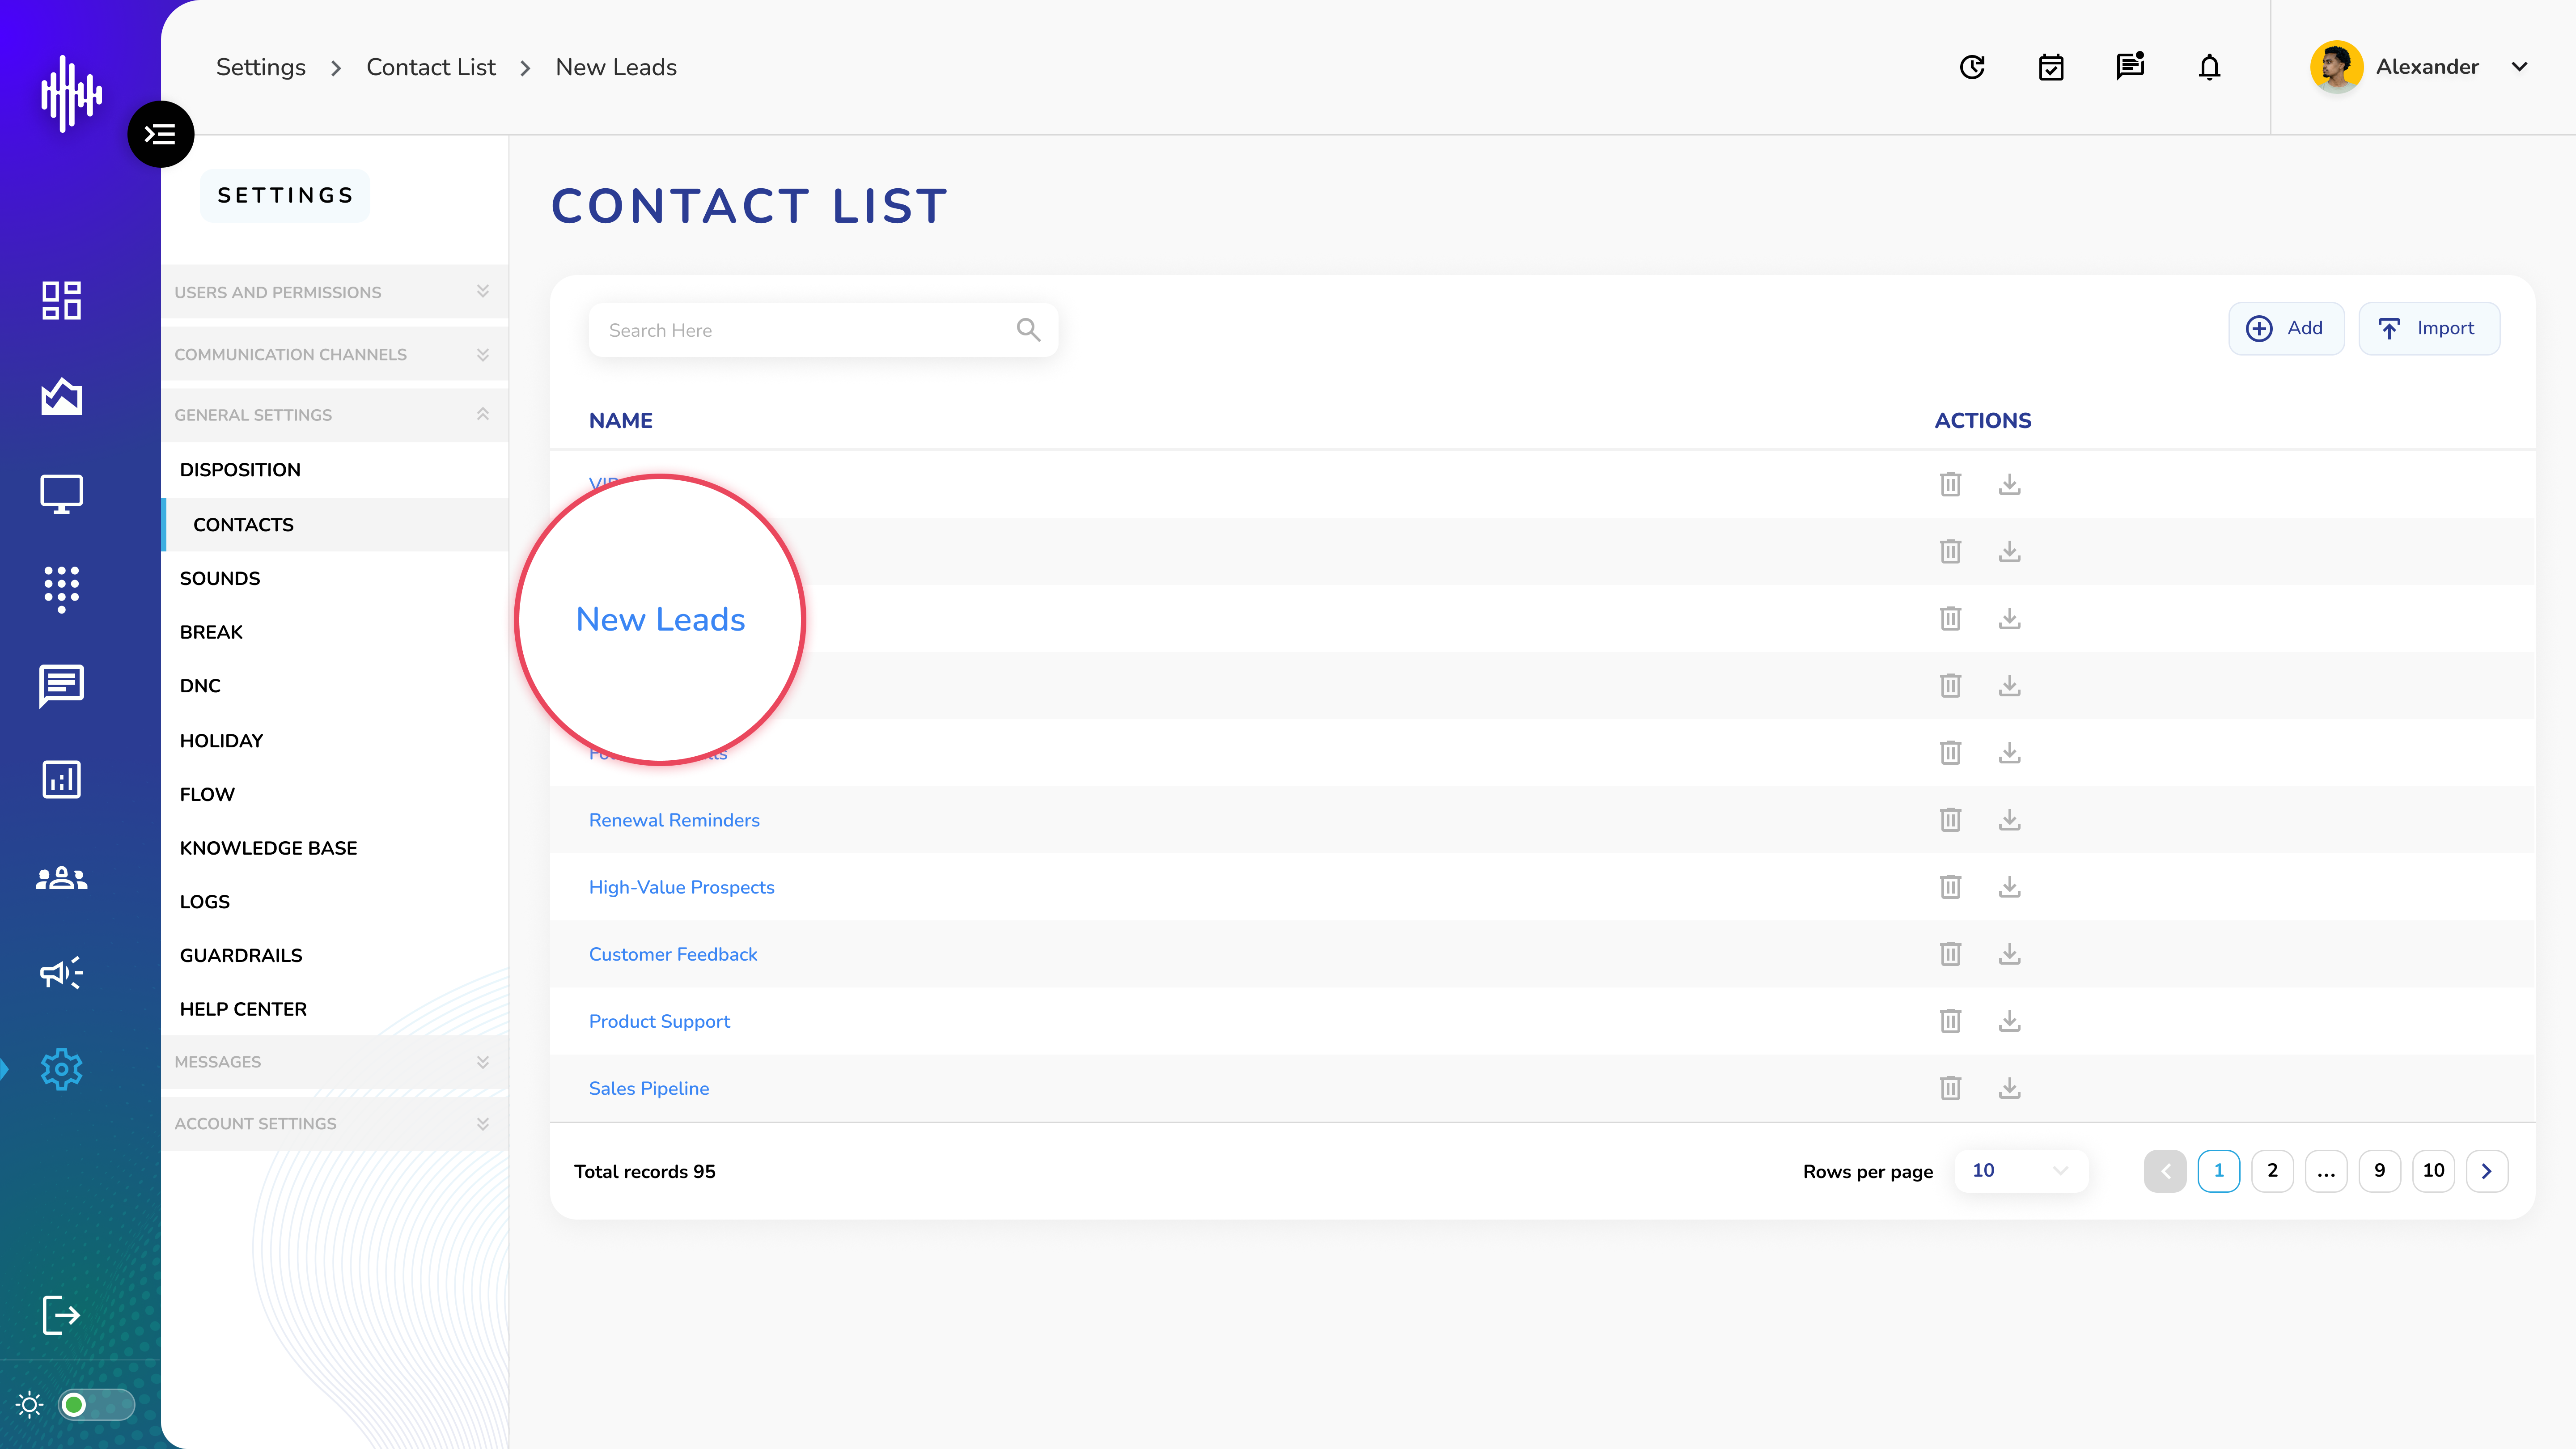
4. Click on the Name of the Contact List
5. Got access the Contact's details.
Contact Management Guide
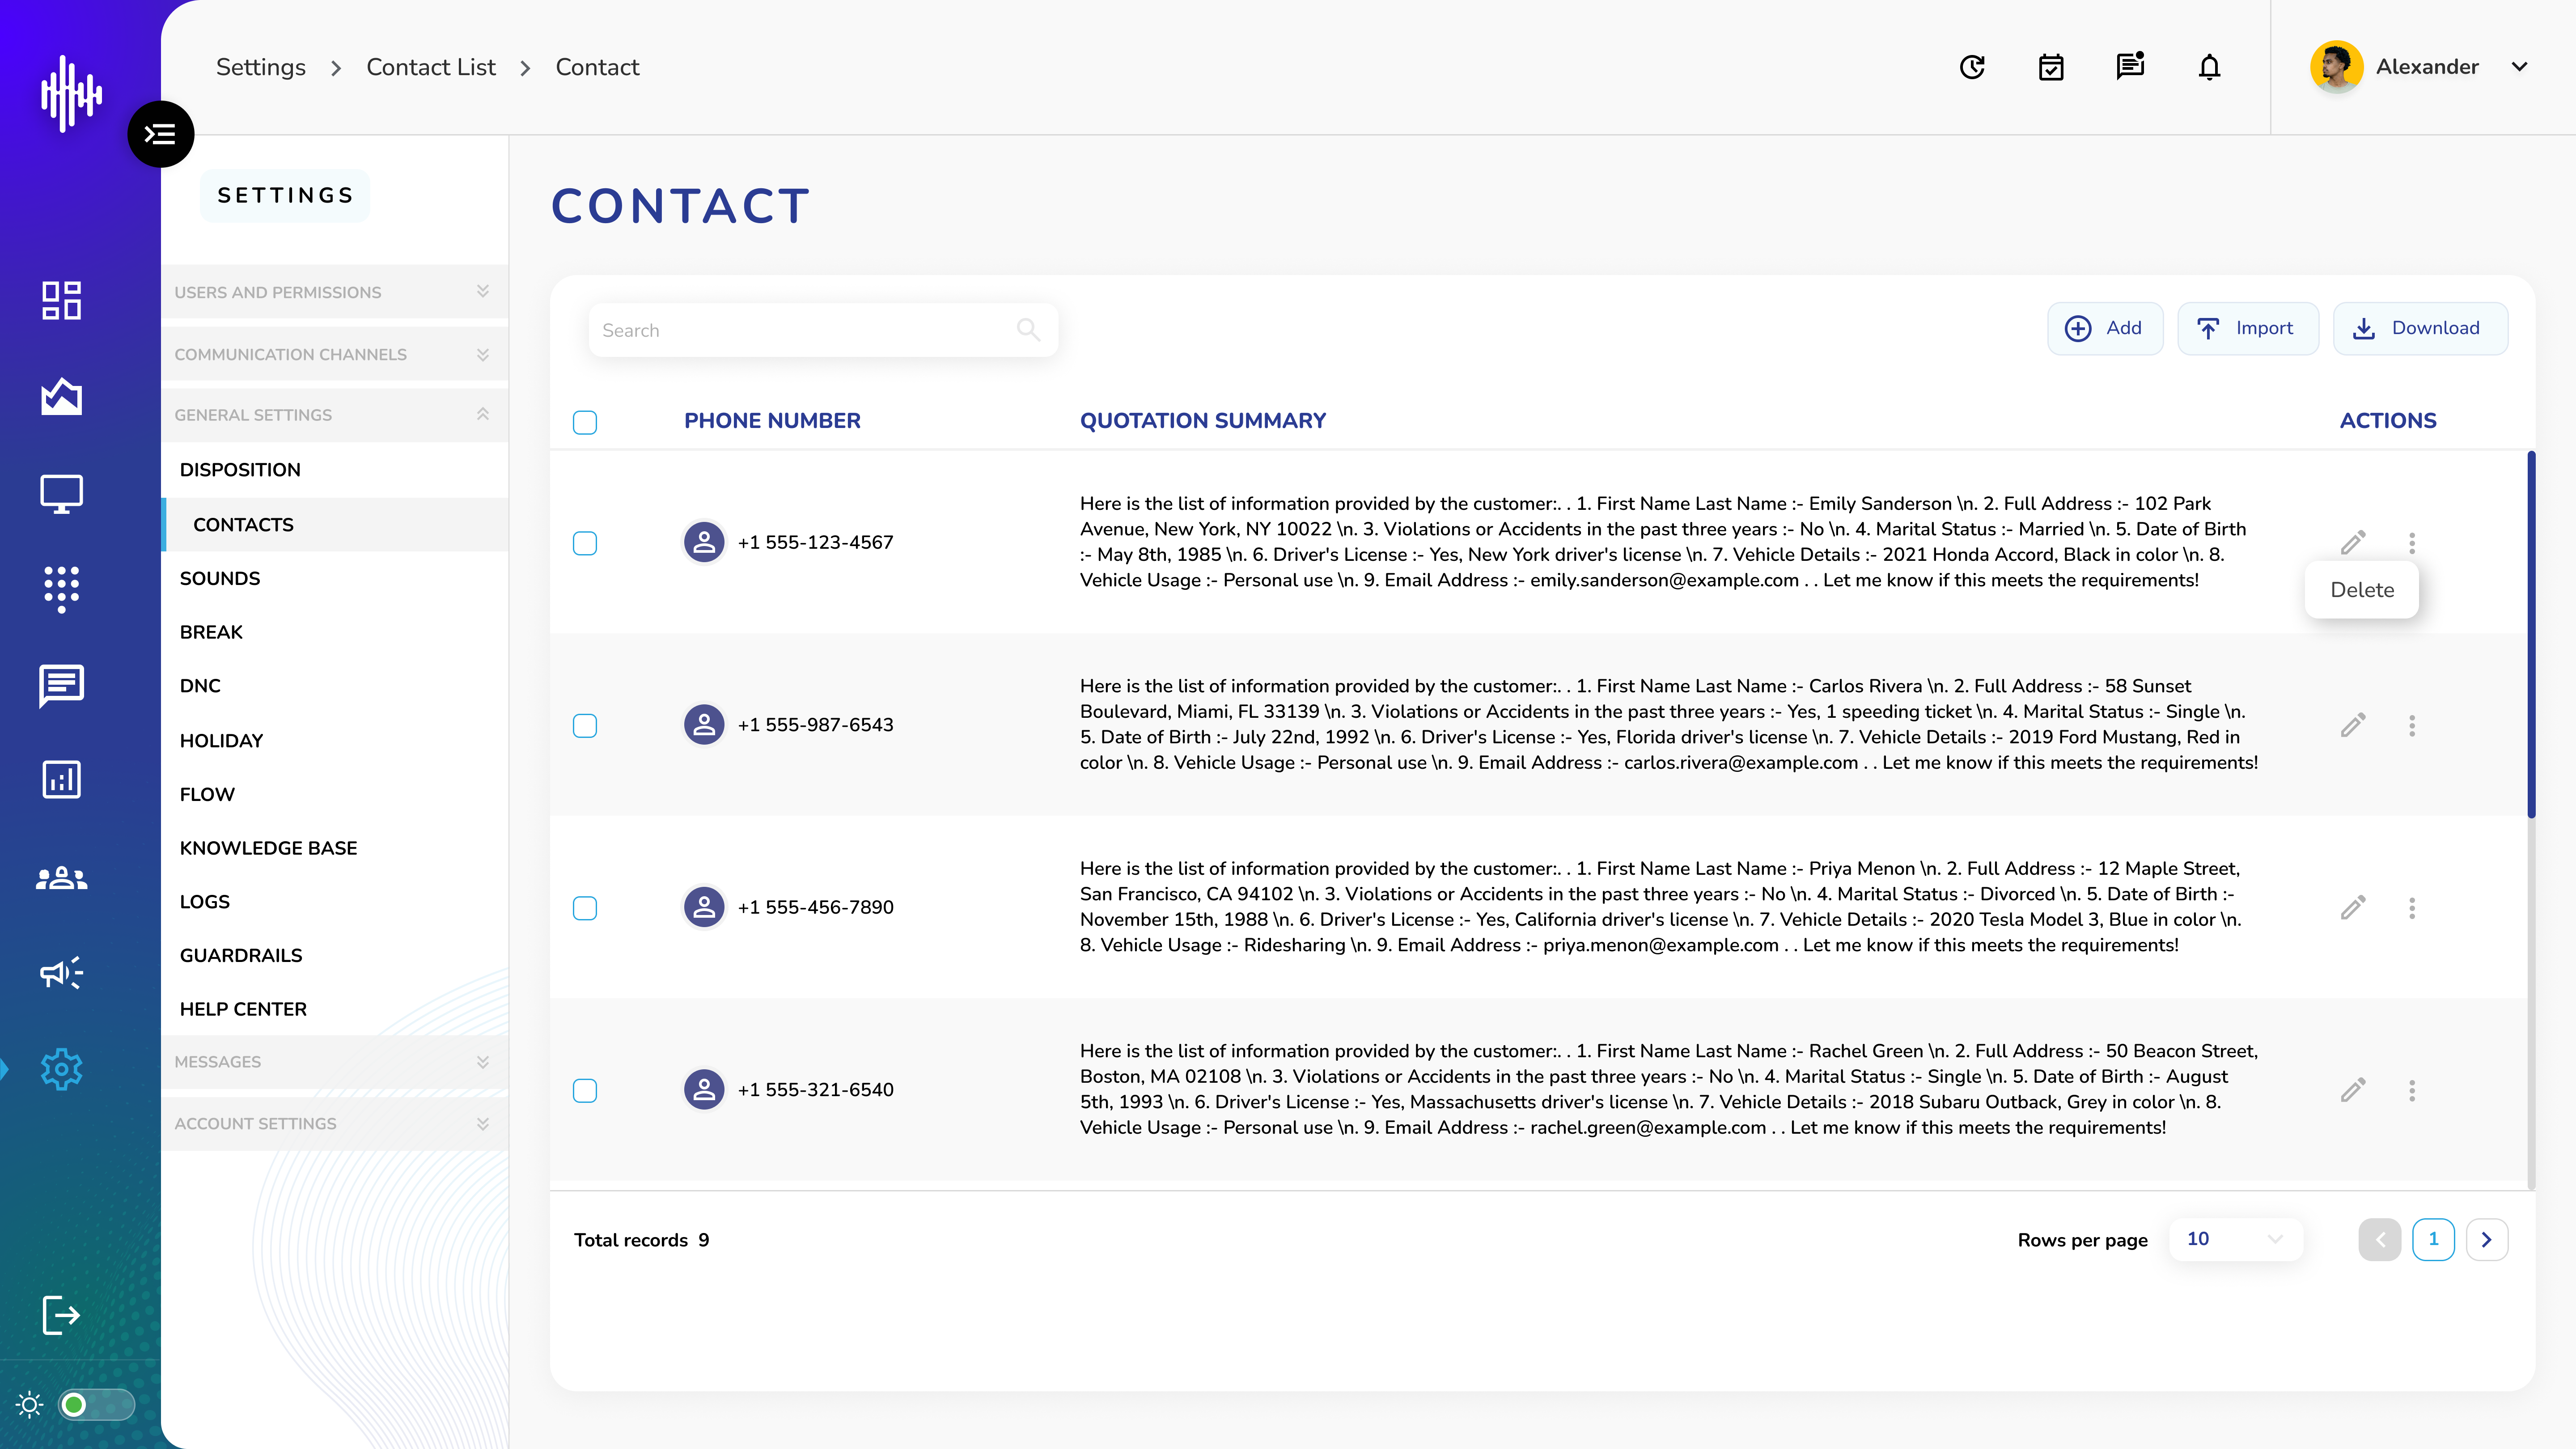
1. Contact View Screen Overview
a. Contact Display
i. Default column: Phone Number (Fixed)
ii. Additional columns: Custom fields based on setup
b. Top Bar Tools
i. Left: Search bar to find contacts
ii. Right: Action buttons
1. "+Add" for new contacts
2. "Import" for bulk uploads
3. "Download" for list export
c. Bottom Navigation
i. Page numbers
ii. Records per page selector
iii. Previous/Next buttons
2. Action Functions
a. New Contact ("+Add")
i. Enter required phone number
ii. Fill in custom field values
iii. Save to add to list
b. Import Contacts
i. Upload CSV file
ii. Map CSV columns to list fields
iii. Import multiple contacts at once
c. Download List
i. Exports all contacts
ii. Includes all field data
iii. Saves as CSV format
3. Search and Navigation
a. Use search bar for quick lookups
b. Sort any column by clicking header
c. Navigate pages using bottom controls
Important Notes:
-
Each contact must have a phone number
-
Custom fields appear as columns
-
Search works across all fields
-
Sort available on all columns
Add New Contact Guide
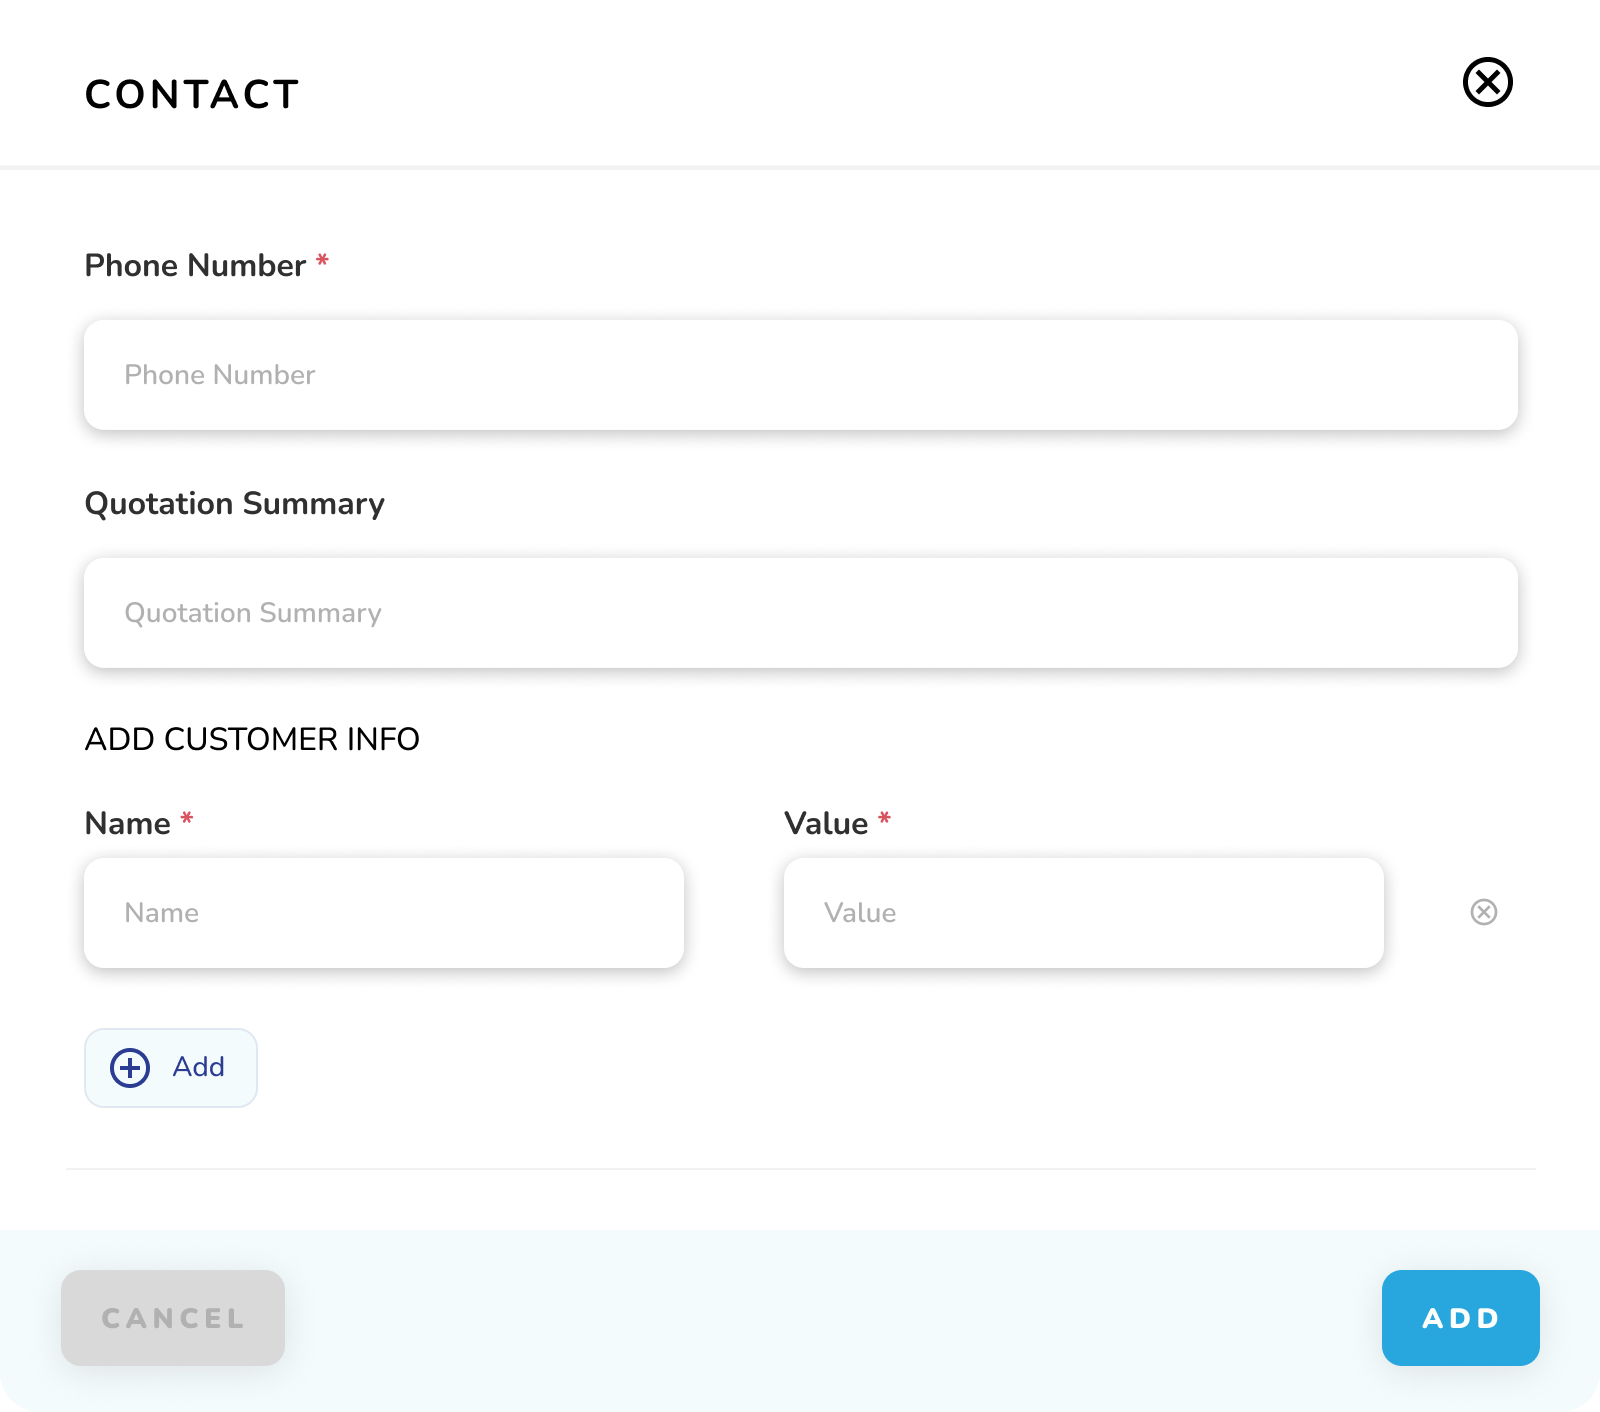
1. Required Information
a. Basic Details
i. Phone Number* (Required)
b. Custom Information Fields
i. Name*: Field label/header
ii. Value*: Corresponding data
iii. Multiple fields can be added using "+Add" button
2. Steps to Add Contact
a. Enter phone number
b. Add customer information:
i. Click "+Add" button
ii. Enter field Name (e.g., "Email", "Address")
iii. Enter corresponding Value
iv. Repeat for additional fields
3. Controls
a. "+Add": Add more custom fields
b. "CANCEL": Exit without saving
c. "ADD": Save new contact
Important Notes:
-
Fields marked with * are mandatory
-
Each custom field requires both Name and Value
-
Custom fields will appear as columns in contact list
-
Phone number must be unique