Flow
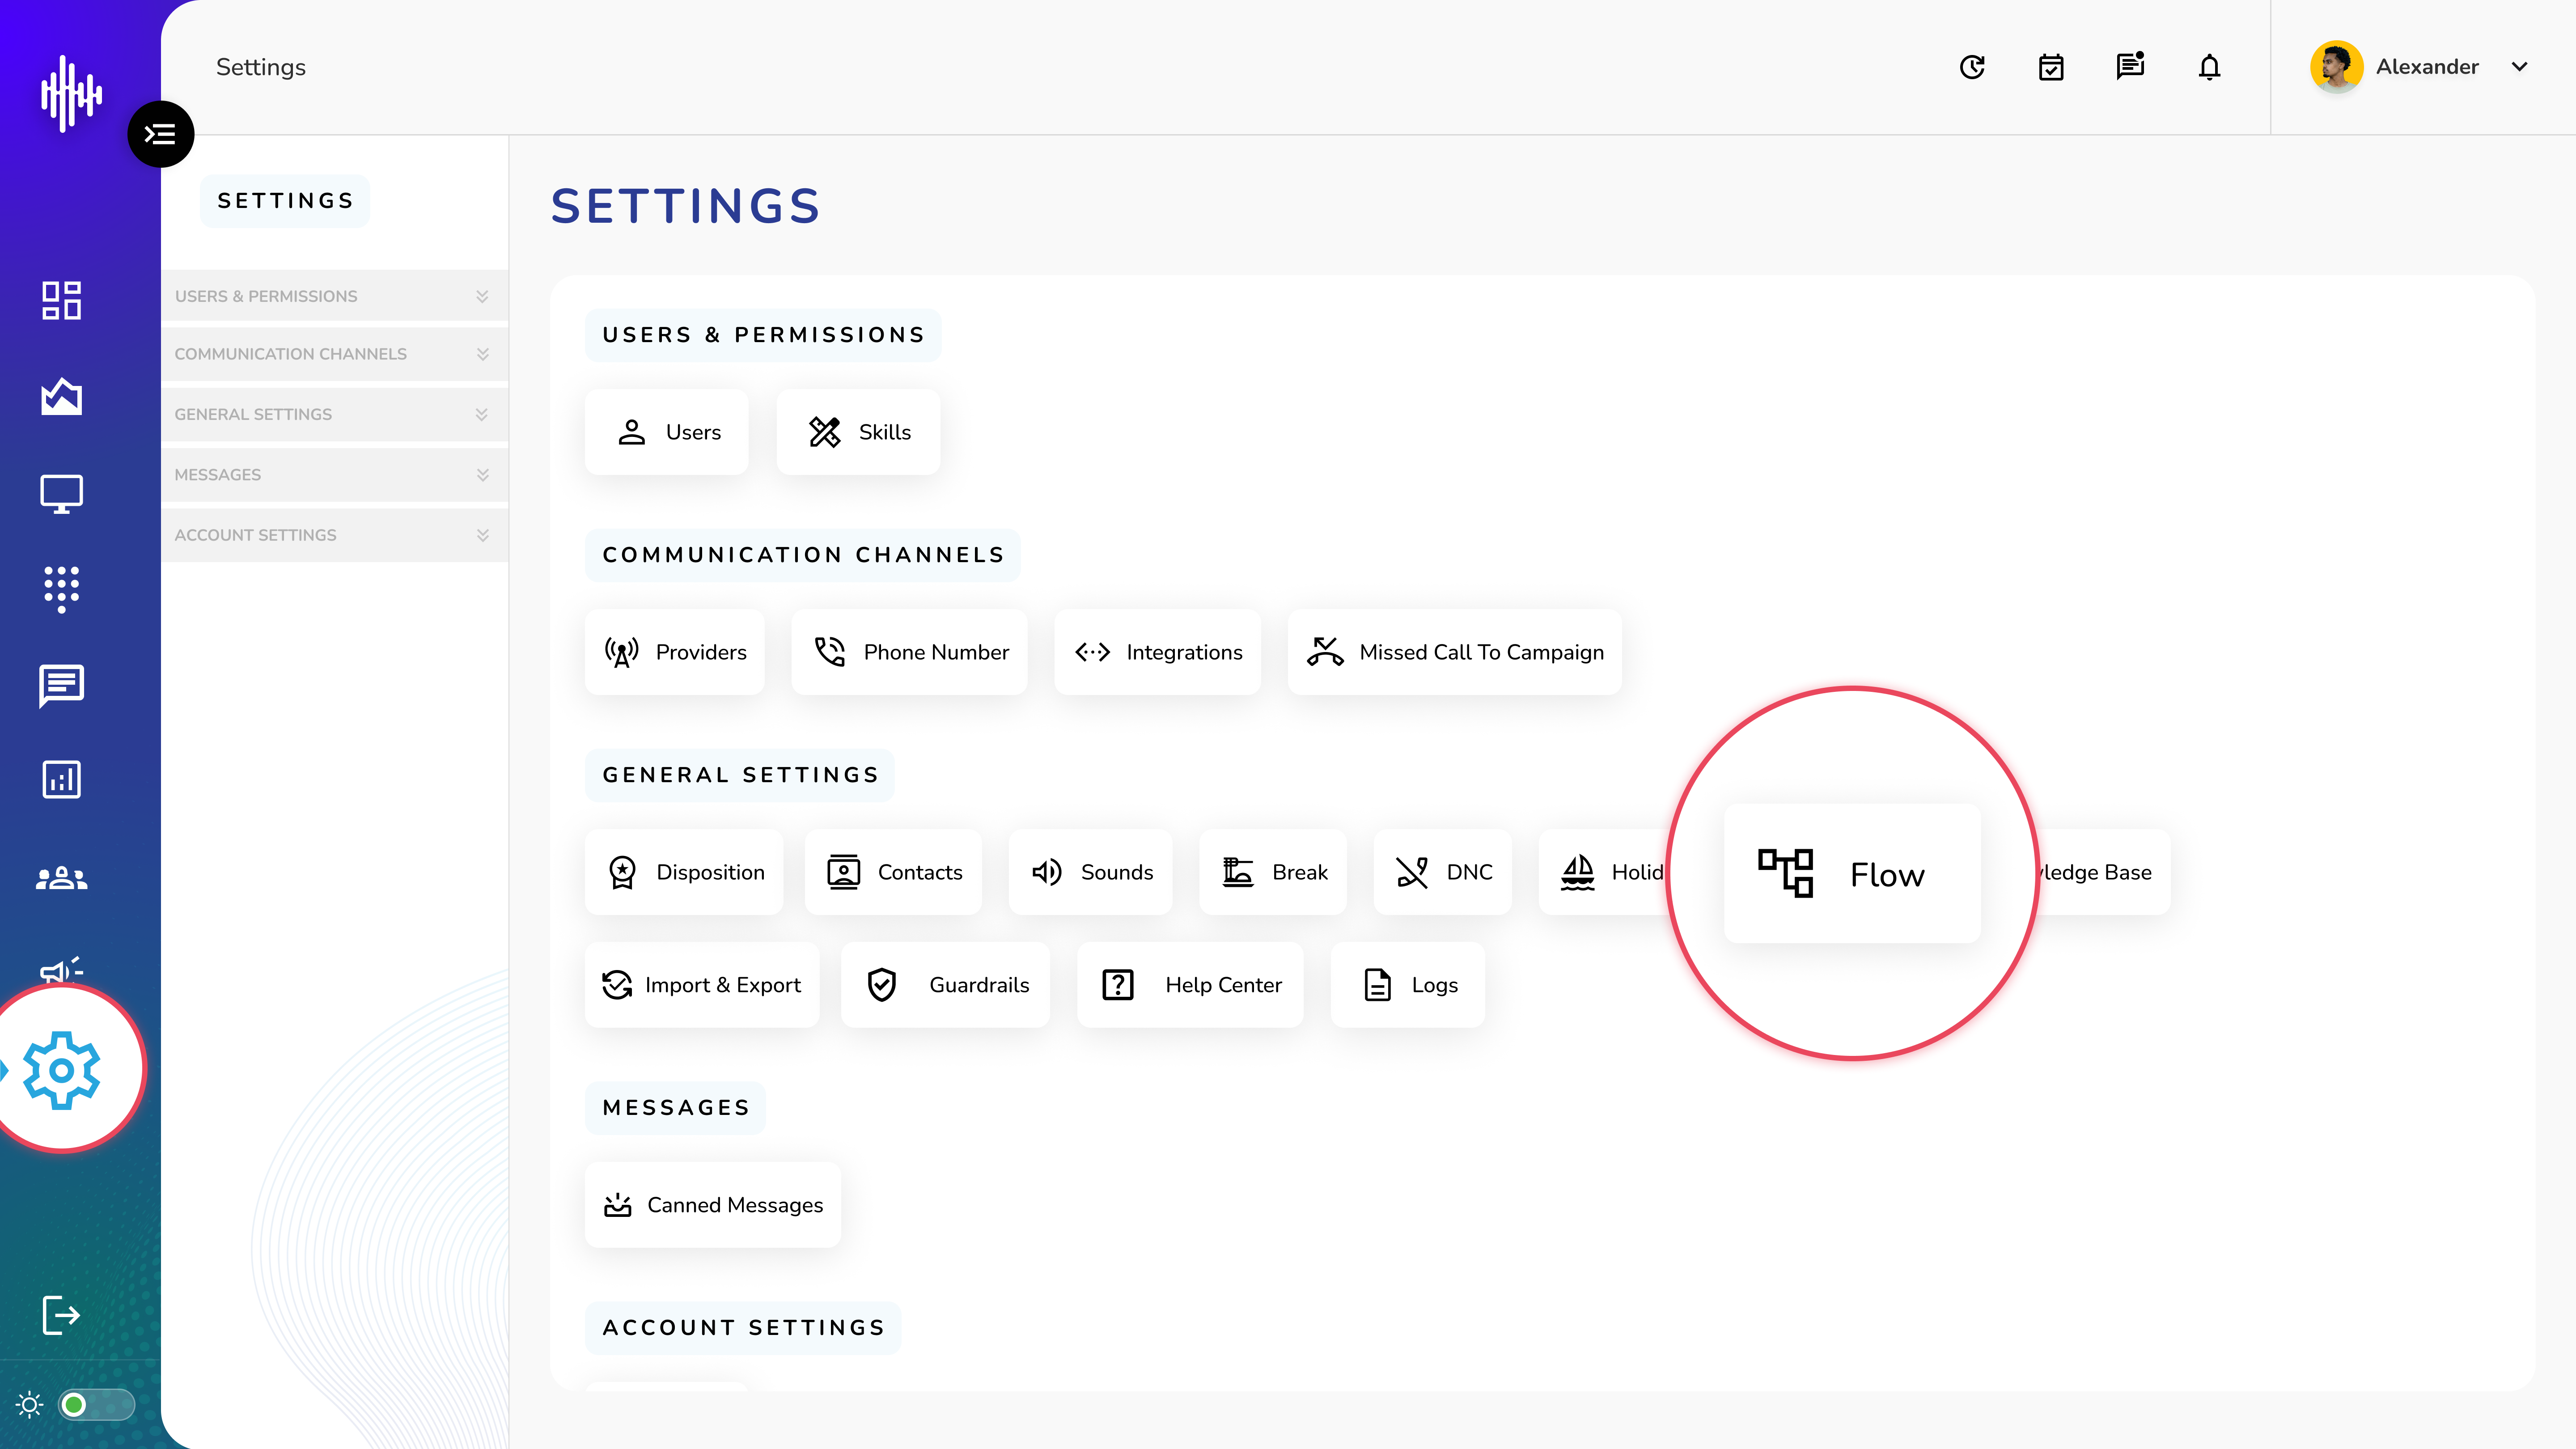
1. Login to your admin account
2. Click "Settings" from the left side menu
3. Click “Flow” to access the flow's details.
Flow Management
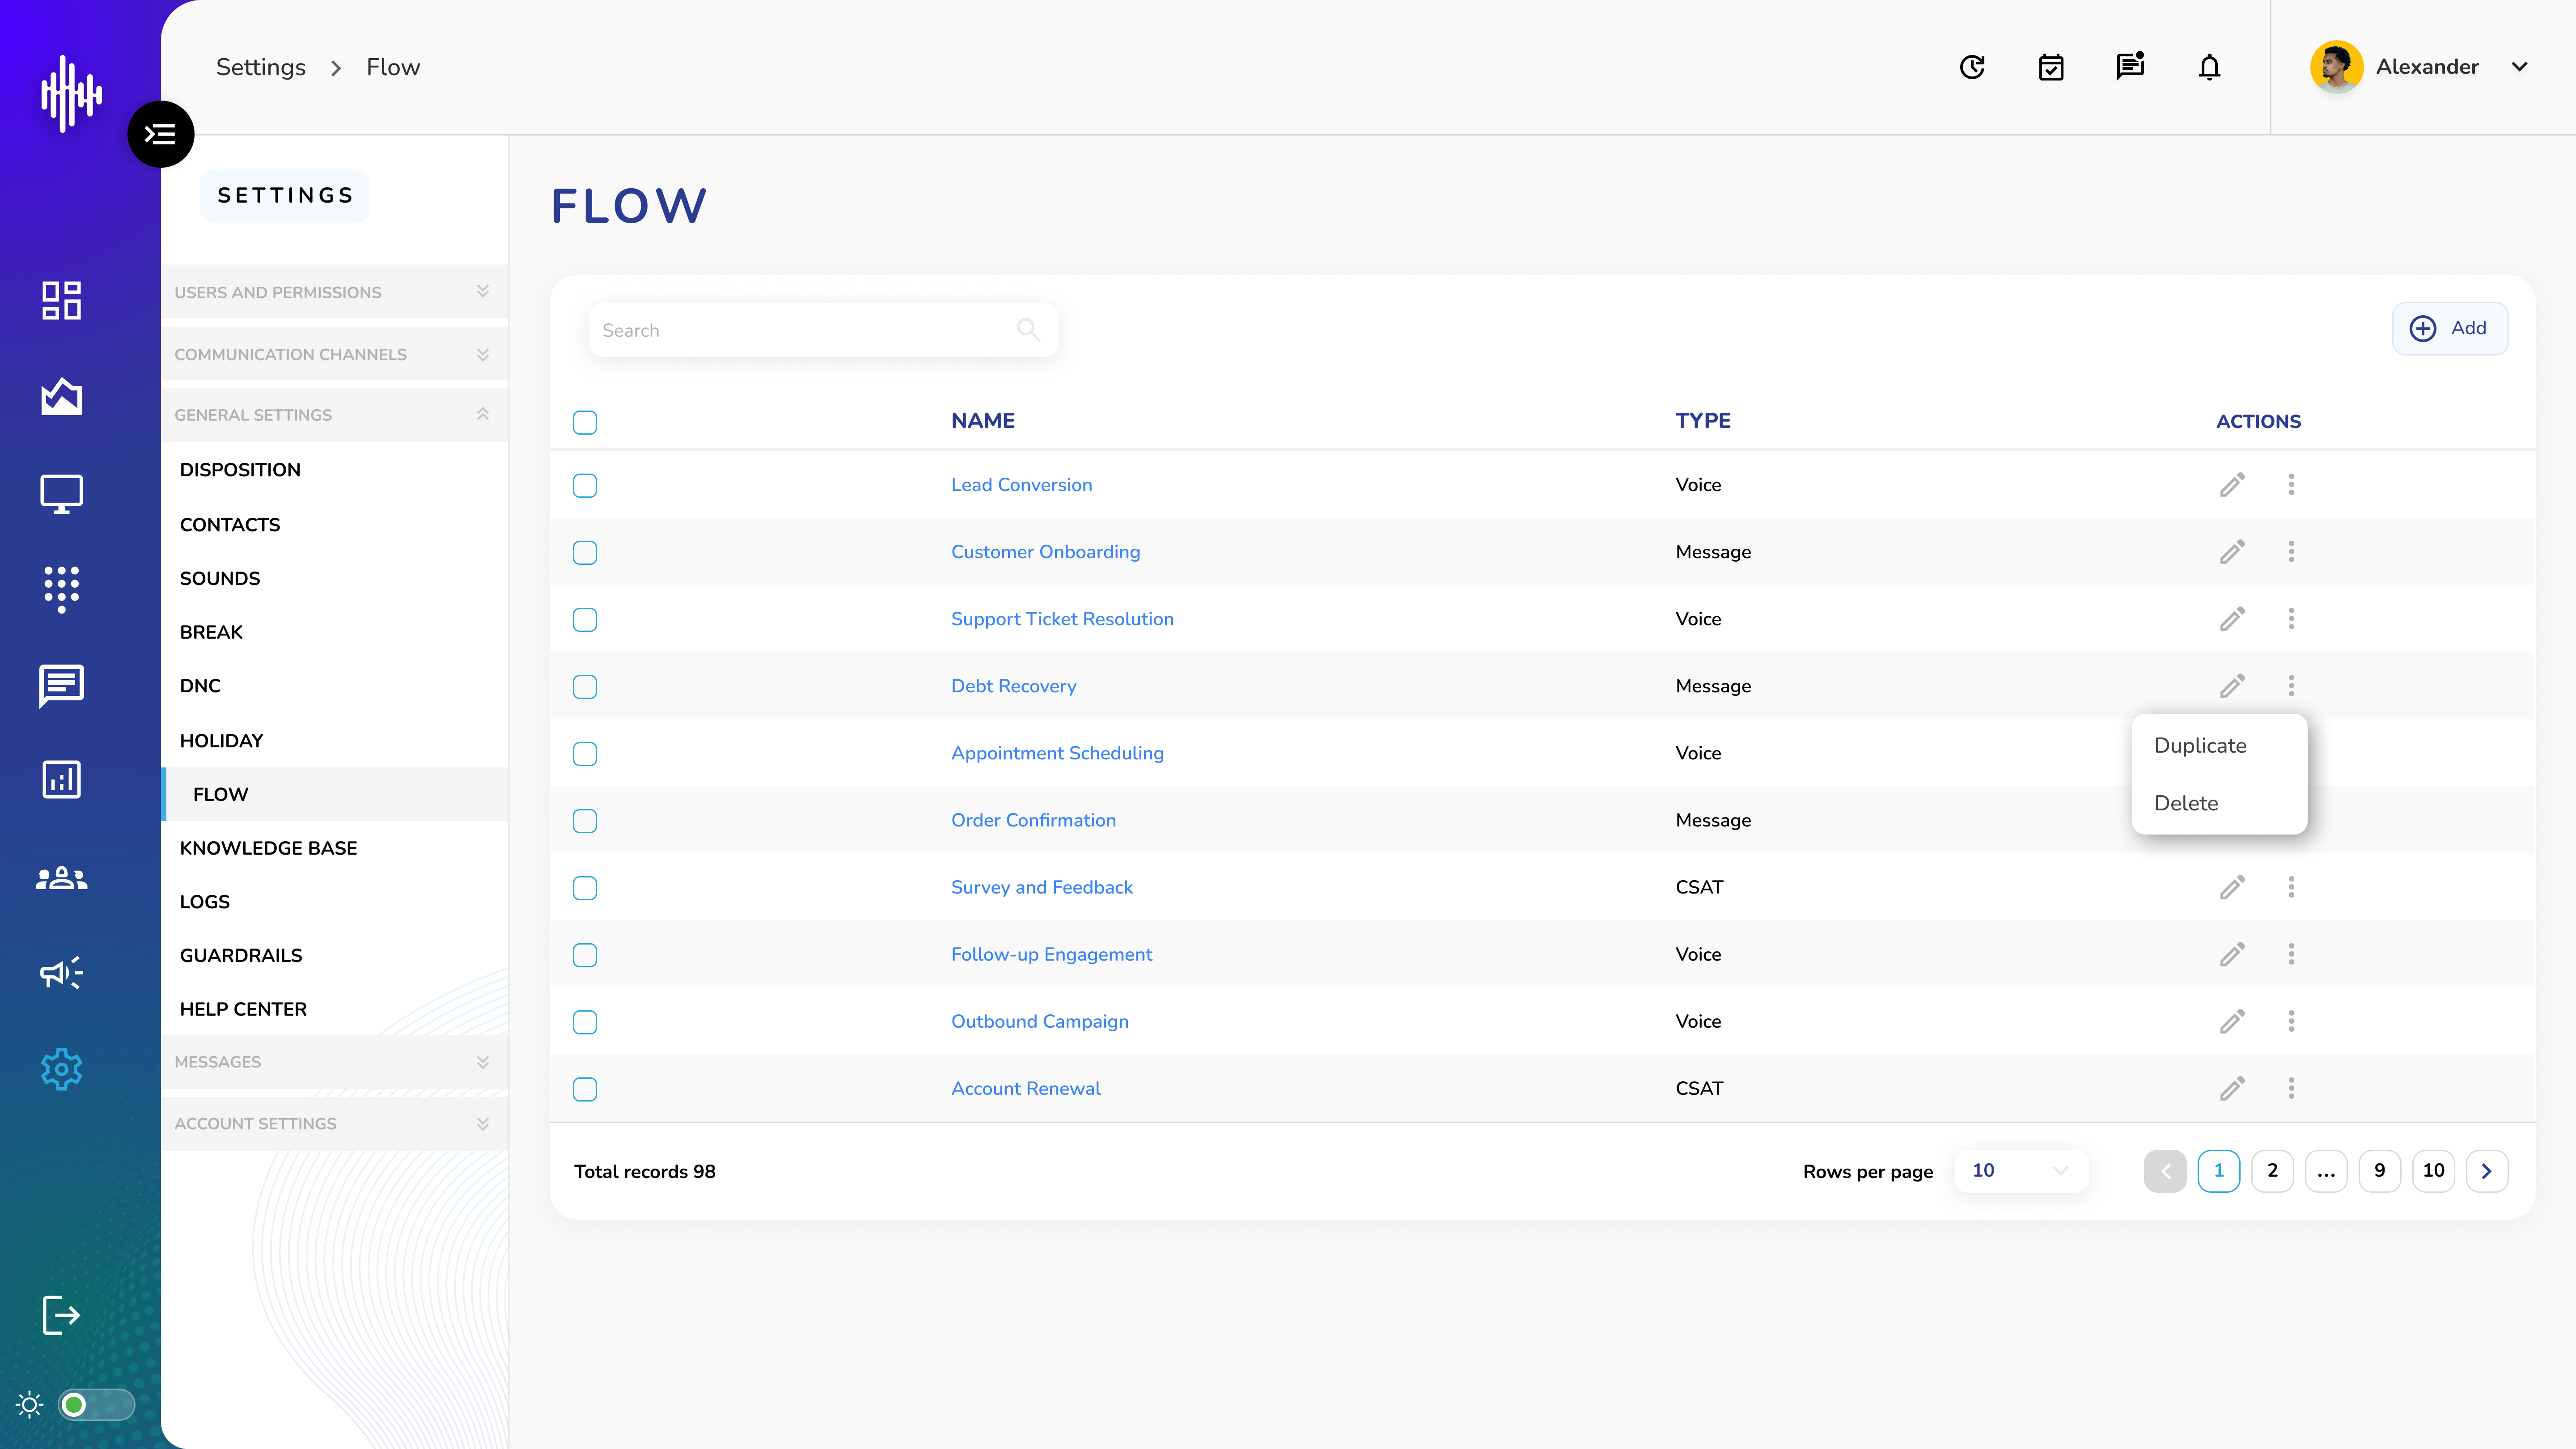
1. Flow List View Screen Elements
a. Column Information
| Column | Description |
|---|---|
| Name | Flow identifier |
| Type | Voice/Message/CSAT |
| Actions | Edit and options menu |
b. Available Actions
i. Pencil Icon: Edit flow configuration
ii. Three Dots Menu:
1. Duplicate: Create copy of flow
2. Delete: Remove flow
2. Top Bar Features
a. Search bar: Filter flows
b. "+Add" button: Create new flow
3. Navigation
a. Adjustable rows per page
b. Pagination controls
c. Total records counter
Important Notes:
-
Different flows support different channels
-
Test flows before deployment
-
Backup important flows using duplicate
-
Verify dependencies before deleting
Add New Flow Guide
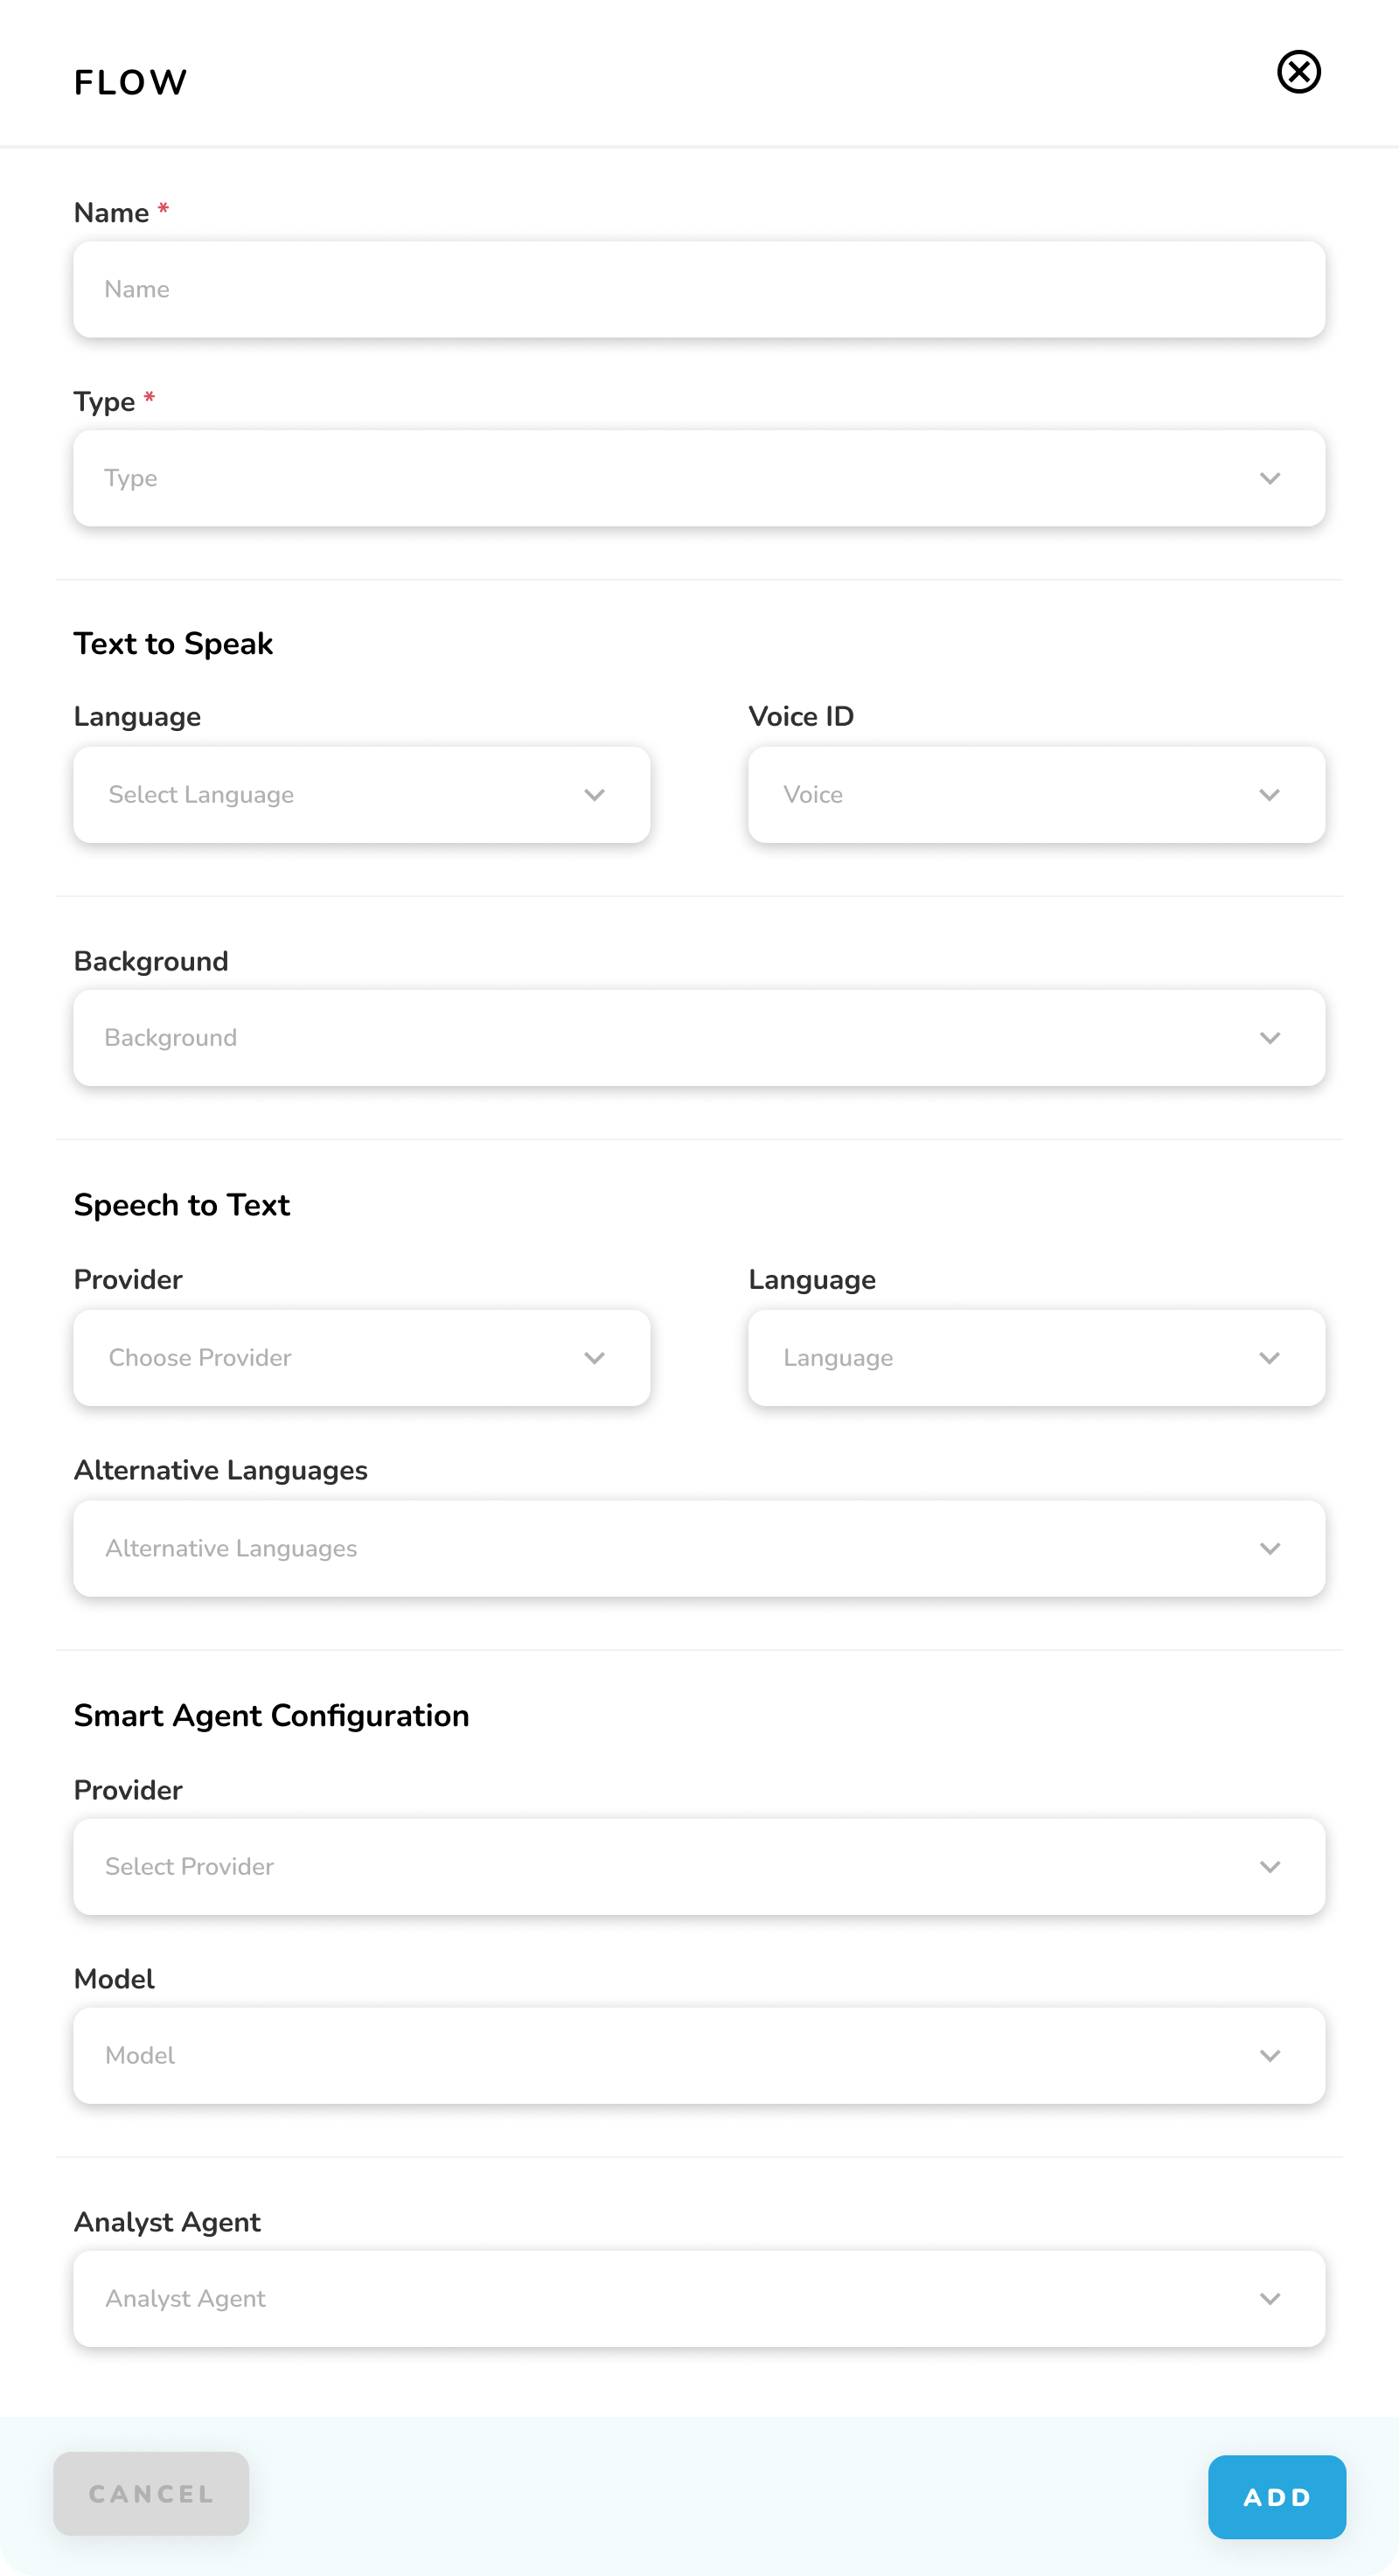
1. Basic Information
| Field | Description | Required |
|---|---|---|
| Name* | Flow identifier | Yes |
| Type* | Flow category | Yes |
2. Text to Speak Settings
a. Language Settings
i. Select Language: Choose primary language
i. Voice ID: Select voice type
iii. Background: Add background audio (optional)
3. Speech to Text Configuration
a. Provider Settings
i. Choose Provider: Select service provider
ii. Language: Set primary language
iii. Alternative Languages: Add additional languages
4. Smart Agent Configuration
a. AI Settings
i. Provider: Select AI provider
ii. Model: Choose AI model
b. Analyst Agent
i. Select analysis agent
5. Action Buttons
a. CANCEL: Exit without saving
b. ADD: Create new flow
6. Flow Types
a. Voice
b. Message
c. CSAT
Important Notes:
-
Fields marked with * are mandatory
-
Configure text-to-speak for voice flows
-
Set up speech-to-text for voice recognition
-
Smart agent settings affect AI interactions
Flow Playground Start Guide
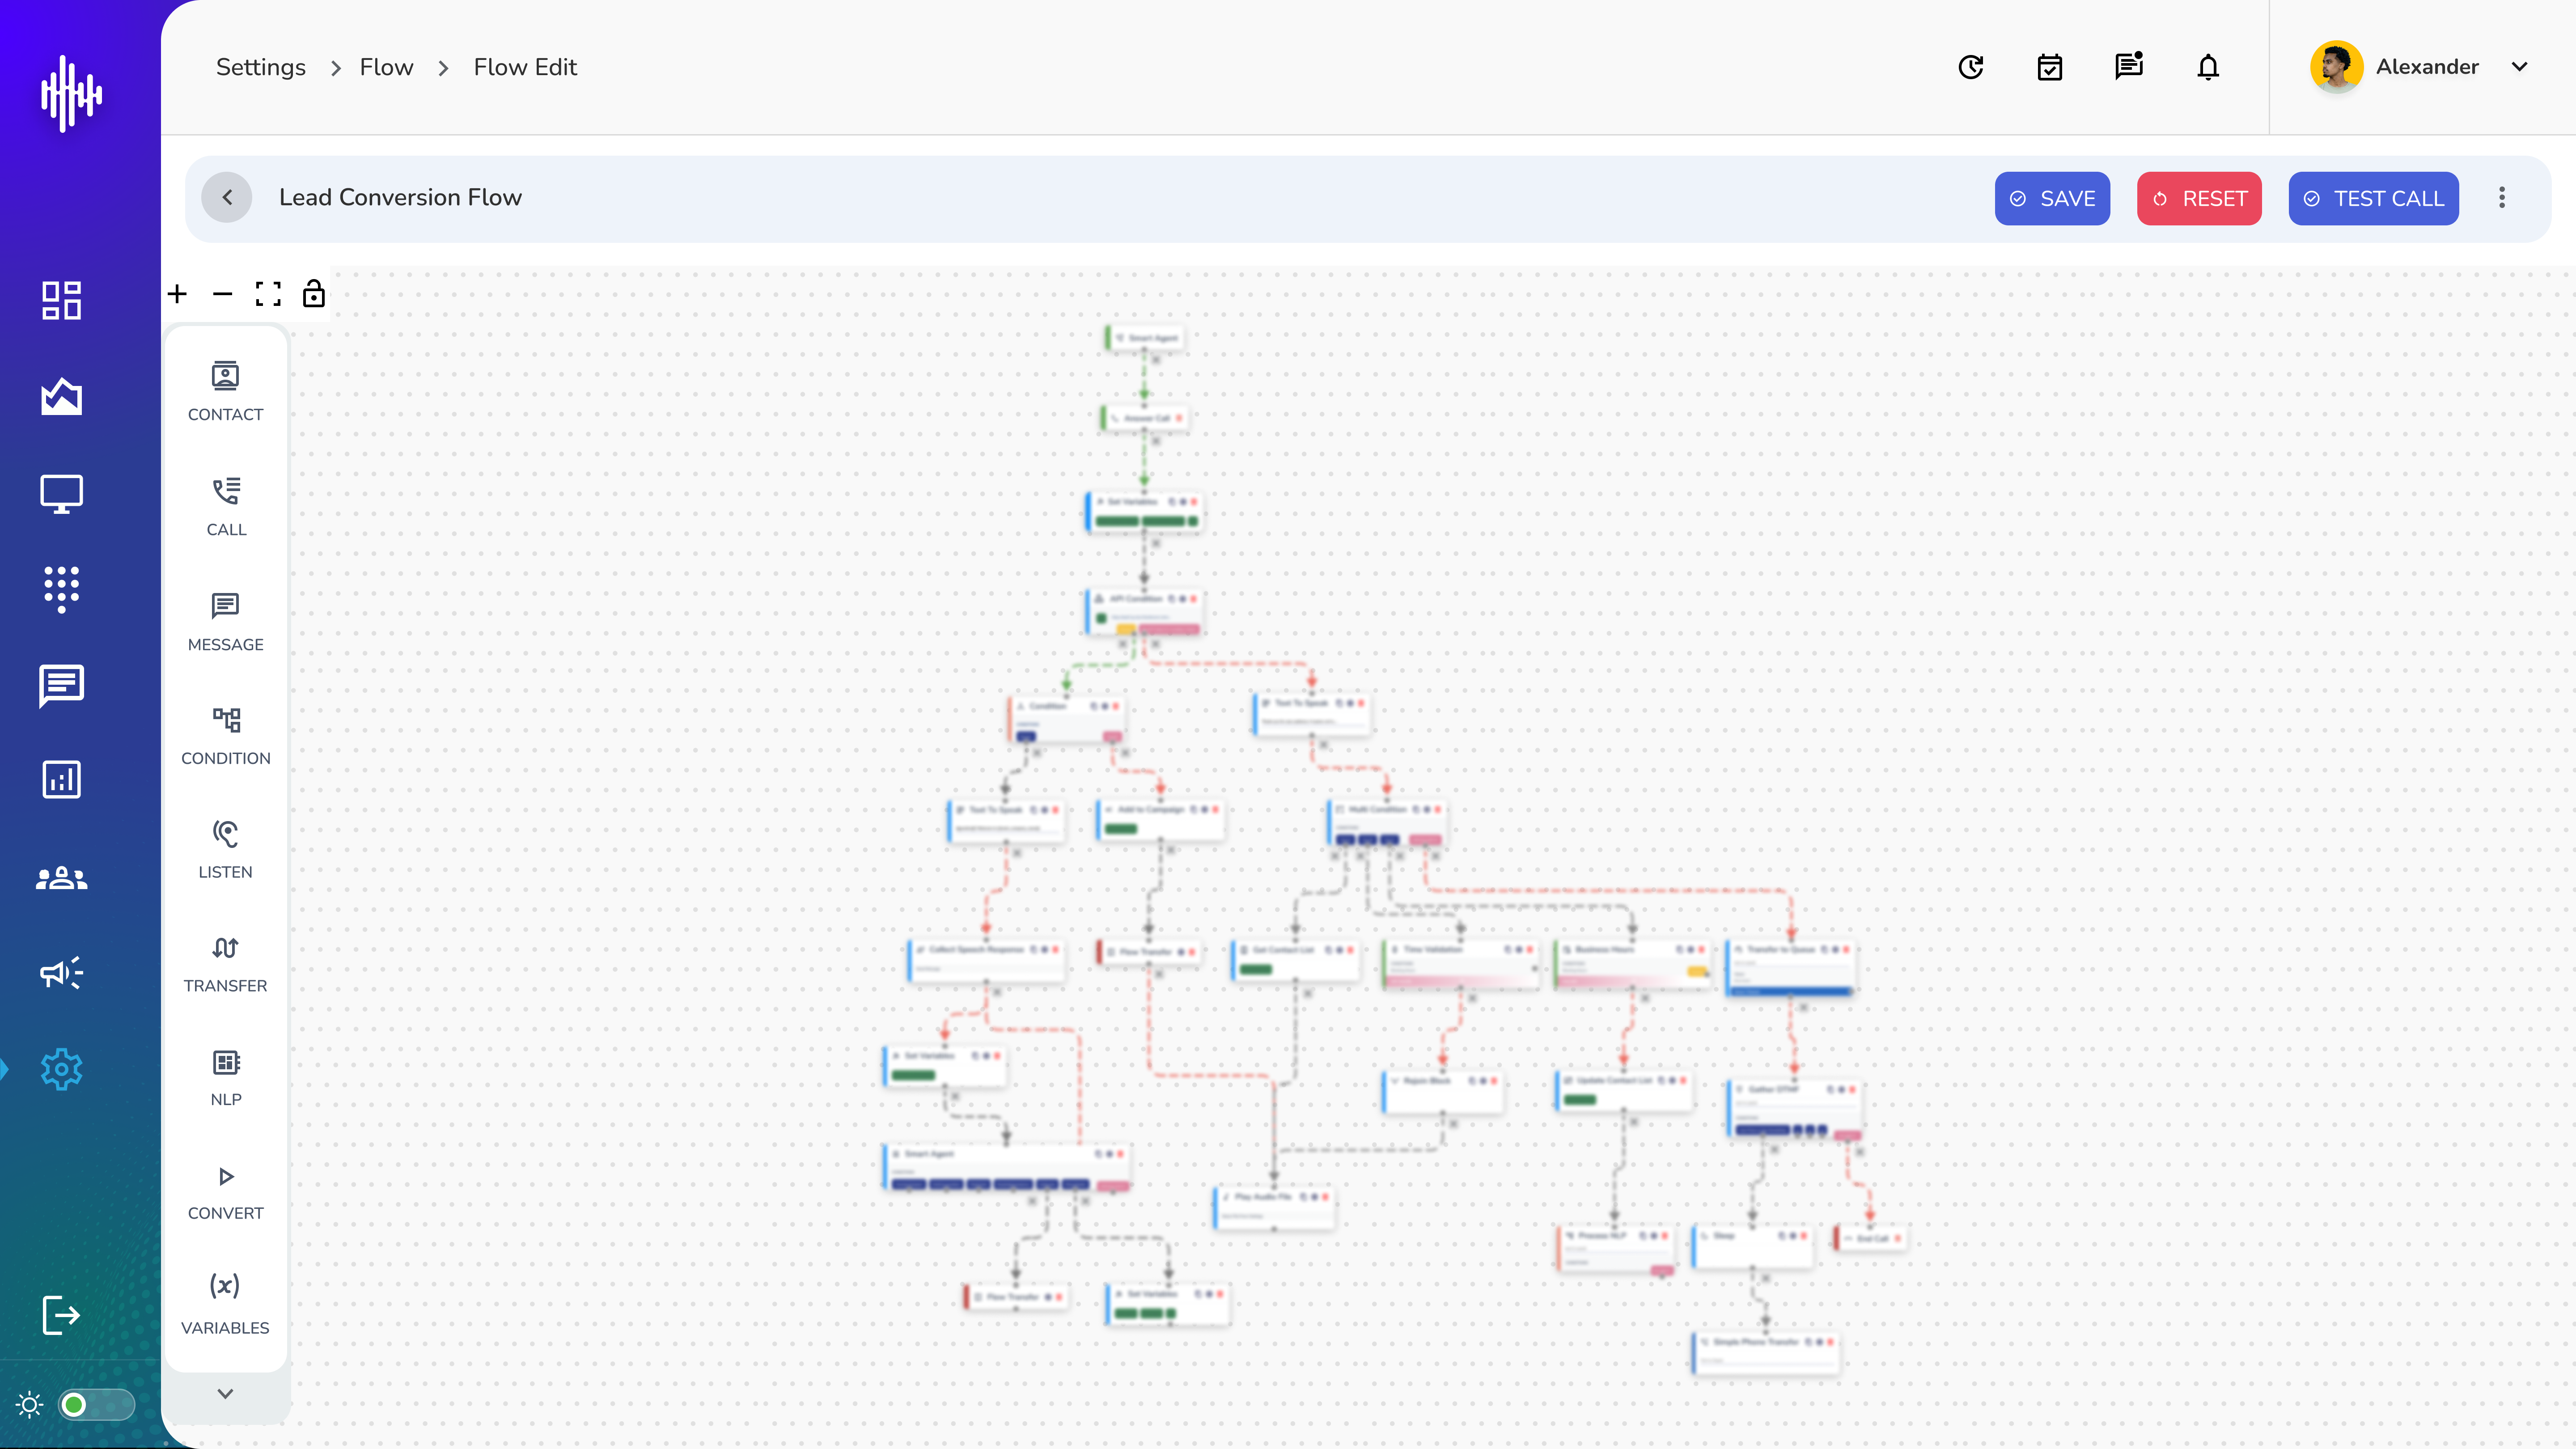
1. Basic Navigation
a. Access Flow Editor
i. Click on flow name from Flow Management screen
ii. Displays flow builder interface
b. Top Bar Controls
i. SAVE: Store flow changes
ii. RESET: Clear current changes
iii. TEST CALL: Test flow functionality
iv. Three dots menu for additional options
2. Left Sidebar Nodes
| Node Type | Purpose |
|---|---|
| CONTACT | Contact management actions |
| CALL | Call handling operations |
| MESSAGE | Messaging functions |
| CONDITION | Flow control and logic |
| LISTEN | Voice input processing |
| TRANSFER | Call transfer operations |
| NLP | Natural language processing |
| CONVERT | Data conversion tools |
| VARIABLES | Variable management |
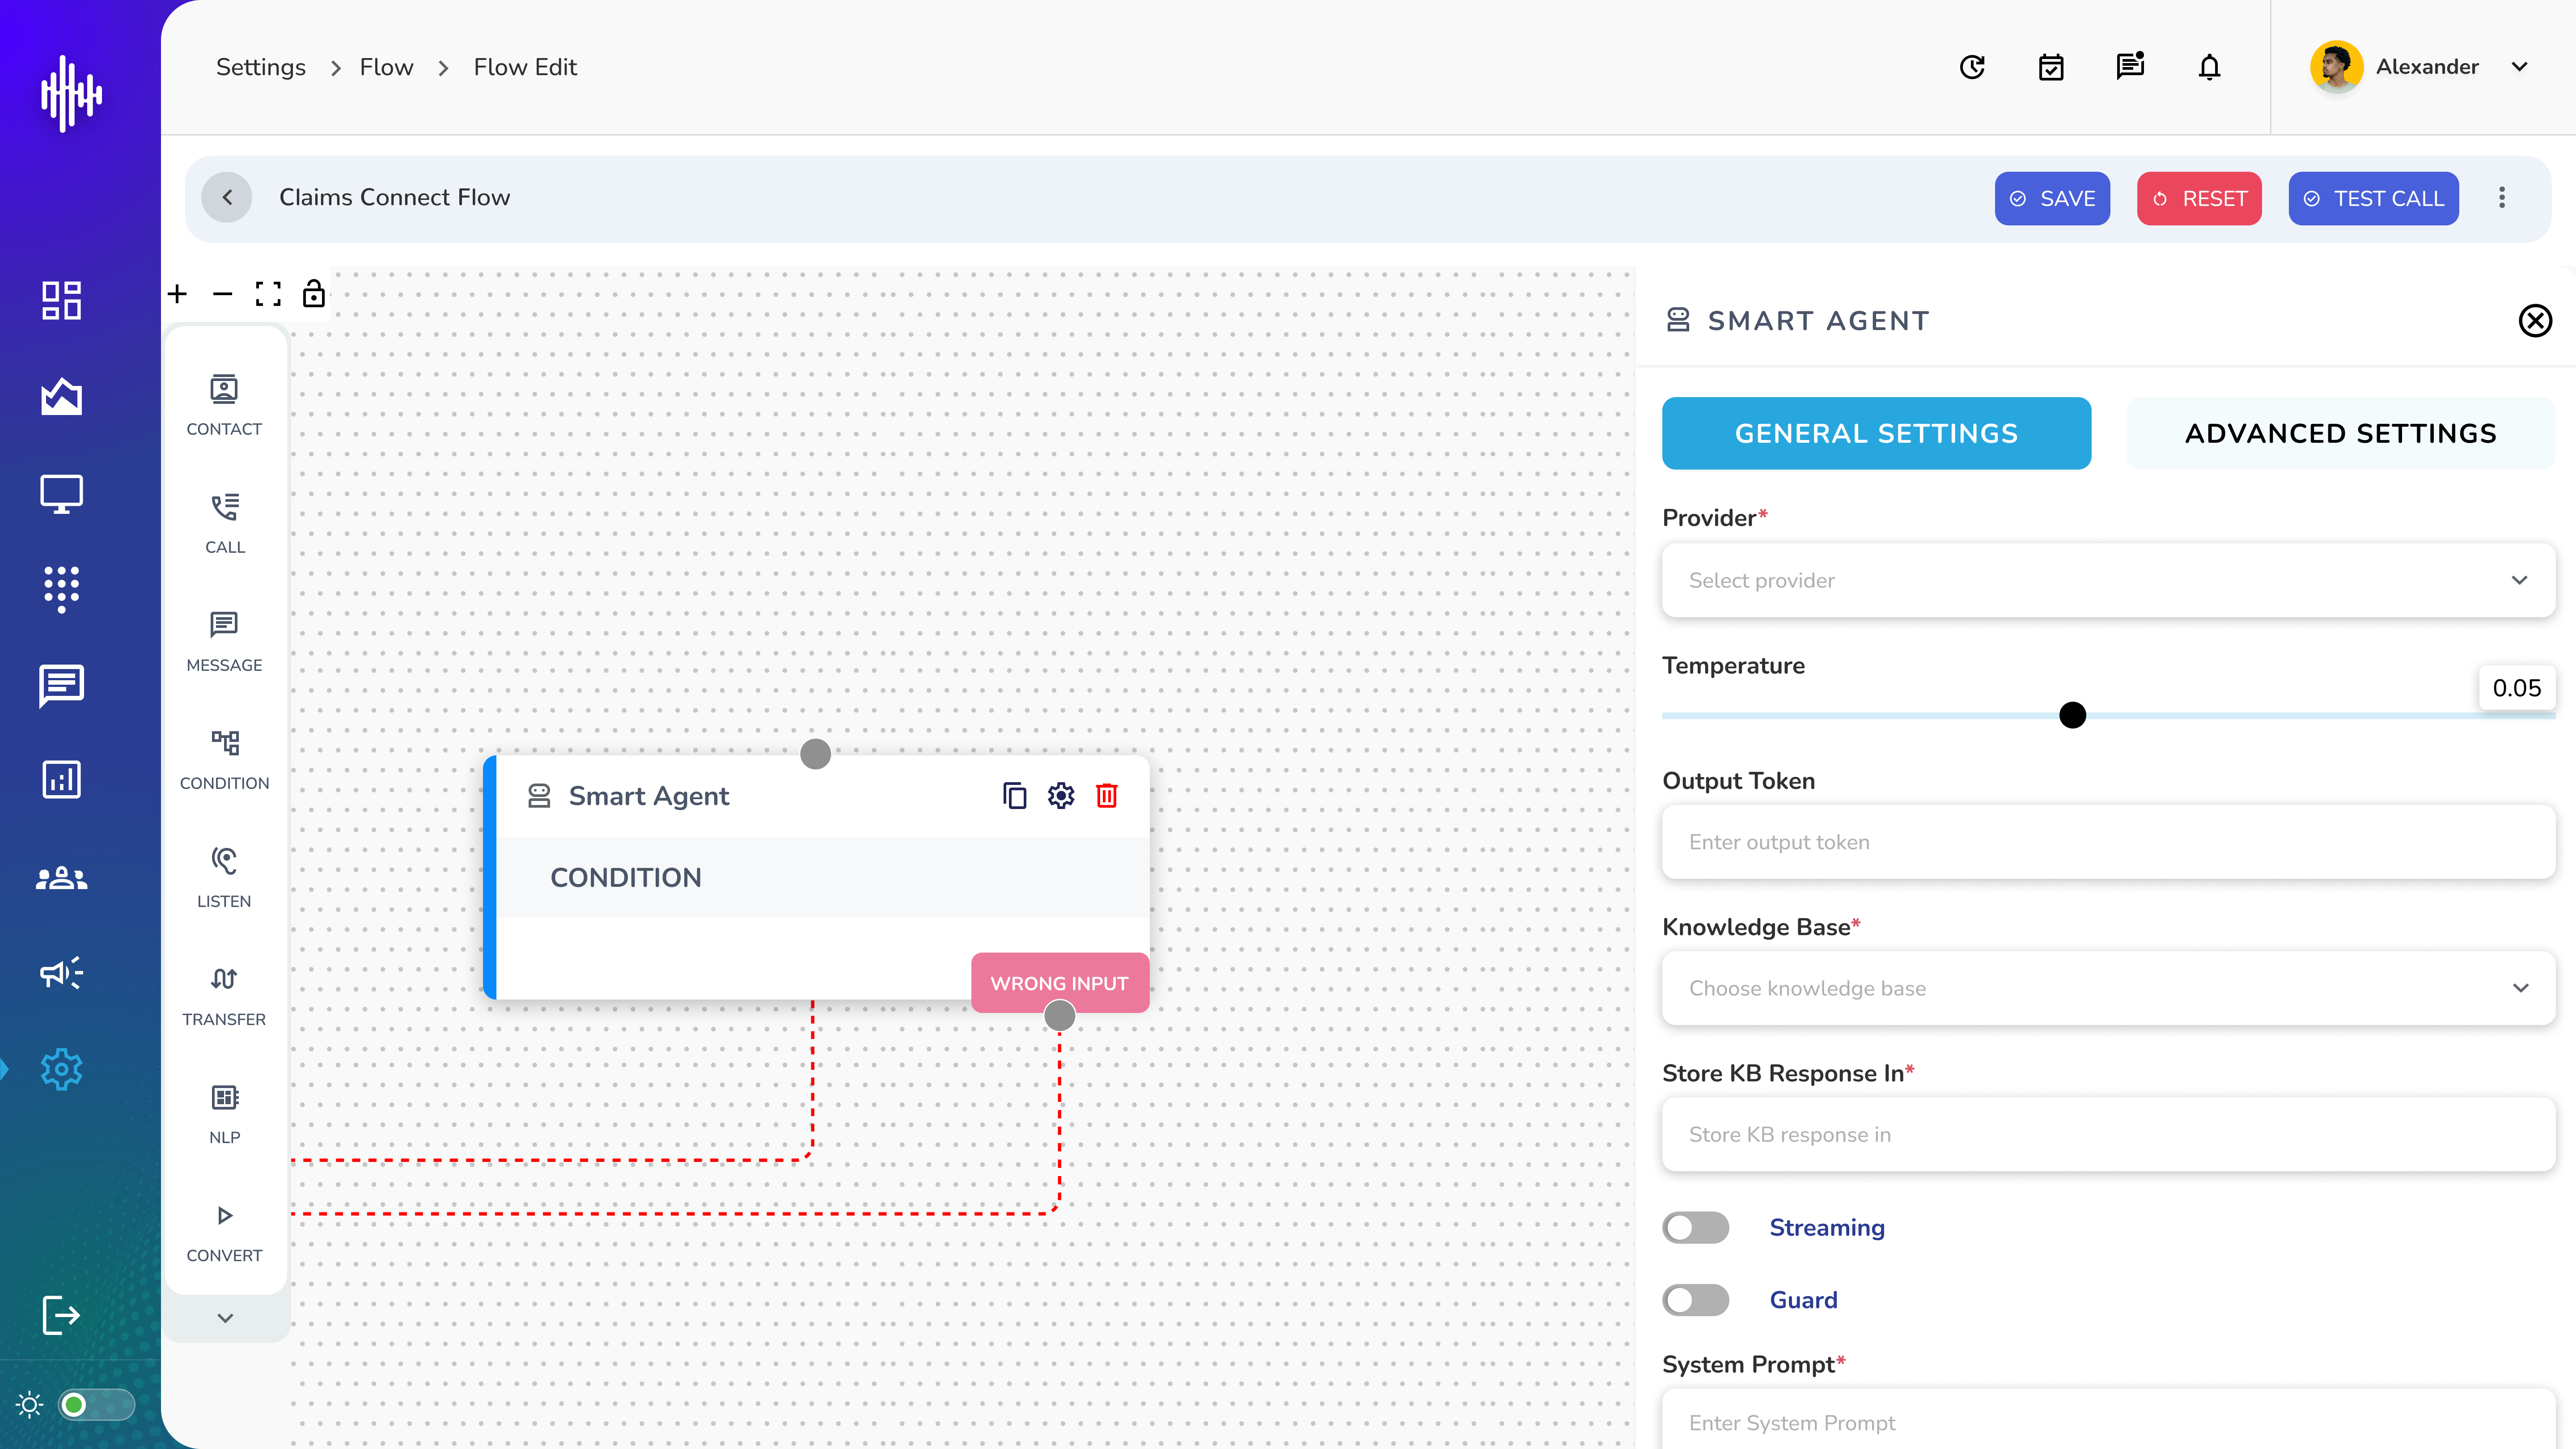
3. Building a Flow
a. Drag nodes from left sidebar
b. Drop onto canvas
c. Connect nodes to create logic flow
d. Configure each node's settings
4. Basic Flow Elements
a. Start node (beginning point)
b. Processing nodes (middle steps)
c. End nodes (termination points)
d. Connection lines between nodes
Important Tips:
-
Save frequently while building
-
Test flow before deployment
-
Use conditions for logic branches
-
Verify all connections
-
Test with different scenarios
Getting Started:
-
Start with basic flow structure
-
Add essential nodes first
-
Test each section as you build
-
Add complex logic gradually